
Should You DIY Your Lawn Leveling or Call a Pro?
Staring at a bumpy lawn and wondering if you can fix it yourself without wasting your weekend or your budget is a real homeowner moment.
Let’s break down the real choice between doing it yourself and hiring someone, looking at the true costs of each path, the time and tools required, and what you can realistically expect for your lawn’s outcome.
I’ve leveled my own lawn with a rented roller and sand, and I’ve also written the check for a pro to handle a major grading project.
What Is Lawn Leveling and Why Does a Flat Lawn Matter?
Lawn leveling is the simple, hard work of smoothing out the bumps, dips, and ruts in your soil. Think of it as fixing a lumpy mattress for your grass. You’re giving the roots a firm, even place to sleep and grow, similar to leveling and flattening a bumpy, uneven lawn.
The benefits go far beyond just looks. A level lawn stops water from pooling into muddy puddles that can drown grass and breed mosquitoes. It lets my mower, Max, glide smoothly without scalping the high spots or missing the low ones. Most importantly, it helps every inch of your lawn get the same amount of water, sunlight, and nutrients, which is the secret to thick, healthy grass, especially when you water it at the right time.
Those bumps and holes don’t just appear. Common causes are simple. Soil settles unevenly after years of rain and thawing. Pets digging for treasure create instant craters. Even heavy foot traffic from kids playing or you moving the garbage cans can slowly wear ruts into the earth.
How to Tell If Your Yard Needs Leveling
Your lawn will tell you when it’s feeling uneven. The signs are hard to miss once you know what to look for. After a rain, watch for places where water collects and sits for more than an hour. When you mow, see if Max leaves behind patches of taller grass (dips) or scalp marks where soil shows (bumps). If you find yourself tripping over hidden dips while walking, that’s a sure sign.
For a definitive check, try the simple golf ball test. Wait for a dry day, then walk your yard and gently roll a golf ball across it. Watch its path. A ball that rolls smoothly is on a good surface. A ball that stops, gets stuck, or changes direction quickly is revealing a low spot or a hidden bump you need to address.
Timing is everything for a successful leveling project. The best windows are during peak growing seasons when grass can recover fast. For most cool-season grasses, that’s early spring or early fall. For warm-season grasses, late spring as they green up is ideal.
You should pause your leveling plans during summer heat stress or winter dormancy. Adding stress to grass when it’s already struggling to survive the heat or the cold can do more harm than good. Let the lawn rest, then tackle the job when conditions are right—especially after you’ve prepared and winterized your lawn for cold weather.
The Complete DIY Lawn Leveling Guide: Tools, Mix, and Steps
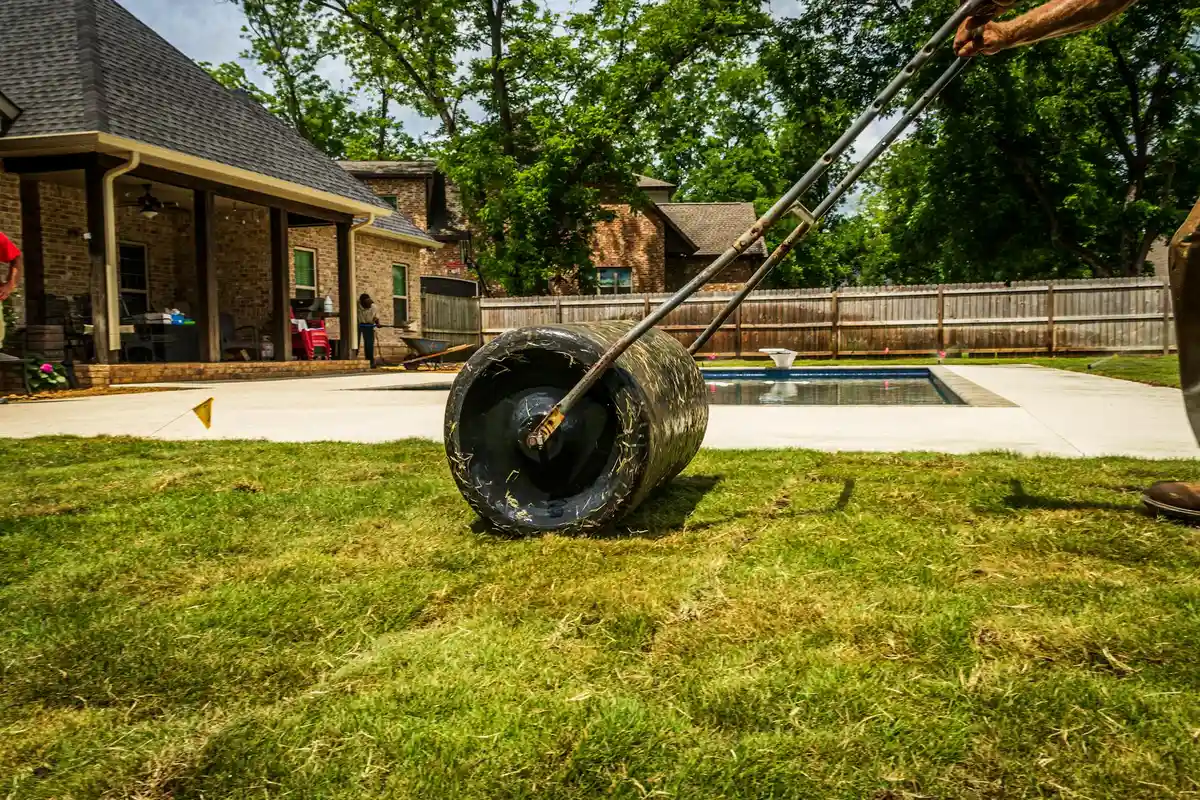
If you’ve got a weekend free and some energy to burn, you can tackle most common lawn bumps and valleys yourself. This is the path I usually take. It’s satisfying work that gives you direct control over the results.
With a methodical approach and the right materials, you can smooth out the kind of unevenness that makes mowing a teeth-rattling chore.
Your DIY Toolbox: What You’ll Need to Get Started
You don’t need a garage full of fancy gear. For most jobs, your core tools are simple. The main workhorse will be something to drag and spread the mix. A dedicated lawn leveling rake is fantastic, but a sturdy garden rake or even a piece of chain-link fence can work in a pinch.
- Leveling Tool: A lawn leveling rake (sometimes called a levelawn rake), a drag mat, a heavy pallet, or a sturdy garden rake.
- Mixing Supplies: A wheelbarrow and a shovel for blending your materials.
- Marking Aids: A few landscape flags or a can of biodegradable spray paint to mark low spots.
For the mix itself, you want a blend that fills holes but still drains. My go-to is a simple combo. I use coarse mason’s sand (not fine play sand), good quality topsoil, and some compost for a nutrient kick.
A standard DIY lawn leveling mix is 2 parts sand to 1 part topsoil and 1 part compost.
On a budget? You can make a serviceable drag from a 4-foot section of PVC pipe or find an affordable leveling rake at Harbor Freight. For a 1,000 square foot area needing a moderate leveling, your cost might look like this:
- Tools (rake, wheelbarrow): $50 – $150 (one-time purchase)
- Materials (sand, topsoil, compost): $100 – $300 (depends on local prices and delivery)
The Step-by-Step Process to Level Your Lawn Yourself
Think of this like painting a room. Prep is everything, and patience between coats pays off. Here’s how I do it.
Step 1: Mow, Mark, and Check Your Soil
Start by mowing your grass as short as you safely can. I take Max down a notch lower than usual. Then, give the area a light watering. This dampness helps you see the true lay of the land. As the sun hits it, low spots will stay darker and wetter longer.
Walk your lawn and mark every dip and valley with a flag or a quick dot of spray paint. Now, check your soil. Push a screwdriver into the ground in a few spots. If it feels like you’re trying to poke through a tabletop, you have compaction. For a small area, you can loosen it with a garden fork. For bigger areas, I’d plan to rent a core aerator before you level. It makes a world of difference.
Compacted soil is like a packed sponge, it won’t absorb water or let grass roots breathe, making leveling less effective.
Step 2: Create and Spread Your Leveling Mix
Mix your sand, topsoil, and compost in the wheelbarrow until it looks uniform. To figure out how much you need, calculate the volume of your low spots. For a 1,000 sq ft lawn, if you’re filling an average of half an inch deep, you’ll need about 1.5 cubic yards of mix. Your soil yard can help you convert that to bags or a bulk delivery.
The key to spreading is thin layers. Dump small piles around the lawn and use the back of your rake to push the mix into the low spots you marked. Your goal is to fill the dips without burying the existing grass blades. If you smother the grass, it will die and create a bare spot. Then seed those areas using methods for spreading grass seed effectively. This helps ensure even germination and blends with the surrounding turf.
Step 3: Work the Material In With Your Leveling Tool
This is where you see the magic happen. Attach your leveling rake or drag mat and start making gentle, overlapping passes across the lawn. I go in two directions to be thorough. The sound of the sand and soil sifting down through the grass is deeply satisfying. If you’re using a homemade PVC rake or a pallet drag, the principle is the same, slow and steady. A light sand lawn leveling topdressing can help fill tiny low spots and keep the surface even as you work. This prepares the lawn for the next steps.
Use gentle, sweeping motions to pull the mix from high areas into low ones, letting the grass blades peek through.
The biggest mistake is applying too much material at once. If a dip is deeper than an inch, fill it halfway now, let the grass grow through, and hit it again in a few weeks.
Step 4: The Follow-Up: Watering and Recovery
Once you’re happy with the smoothness, give it a light watering. I set Sunny, my drip system, to a gentle cycle for about 15 minutes. This settles the soil without washing it away. Then, let the lawn rest. Wait at least a week, ideally until you see the grass growing strongly again, before you mow the newly seeded lawn.
This is a perfect time to overseed any thin areas with a grass type that matches your lawn. Be realistic. One pass might not create a putting green. Leveling my problem area, “Patch,” often takes 2 or 3 sessions over a season to get it just right. Understanding the best time to overseed or reseed your lawn can boost germination and results. Spring and fall are common windows, depending on climate.
Calculating the Real Cost of DIY: More Than Just Money
The dollar math is straightforward. For that 1,000 sq ft project, you might spend $150 to $450 total on tools and materials, most of which you can reuse. The bigger costs are intangible.
You are investing a full weekend of physical labor. It’s a good workout, but your back will feel it. There’s also the risk of the learning curve, your first attempt might not be perfect. But you gain the knowledge and the tools to maintain that smoothness forever.
The DIY cost is a blend of cash, sweat, and time, but it buys you lasting skills and the pride of doing it yourself.
Hiring a Professional: What You’re Really Paying For
Sometimes, the DIY route isn’t the right fit. If your lawn looks like a miniature mountain range, or if your Saturday is already packed, calling a pro is a smart move. They solve problems that go deeper than a bag of topdressing mix.
The Pro Advantage: Equipment and Expertise
This is where the real difference lies. I have a rake, they have a laser-guided grading box. Professionals come with industrial power rakes (dethatchers), heavy-duty rollers, and machines that can move yards of soil with precision. Their expertise isn’t just in spreading sand, it’s in diagnosing why your lawn is uneven in the first place.
You’re paying for their ability to fix severe erosion, correct drainage that’s funneling water to your foundation, or completely regrade a slope.
They also bring insurance, often a workmanship warranty, and the biggest perk of all, they save your weekends. You trade a check for your time and their guaranteed result.
Understanding Professional Lawn Leveling Costs
Professional pricing isn’t as simple as per-square-foot, but it gives a starting point. For basic topdressing and leveling, you might see quotes from $0.15 to $0.50 per square foot. Most pros have a minimum project charge, often $500 to $1,000.
Costs spike quickly if the job gets complex. Regrading for drainage, removing old sod or tree roots, or dealing with terrible soil that needs full replacement will increase the price. So will poor access for their equipment. If you’re in an area with unique soil, like the hard clay common in Dallas, a local pro will already know the exact mix and method needed, which is worth the premium.
How to Find and Choose a Reputable Lawn Pro
Don’t just pick the first name in an online ad. Start by asking neighbors with great lawns who they use. Check local community groups on Facebook or Nextdoor. Read reviews, but look for details about communication and cleanup, not just stars.
When you get quotes, ask specific questions:
- How long have you been leveling lawns in this area?
- What is your specific process for my type of grass?
- Is the quote for simple topdressing or does it include fixing underlying drainage?
- What is the project timeline and who handles cleanup?
Always get at least three detailed, written estimates. A huge difference in price often signals a huge difference in the scope of work or experience.
The right pro will walk your lawn with you, explain their plan clearly, and not pressure you for an immediate decision.
Making Your Decision: A Simple Cost-Benefit Checklist

Think of this as your personal scorecard. I use a mental version of this every time I look at Patch in the backyard, weighing my time against my ambition. It helps cut through the noise.
DIY vs. Pro: A Quick-Reference Comparison
Here’s the trade-off, laid out simply. Your situation will lean you toward one side or the other.
- Cost: DIY means money for materials (soil, sand, rental). A pro means money for labor and expertise. DIY wins on upfront cost almost every time.
- Time Commitment: DIY is a weekend project that often spills into evenings. A pro crew can finish in a day. Hiring a pro gives you your weekends back.
- Quality of Result: A meticulous DIYer can achieve a great, level surface. A pro with a laser grader and commercial roller will achieve a pool-table finish. For absolute precision, the pro has the better tools.
- Stress Level: DIY involves physical labor, problem-solving, and hoping your math was right. Hiring out involves writing a check and supervising. Your back and your mind get a break when you hire it done.
When This DIY Guide Isn’t Enough: Signs You Need a Pro
Some lawn problems are symptoms of a bigger issue. Here’s when to call for backup.
If you see standing water that sticks around for days after rain, that’s not just a low spot. That’s a drainage issue that likely requires regrading or subsurface work. My setup, Sunny, can water evenly, but she can’t fix where the water decides to pool forever.
Are the uneven areas larger than a kiddie pool or deeper than three inches? Filling and compacting that much material correctly is a major earth-moving task. Large, deep depressions often need professional machinery to compact the soil layers properly and prevent future sinking.
What’s under your grass? If you dig and hit solid clay that feels like pottery or a layer of rubble, stop. Problematic subsoil requires removal, replacement, or specialized amendments that go beyond simple topdressing. This is where a pro’s diagnosis saves you from wasting money on bags of soil that just sit on top of a problem.
Your Action Plan: Answer These Questions to Choose
Grab a notepad and walk your lawn. Be honest with your answers.
- How large and how deep are the problem areas? Use a rake handle or a level to check. Lots of shallow dips and bumps? That’s DIY territory. One giant sinkhole? Get a quote.
- What is your absolute budget ceiling? Factor in soil, sand, rental fees, and a pizza budget for helpers. Compare that number to two or three professional estimates.
- How many free weekends are you willing to dedicate? This work is physically demanding. If your next month is packed, the stress of a half-finished project isn’t worth the savings.
- Does the cause seem simple (like old settling) or complex (like constant water)? Simple causes have simple fixes. Complex causes need an expert eye.
If your answers lean toward small areas, a tight budget, and free time, you’ve got a great DIY project ahead. If they point to major issues, a flexible budget, and a booked schedule, calling a pro is the smart play. Both choices get you to the same goal: a flat, safe, beautiful lawn you can enjoy. I’ve done it both ways, and a level lawn is always worth the effort, whether it’s your sweat or your investment. Together, these choices lead to a healthy, beautiful lawn you can enjoy. The next steps will lay out easy, practical actions to achieve it.
Your DIY Lawn Leveling Questions, Answered
What’s the best way to store leftover leveling mix for touch-ups?
Keep your custom blend in a clean, lidded trash can or heavy-duty storage bin to keep it dry and ready. This lets you tackle new dips as they appear without remixing a whole new batch.
How do I properly clean and maintain my lawn leveling rake after use?
Hose off all soil and debris immediately, then let it dry completely to prevent rust. A quick wipe with an oiled rag on the tines once a season will keep it gliding smoothly for years.
Can I really use a homemade pallet drag effectively, or is it a hack?
A weighted pallet drag is a perfectly legitimate tool for spreading mix over larger, open areas. Just secure a few concrete blocks on top to help it skim the high spots and push material into the lows.
How can I tell if my DIY sand/soil/compost mix is the right consistency?
A good mix should be damp enough to hold together when you squeeze a handful, but dry enough to crumble apart when you poke it. If it’s muddy or dusty, adjust with more sand or a little water before spreading.
I’m in Dallas with heavy clay soil. Do I need a special DIY approach?
Absolutely. For Dallas clay, increase the sand portion of your mix to improve drainage and prevent concrete-like clumps. Seriously consider core aeration before leveling to help that dense soil accept the new material.
Making Your Leveling Decision

After comparing costs and efforts, I stick to a simple rule: tackle the project yourself only if the size of your problem matches your available time and enthusiasm. For a few low spots, a DIY mix of sand and compost spread over a weekend does wonders; for a lawn that rolls like a wave, a professional crew with their heavy equipment is the smarter, long-term investment.
Remember, a level lawn should be a safe lawn, so always use pet-friendly materials and avoid synthetic chemicals that can runoff. The real win is building a thicker, resilient turf over time, and that comes from observing what works in your own yard, season after season. If you decide to fertilize, opt for safe, slow-release formulas and follow the label for safe, effective results. A soil test can guide you to the right nutrients, helping you grow a thicker, healthier lawn without excess runoff.
Citations and Authoritative Sources
- r/lawncare on Reddit: My $25 DIY leveling rake worked!
- How to Level a Yard: Easy Steps for a Perfect Lawn | Lowe’s
- How to Level a Lawn Yourself: Step-by-Step Homeowner DIY
- DIY Guide: How to Level a Yard | Today’s Homeowner
Written by Ria Carrington. Ria is an avid lawn care enthusiast and advisor. No lawn is unsalvagable when Ria is at work. She has helped countless homeowners breath new life into their dying lawns. She has a B.Sc in Agriculture and brings practical advice combined with knowledge of plant science and her decade worth of hands on experience.