
When Should You Overseed Your Lawn: Spring or Fall?
If you’re looking at bare patches and debating the right season to seed, I get it. Timing this right saves your back and your budget.
We’ll cover how soil temperature acts as your secret signal, why fall usually beats spring for lasting results, the straightforward steps for each season, and how to nurture new grass safely for pets and bees.
I’ve tested this timing over years, learning from my mower Max and that stubborn spot, Patch.
Why Timing Is Everything (It’s Not Just About the Calendar)
Forget the date on your phone. The real schedule is written in the dirt a few inches down. Air temperature is a fickle guide. It changes daily. Soil temperature is your steady, reliable partner.
Think of a grass seed like a tiny person needing to wake up. Would you rather sleep on a cold, hard floor or in a warm, cozy bed? Your goal is to give that seed a warm bed, and that warmth comes from the soil, not the air.
For cool-season grasses like Kentucky Bluegrass or Tall Fescue, that magic soil temperature range is roughly 50-65°F. You can guess, or you can know. A cheap meat thermometer pushed into moist soil works. My favorite trick is the morning coffee test. If the ground feels cool but not icy to your bare foot, like a ceramic coffee mug that’s been sitting out for a bit, you’re likely in the zone.
The Great Season Showdown: Fall vs. Spring
Fall is the champion for a reason. As soil temps cool from summer highs into that perfect range, nature provides a perfect setup. Autumn rains (usually) increase. Weed competition from summer annuals like crabgrass is winding down and dying off. The decreasing daylight signals grass to focus energy on root growth, building a strong system to survive winter and explode next spring.
Spring seeding is your second chance, not your first choice. Yes, you get a longer window for grass to establish before summer stress. But you’re also planting into a battlefield. Weed seeds are germinating with wild abandon, fighting your grass for every bit of light, water, and food. You’re constantly on defense with mower and sprayer. Knowing the best time to plant grass seed in spring can give your lawn a head start. It helps your seedlings establish before weeds surge.
Don’t guess. Use a local soil temperature map from a nearby university extension service. It’s the difference between hoping you’re right and knowing you are. This simple step has saved me from wasting a bag of seed more than once.
Overseeding vs. Reseeding: What’s Your Lawn’s Prescription?
These aren’t fancy terms. They’re different levels of care for different problems. Overseeding is like filling in a thinning head of hair. You still have good coverage, but it’s getting sparse. Reseeding is like starting over on a completely bald spot. The soil is bare, and you need to rebuild from scratch.
Here’s a simple way to diagnose your lawn right now. Go stand in your worst area.
- Look down. Is the ground more than 50% visible bare soil?
- Or, do you still see mostly grass blades, just thin and weak-looking?
If you see more dirt than grass, you’re in reseeding territory. If you see more grass than dirt, even if it’s thin, overseeding is your path.
Effort, Cost, and What to Expect
Let’s talk about Patch, that stubborn shady corner in my yard. For years, it was just thin. I’d overseed it every fall. The process was straightforward: mow low, rough up the soil a little with a rake, spread seed, keep it moist. Cost was just the seed. By Halloween, it was thicker, blending in with the rest.
Then one summer, a fungus wiped it out. Suddenly, it was a dirt patch. That’s reseeding. The effort level jumped. I had to remove the dead debris, till the top inch of soil, level it, maybe add a thin layer of compost. The cost included seed and maybe soil amendments. The risk was higher too, with more exposed ground for weeds to find. It took more babying, but by next spring, it was a full lawn again.
Overseeding is routine maintenance. Reseeding is a renovation project. Choose the tool that matches the job, and you won’t waste a weekend or your budget. Start by diagnosing your lawn’s real needs, not what you wish they were.
The Golden Rules for Cool-Season Grasses (Fescue, Kentucky Bluegrass, Rye)

For grasses like yours that thrive in cooler weather, timing is everything. Think of your lawn’s success like baking bread. You need the right warmth for the yeast to work. Your grass seed needs warm soil to wake up and germinate and grow roots.
The magic number is a soil temperature between 50 and 65 degrees Fahrenheit. This isn’t air temperature. You need a simple soil thermometer, or you can check reliable local weather resources online.
Early fall is the undisputed champion for seeding. This window typically opens in late August and runs through October. The soil is still warm from summer, but the cooling air is gentle on tender new seedlings. Fall rains are often more reliable, and pesky annual weeds are winding down for the year, giving your grass a fighting chance.
Spring, when soils hit that same 50-65°F range, is your backup plan. It’s trickier. You trade earlier green-up for a big summer survival challenge. Those young grass plants have shallow roots when the heat hits, demanding perfect watering to avoid burnout.
Let’s answer the common questions right now. Can you plant grass seed in September? Absolutely. That’s prime time. Can you plant in October or November? Maybe. If the soil is still warm and you get it down early, it can work. But by late October, you’re gambling that the seedlings will establish roots before the ground freezes. I’ve pushed it with Patch in early November before a mild winter, but I wouldn’t recommend it.
The Early Fall Sweet Spot
This period is perfect for a few key reasons. The warm soil acts like a cozy bed for seeds. The cool air means less stress and evaporation. You’ll notice heavier morning dew, which is like free, gentle irrigation. Best of all, crabgrass and other summer annuals are dying off, so they won’t steal sunlight, water, or nutrients from your baby grass.
To get ready, don’t just wait for the calendar date. Your late summer prep sets the stage.
- About a month before you plan to seed, start mowing a bit shorter. I drop my mower deck down one notch. This allows more sunlight to hit the soil surface where your new seeds will land.
- Test your irrigation system. A week before seeding, I run Sunny, my drip system, to check for broken heads or dry spots. You need even, consistent moisture.
- Get your seed and any soil amendments ready. Waiting until the day you seed means you might rush or use the wrong product.
- Plan to aerate if your soil is compacted. Those holes give seed and water a direct path to the soil.
Doing this work in late summer means you can hit the ground running the moment soil temps dip into the ideal range.
The “Plan B” Spring Window
Spring seeding is a battle on two fronts. First, you’re competing directly with every weed seed that’s also waking up. Second, you’re racing the clock to build a deep root system before summer stress arrives.
The biggest risk is summer heat. A lawn seeded in spring hasn’t had months to develop the deep, drought-resistant roots that fall seeding provides. If you miss a few waterings in July, you can lose the whole area.
If you must seed in spring, use a targeted, smart strategy. Don’t try to overseed your entire lawn.
- Focus only on repairing bare or thin areas. This conserves your effort and water.
- Choose a grass type known for quick establishment. Perennial ryegrass germinates faster than Kentucky Bluegrass, giving it a head start.
- Be extra diligent with weed control. You might need a starter fertilizer with a weed preventer made for new seed, but always read the label for pet and pollinator safety.
- Commit to your watering schedule. Those seedlings will need consistent moisture to survive their first summer.
Treat spring seeding as a tactical repair mission, not your primary lawn renewal strategy. I save my big bags of seed for fall, when the conditions do most of the work for me.
The Warm-Season Grass Playbook (Bermuda, Zoysia, St. Augustine)
If your lawn is a sun-worshipper, your timing is everything. You can’t rush these grasses. They wait for the soil to feel like a warm bath, not just a cool morning.
You want the soil temperature to be consistently above 70°F. That’s the sweet spot where these seeds wake up and grow with purpose. This usually lines up with late spring rolling into early summer. Think late May through June for most areas. A simple soil thermometer is your best friend here. Don’t guess by the air temperature. On a 75-degree spring day, that soil can still be a chilly 55 degrees.
Planting when the soil is warm enough is like giving a child a full summer day to play outside instead of just an hour before dinner.
Why Fall is a No-Go for Seeding Warm Lawns
I know the fall weather is beautiful for working outside. The temptation to fix a patch then is real. Resist it. For Bermuda, Zoysia, and St. Augustine, fall seeding is setting up new grass for failure.
These grasses need a long, warm growing season to establish deep roots and store energy. Seedlings started in fall simply won’t have enough time to toughen up before the first frost triggers dormancy. They’ll go into winter as weak babies, and you’ll likely find them dead or pathetic come spring. It’s a waste of effort and seed.
For warm-season grasses, use fall for core aeration and feeding, not for starting from seed. Let the mature grass soak up those nutrients and strengthen for the next year.
Your Quick FAQ: “Can I plant grass seed in August?”
This is a great question because the answer splits perfectly between grass types.
For warm-season grasses like Bermuda, August is very late and risky. You’re giving the grass maybe 8-10 weeks before cooler weather slows it down. In hotter southern zones, you might get away with it, but it’s a gamble. A sudden early cool snap can stop everything. I don’t like gambling with an entire season’s work.
For cool-season grasses like Fescue or Kentucky Bluegrass, August is often the very start of the prime seeding window. As nights begin to cool but soil is still warm, you’re in business.
So, your first question back should always be: what type of grass do I have? That tells you the whole calendar.
Your Step-by-Step Seeding Game Plan
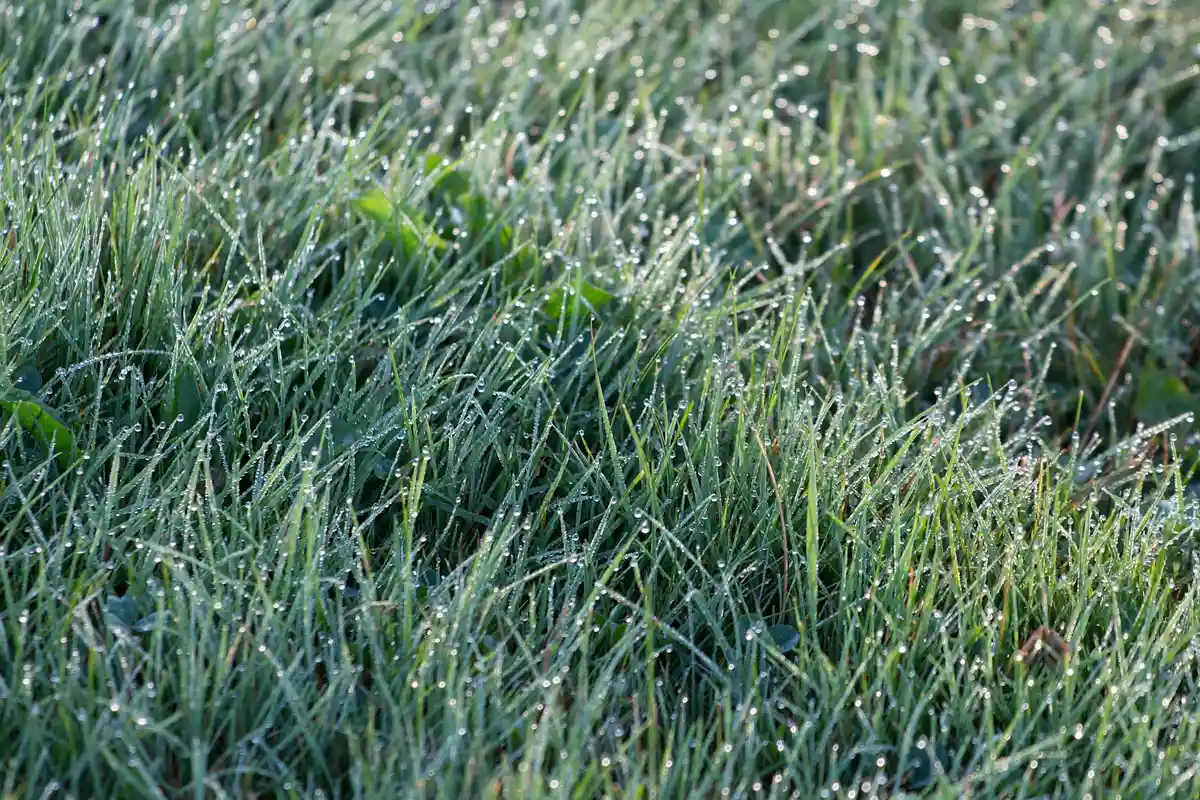
Picking the right time is one thing. Getting results is another. The secret isn’t a magic seed. It’s the work you put in before and after you spread it. This is the game plan I follow every single time, broken into three phases.
Phase 1: The Prep Work (Don’t Skip This)
Think of your lawn as a canvas. You can’t paint a masterpiece on a dirty, lumpy surface. This phase is about creating the perfect bed for new seed. Doing this right matters more than which bag of seed you buy from the store.
First, mow your existing grass short. I mean, really short. You’re not giving it a haircut, you’re clearing the stage. This lets light and water reach the soil.
Next, clear the deck. Remove every leaf, twig, and toy. Then, get aggressive with a sturdy metal rake. You’re not just tickling the grass. You’re scratching deep grooves into the soil to expose it. In my shady spot, Patch, this is where I spend extra time. If your lawn feels spongy or has a thick layer of dead stems (thatch), you might need to rent a dethatcher. The goal is to see bare, loose soil.
Good seed-to-soil contact is non-negotiable; if the seed is just sitting on top of old grass or thatch, it will dry out and fail. This prep work gives every tiny seed a fighting chance to put down roots.
Phase 2: Spreading and Covering
Now for the main event. Grab your spreader. For me, that’s Max, my old reliable drop spreader. Don’t just guess. Check the seed bag’s settings for your spreader type and calibrate it. Walk at a steady pace.
Here’s my trick: apply the seed in two different directions. Go north to south for one pass, then east to west for the next. This criss-cross pattern prevents thin stripes and missed spots.
Once the seed is down, don’t leave it naked. Take a leaf rake, turn it over so the tines face up, and lightly drag it across the area. This gently mixes the seed into the soil grooves you made. Finally, apply a whisper-thin layer of straw or compost. You should still see some seed peeking through. This blanket keeps birds away and holds precious moisture.
Phase 3: The Critical Aftercare
You’ve planted the seed. Now you become its guardian. This is where Sunny, my drip system, earns its keep, but a simple sprinkler works fine.
Watering is everything at the start. For the first two weeks, the top inch of soil must stay consistently damp, like a wrung-out sponge. This usually means light watering two or three times a day. If you see puddles, you’re overdoing it. If the soil dries out, the seedlings will die.
Be patient with the first mow. Wait until the new grass is at least one-third taller than your regular mowing height. For example, if you mow at 3 inches, let it grow to about 4 inches before that first cut. Use a sharp mower blade and never remove more than one-third of the grass blade height to avoid shocking the tender new plants. That first crisp snap of the mower blade through your new, thick grass is a sweet reward for all the work.
The Critical First Weeks: Lawn Aftercare Non-Negotiables
You got the seed down. Now comes the real work. I compare this phase to babysitting a new seedling. It needs constant, gentle attention. Mess this up, and all that prep work was for nothing.
The first two weeks are absolutely critical. Your job is simple but requires vigilance. Think of it as setting the foundation for everything that comes next.
Mastering Moisture: The Sponge Test
Your number one job is moisture management. Those tiny seeds need to stay consistently damp to germinate. The goal is to mimic a perfect spring rain, not a monsoon.
Imagine your seedbed is a kitchen sponge that should never fully dry out, but also never sit in a puddle. If it dries out, the germinating seed dies. If it’s soggy, you invite fungus and rot.
I walk out to my lawn every single day during this phase, often twice. I don’t just look, I feel. I kneel down and touch the soil. Is the top quarter-inch cool and damp? Good. Is it dry and dusty? Time to water.
The Watering Schedule That Actually Works
Forget complicated charts. Follow this rhythm, and you’ll see sprouts.
First, the setup. Use a gentle spray. You want a fine mist, not a jet stream that will wash your expensive seed into the gutter or onto the sidewalk. Sunny, my drip system, is perfect for targeted areas, but a good oscillating sprinkler on a timer works for larger spaces.
Here is your simple schedule:
- Weeks 1 & 2 (Germination Phase): Light watering, 2-3 times per day. Aim for just 5-10 minutes per session, early morning and late afternoon. The goal is only to dampen the top half-inch of soil.
- Weeks 3 & 4 (Seedling Stage): Transition to deeper, less frequent watering. Cut back to once a day, but water for longer (about 20-30 minutes) to encourage the young roots to reach down for moisture.
- Week 5 Onward (Establishment): You’re now training your lawn to be drought-tolerant. Water deeply only 2-3 times per week, applying about an inch of water each time. This promotes strong, deep root systems.
Wind and sun will dry things out fast. If you see a dry, windy forecast, be ready to add an extra brief watering session. This is where that daily “touch test” pays off.
The First Mow: Don’t Rush This Milestone
Seeing those first green blades is exciting. You’ll be tempted to get Max out and clean it up. Resist. Mowing too early is a classic mistake that rips young grass right out of the ground.
Follow this rule: Wait until your new grass is about one-third taller than your target mowing height. If you want a lawn at 3 inches, let it grow to roughly 4 inches before the first cut.
This waiting period allows the seedling to develop a root structure strong enough to handle the tug of mower blades. It feels counterintuitive, but taller grass now means a thicker lawn later.
When the big day comes, make sure your mower blades are razor-sharp. Dull blades tear and shred the tender grass, leaving ragged ends that turn brown and open the door for disease. I sharpen my blades every season, without fail. The clean slice of a sharp blade is a beautiful thing. If you notice chips or excessive wear, you may need to sharpen it or replace the blade. Either option helps keep your lawn healthy and your mower performing at its best.
For that first mow, take only the top third off. Never scalp your new lawn. When you’re mowing a newly seeded lawn for the first time, keep the cut light and the passes slow. This helps protect the young seedlings as they establish. Be gentle, and maybe even bag the clippings this one time to avoid smothering the young plants. After that, you can go back to mulching.
This process takes patience. I learned this with Patch, my problem area. Rushing never helped. Consistent, gentle care did. Stick with this plan, and you’ll be rewarded with a lawn that looks established in weeks, not months — especially if you’re working on yellow patches in your lawn.
Common Pitfalls and How to Sidestep Them

You’ve picked your time, bought your seed, and you’re ready to go. I’ve been there, full of weekend energy. But a few simple mistakes can turn that excitement into a patchy disappointment. Here’s how to avoid the classic errors I’ve made (or seen in my own neighborhood) so your hard work pays off.
Planting Seed Too Deep
This is the number one reason new grass doesn’t show up. We think we need to bury the seed to protect it, like planting a bean. Lawn grass seed is tiny. It doesn’t have the energy to push through a quarter-inch of soil.
The simple fix is to aim for seed-to-soil contact, not seed burial. After spreading seed, I gently rake the area so the seeds just settle into the top of the soil. You should still see some seeds on the surface. Think of it like sprinkling pepper on a steak-it just needs to stick, not sink in.
Using Old or Unknown Seed
That half-bag from two seasons ago hiding in the garage is tempting. I’ve tried it. The germination rate plummets every year, and you’re often just spreading mostly filler and weed seeds.
Always use fresh, high-quality seed from a current season bag, and check the label for the “weed seed” and “other crop” percentages-they should be 0.0%. It costs a bit more upfront, but you’ll use less and get vastly better results. It’s the difference between planting hope and planting a guarantee.
Watering With a Firehose
A powerful blast from the hose might feel efficient, but it creates tiny rivers that wash your expensive seed into piles in low spots or down the driveway. I learned this the hard way with my setup, Sunny; gentle is key.
Use a gentle spray nozzle or oscillating sprinkler and water multiple times a day for short periods. Your goal is to keep the top half-inch of soil consistently moist like a wrung-out sponge, not create mud soup. If you see puddles or seed floating, you’re using too much force.
Mowing Too Soon or With Dull Blades
The urge to mow the new, bright green grass is strong. But those young seedlings are still anchoring themselves. Mowing too early rips them right out. Even later, mowing with dull blades tears the grass, leaving jagged, brown tips that stress the plant.
Wait until the new grass is at least one-third taller than your normal mowing height before its first cut, and always sharpen your mower blades. My rule with Max is to sharpen the blades twice a season-once before spring seeding and once in late summer. A clean cut heals faster and looks crisper.
Ignoring the Soil Beneath Your Feet
We focus on the seed, but the seed needs a good home. If your soil is hard as a parking lot or lacks nutrients, the grass will struggle. This is what Patch, my stubborn weedy corner, taught me over years. Seed alone won’t grow—it’s the soil and care that complete the lawn project.
Before you seed, take five minutes to check your soil. Try pushing a screwdriver into the ground. If it’s difficult, your soil is too compacted. The correction is simple: aerate to let air and water in. For a real boost, spread a thin layer (about 1/4 inch) of compost over the area after seeding. It feeds the soil, which in turn feeds your new grass.
Greedy Grass Pro Tip: The Soil Test Shortcut

Let’s talk about the one step I see people skip most often. They get excited, buy the fanciest grass seed and a giant bag of fertilizer, and then wonder why their results are just… okay.
I’ve been there. A few years back, I dumped a “builds thick turf” fertilizer on Patch, my problem shady spot, expecting a miracle. All I got was lusher weeds. I was working harder, not smarter. The fix was embarrassingly simple: a soil test.
Think of a soil test as a recipe from your lawn. You wouldn’t just throw random ingredients into a cake. Your soil is telling you exactly what it needs (or doesn’t need) before you spend a single dollar. When you interpret those results, you’ll know exactly what your lawn needs and how to tailor your lawn care. This practical step keeps decisions data-driven rather than guesswork.
What a Test Actually Tells You
You send a few scoops of dirt to your local university extension office. For a small fee, they send back a report. It’s not just numbers. It’s a clear game plan.
- pH Level: This is huge. If your soil is too acidic or too alkaline, your grass can’t use the nutrients you feed it, no matter how much you buy. It’s like a locked door.
- Nutrient Levels: The report shows your levels of Nitrogen (N), Phosphorus (P), and Potassium (K). You might be low in one and already have plenty of another. Now you buy a fertilizer that matches, instead of guessing.
- Organic Matter & Texture: It clues you in on if your soil is a dense clay that holds water like a bathtub or a sandy soil that drains like a sieve. This changes how you water with Sunny, my drip system.
This targeted approach saves you money on products you don’t need and prevents you from harming your soil with amendments it doesn’t require.
How to Do It (It’s Easier Than Mowing)
This isn’t a complicated science project. Here’s my simple routine.
- Get a clean trowel and a bucket. Take about 10-12 thin slices of soil, about 3 inches deep, from different spots in your lawn. Mix them all in the bucket.
- Let it dry out for a day, then fill the sample bag or box from your test kit. Your local garden center often has them, or you can contact your county’s extension office directly. They are the best, most affordable source.
- Mail it off. In a week or two, you get your personalized prescription. Follow it.
I test different zones separately. The soil in my sunny backyard is different from the dirt under my big oak tree. Treating them the same was my old mistake.
That report takes all the guesswork out. You stop throwing products at the problem and start solving it. You’ll know if you need lime to adjust the pH or a specific nutrient mix to help that new seed thrive. It’s the smartest first move you can make for your lawn, every single time.
Greedy Grass FAQ: Your Overseeding Questions, Answered
Is it okay to walk on the area after I overseed?
Keep your feet (and paws) off the seedbed for at least 3-4 weeks. Those baby seedlings are putting down roots and can’t handle being trampled.
Do I really need to put straw down over the seed?
Straw isn’t mandatory, but think of it as a cheap security blanket. It holds moisture, protects from hungry birds, and prevents seed washout during a surprise rain.
What’s the real difference between a “sun & shade” mix and a “fast” mix?
A “sun & shade” mix is built for location, containing grasses that tolerate different light levels. A “fast” mix is built for time, prioritizing quick-germinating seeds like ryegrass to outpace weeds.
How much should I actually budget for an overseeding project?
For most lawns, budget for the seed and maybe a bag of starter fertilizer-that’s it. The real cost is your time and diligence with watering, which is free but priceless.
What if it pours rain right after I spread the seed?
Don’t panic; a gentle rain is perfect. If a downpour washes seed into piles, simply rake the areas level once things dry out a bit and lightly spread some more seed from your bag.
Final Thoughts on Spring vs. Fall Overseeding

Getting your timing right is your biggest win. For a thick, resilient lawn, match your grass type to the season, prepare your soil, and give those new seeds everything they need to succeed.
Remember, a healthy lawn is your best defense. I always look for pet-safe fertilizers and skip harsh weed killers near my flower beds for the bees. There’s always something new to learn in this hobby, and getting it right feels good.
Expert Resources and Citations
- r/lawncare on Reddit: Is overseeding in both the fall and spring a thing?
- Can You Overseed Your Lawn In The Spring?
- When to Overseed Your Lawn: Overseeding in the Spring or Fall? | TruGreen
Written by Ria Carrington. Ria is an avid lawn care enthusiast and advisor. No lawn is unsalvagable when Ria is at work. She has helped countless homeowners breath new life into their dying lawns. She has a B.Sc in Agriculture and brings practical advice combined with knowledge of plant science and her decade worth of hands on experience.