
How Often Should You Sharpen or Replace Your Lawn Mower Blade?
That ragged, brown edge on your grass after mowing? It’s a sure sign your blade is begging for attention, and I’m here to help you fix it.
We’ll walk through the telltale signs of a dull blade, the smart sharpening schedule that saves you money, exactly when replacement beats another sharpening, and the simple steps to do both jobs right.
I’ve kept my own lawn thick and green for years, learning these rhythms alongside my zero-turn mower, Max.
Why a Sharp Blade Matters (It’s Not Just About Looks)
Think about using dull scissors on a piece of paper. It doesn’t cut. It tears, leaving a ragged, frayed edge. A dull mower blade does the exact same thing to every single grass blade in your lawn, which is why professional sharpening of mower blades is essential.
A sharp blade makes a clean, surgical slice. A clean cut allows the grass to heal quickly, reducing moisture loss and stress. A dull blade rips and bruises the grass, leaving the tip of each blade looking like a frayed rope. Mulching blades shave the clippings into finer mulch that stays on the turf, while standard blades tend to discharge them. This difference can influence lawn health and maintenance decisions.
You can see this damage the next day. Instead of a uniform, vibrant green, your lawn will have a fuzzy, almost grayish cast. The very tips of the grass will turn white or brown, as if they were singed. I call it “lawn sunburn,” and it’s a direct sign of injury.
This injury is a real problem for lawn health. Those open, ragged wounds are perfect entry points for fungal diseases. A stressed lawn is also less dense, giving weeds like the ones in my Patch area an easier chance to move in. Keeping your blade sharp is a simple way to build a thicker, more resilient lawn that can outcompete problems naturally—especially when combined with proper mowing techniques.
It’s not just bad for the grass. It’s hard on your mower, too. My zero-turn, Max, has to work significantly harder with a dull blade. The engine labors, and you’ll actually burn more fuel to do the same job. A sharp blade is smoother, faster, and more efficient for both your lawn and your machine.
How to Spot a Dull Mower Blade
You don’t need special tools to know it’s time for some blade care. A few simple checks will tell you everything.
First, the visual inspection. After safely tipping your mower (always disconnect the spark plug!), look at the blade edge. A sharp blade has a distinct, clean bevel. A dull one will look rounded over. Scan the entire edge for nicks, dings, or chunks missing from hitting rocks, roots, or patio edges.
The grass itself tells the truest story. After you mow, grab a few of the fresh clippings. Rub them between your fingers. If they feel mushy, shredded, or wet instead of crisp and clean, your blade is tearing, not cutting. Look closely at the tip of a blade of grass still in the lawn; it should look sliced, not crushed. Keeping the lawn at the right cutting height helps the grass heal. A sharp blade supports faster recovery and healthier growth.
Listen to your mower and feel the effort. A dull blade makes the engine sound bogged down, especially in thicker grass. You might notice it leaving tall, uncut stalks or simply struggling to maintain power. The cut will look uneven.
Here’s my quick tip: after mowing, check the underside of your mower deck. A sharp, balanced blade lifts and disperses clippings evenly. A dull one often leaves a pasty, clumped-up mess of shredded grass stuck to the deck. That’s a sure sign it’s time to sharpen or replace your lawn mower blade.
The Real Schedule: When to Sharpen and When to Replace

So, how often should you sharpen the blade? The textbook answer is every 20 to 25 hours of mowing. But your yard isn’t a textbook. I think of it more like a haircut for my mower, Max. When the cut gets ragged, it’s time.
The real schedule depends entirely on what your blade hits week after week.
Let’s compare two scenarios. If your soil is rich, dark loam, your blade stays sharper longer. Sandy soil acts like sandpaper, grinding the edge down much faster. If you’re mowing over the tiny twigs and acorns that fall into my “Patch” area, you need to check the edge more often. A quick visual check after a tough mow takes two minutes.
How Many Times Can You Sharpen a Lawn Mower Blade?
You can sharpen a blade many times, but not forever. Each sharpening removes a tiny amount of metal. Think of it like sharpening a pencil. Do it too much, and there’s nothing left.
To check if a blade is too worn, look at the cutting edge itself. The original bevel, or angled edge, will get wider and wider as you grind it back. If that flat bevel is more than a 1/4-inch wide, you’re losing the knife-like geometry. The blade becomes a dull wedge that bruises grass instead of slicing it.
Clear Signs It’s Time for a Replacement
Sharpening can’t fix everything. Replace your blade when you see any of these issues.
- Deep gashes or nicks: Small ones can be filed out. A deep one, especially near the end of the blade, creates a weak spot that can crack.
- Excessive corrosion: Surface rust is normal. Heavy pitting that weakens the metal is a safety hazard.
- Significant metal loss: As mentioned, if the blade looks skinny or the cutting edge is too wide, it’s done.
- Bends: A bent blade will never run true and vibrates horribly. Don’t try to hammer it straight.
A Simple Seasonal Rhythm
I follow a three-step rhythm that never fails.
- Sharp Start of Season: I put a fresh edge on before the first serious mow in spring. It sets the whole season up for success.
- Mid-Season Check: Around mid-summer, when growth is heavy, I pull the blade for a quick inspection and touch-up with a file if needed.
- End-of-Season Review: After the last fall mow, I decide. If the blade is still in good shape, I sharpen it and store it for spring. If it’s tired, I replace it then and there, so I’m ready to go.
Gathering Your Gear: Tools for the Job
You don’t need a fancy workshop. Here’s what you need to safely remove, sharpen, and reinstall a mower blade.
- The right size wrench or socket for your mower’s spindle bolt (check your manual).
- A sturdy block of wood to wedge the blade and stop it from spinning.
- Safety gloves and eye protection. Always.
- A workbench or very solid table.
Choosing Your Sharpening Tool
You have two main options, each with trade-offs.
A hand file is slow, quiet, and foolproof. It’s hard to mess up. You just need some elbow grease. This is my go-to for mid-season touch-ups. It lets you feel the edge coming back.
A bench grinder or angle grinder is fast and powerful, but that speed comes with risk. You can overheat the metal in seconds, drawing out the temper and making the edge soft. If you use one, use a gentle touch, dip the blade in water frequently to cool it, and wear a full face shield.
The Non-Negotiable: A Blade Balancer
This is the most important tool in the kit. An unbalanced blade causes violent vibration. This shakes your mower apart, stresses the engine spindle, and is just plain unsafe.
A simple cone balancer costs a few dollars. After sharpening, you place the blade on it. If one side dips, you file a little more metal off the heavy end until it sits level. Never skip this step.
Greedy Grass Pro Tip: Buy a second blade. Keep it sharpened and balanced on a shelf. When your primary blade gets dull during the hectic peak season, you can just swap them in five minutes. Then you can sharpen the dull one on a rainy day when there’s no pressure. It’s a game-changer.
Step-by-Step: How to Sharpen and Replace Your Blade Safely

Before we touch a single bolt, let’s talk safety. This is the one rule I never bend.
Step Zero is always disconnecting the spark plug wire to ensure the engine cannot possibly start. I once watched a neighbor try to “quickly” check a blade without doing this, and the mower lurched when it tipped. It scared ten years off my life. No exceptions.
Step 1: Get Safe Access
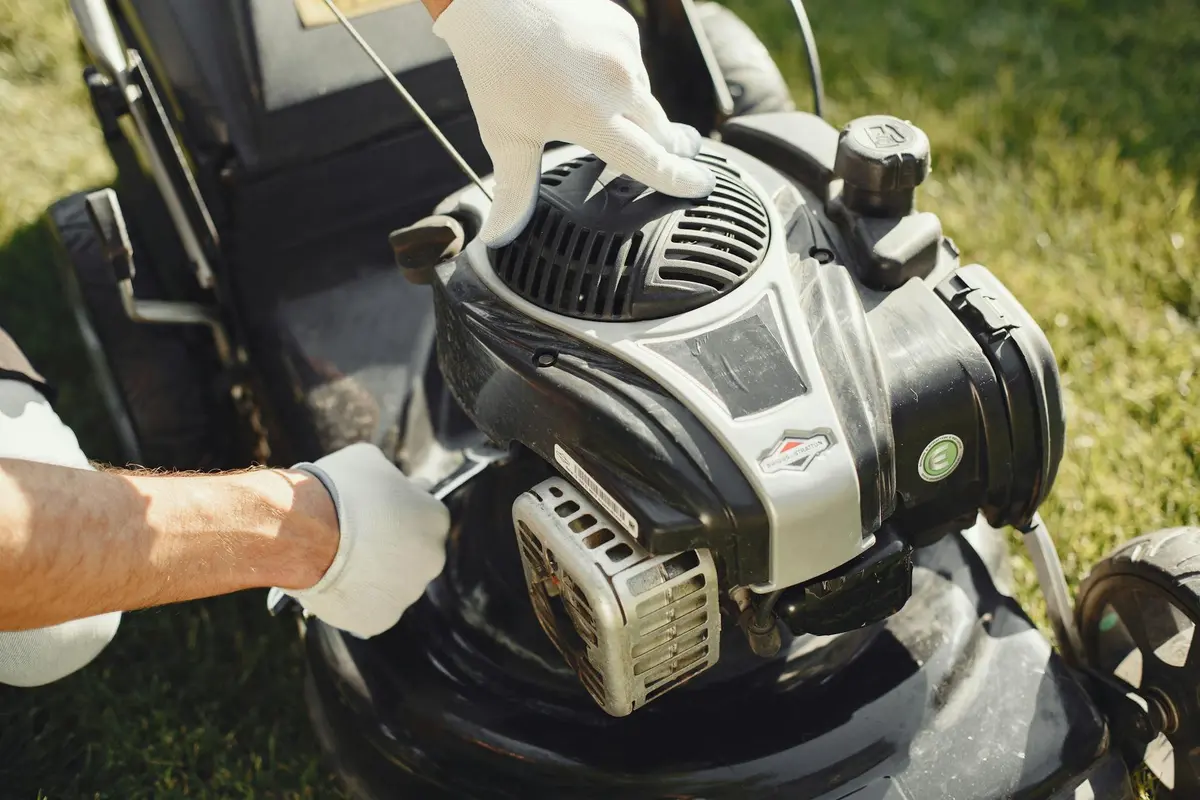
With the spark plug disconnected, tip your mower on its side. For a side-discharge mower, tip it so the air filter and carburetor are pointing up to prevent oil leaks. Prop it securely so it can’t fall. Before you try to loosen the blade bolt, take a scrap block of wood and wedge it between the blade and the mower deck. This locks the blade in place so you can remove or replace your lawn mower blades without the whole assembly spinning.
Step 2: Remove the Blade
Use the correct socket wrench to loosen the center bolt (it’s usually a standard nut, but some are reverse-threaded). Pay attention to which way you turn it. I always take a picture with my phone showing how the blade is oriented before I take it off. It’s an easy insurance policy. Once the bolt is off, the blade and any washers will come free.
Step 3: The Perfect Cleaning Opportunity
You have the blade off and the mower deck exposed. This is your chance. Grab a putty knife or a stiff brush and scrape off all the caked-on, damp grass from inside the deck. This gunk restricts airflow and makes your mower work harder. Clean your blade with a wire brush to remove grass and sap. You’ll see the true edge.
Step 4: Sharpening the Edge
Secure the blade in a vise or clamp it to a sturdy workbench. You can use a metal file or an angle grinder. The key is to follow the existing bevel angle, like sharpening a kitchen knife. Work the cutting edge, moving the file in one direction along the angle. Try to remove an equal amount of metal from each wing of the blade to help keep it balanced. You’re not trying to make it razor-thin, just restoring a clean, sharp edge.
Step 5: The Non-Negotiable Balance Check
This step prevents a shaky, damaging mower. You need a simple blade balancer, a cone-shaped tool that costs a few dollars. Place the blade on the balancer. If it dips to one side, that end is heavier. File a little more metal off the cutting edge on the heavy side, not the back. Recheck. A balanced blade will sit level. An unbalanced blade will vibrate when rotating, wearing out your spindle bearings fast.
Step 6: Reassembly and Final Safety
Place the blade back on the spindle exactly as it was, with any washers in the right order. Hand-tighten the bolt, then use your wrench to get it very tight. Use your block of wood again to keep the blade from spinning. The final, critical step is reconnecting the spark plug wire you disconnected at the very beginning. Now you’re ready for a test.
When to Replace Instead of Sharpen
The process is the same through Step 3. If your blade has deep gashes, is badly bent, or has been sharpened so many times the wings look stubby, it’s time for a new one. Buy a quality replacement, check its balance (even new ones can be off), and install it. It’s that simple.
Keeping Your Cut Clean All Season
A sharp blade isn’t a “set it and forget it” deal. Develop a couple of quick habits.
Give your blade a visual check every four or five mows. After you finish mowing, tip the mower back (spark plug disconnected) and look at the edge. If it looks rounded or has new nicks from a hidden stick, you know it’s time for the sharpening kit. These regular checks are part of basic lawn mower maintenance that can prevent bigger problems.
A quick hose-down of the mower deck after mowing a damp lawn prevents that corrosive grass soup from building up. Let Max air dry in the sun before you put him away. It makes the next deep clean much easier.
When you store the mower for winter, do it with a clean, dry deck. I give mine a final scrape, maybe a light spray with a hose, and let it sit in the garage for a day to fully dry. This fights rust all winter long.
This routine maintenance ties directly to your lawn’s health. A clean, sharp cut seals the grass blade quickly, losing less water and browning less at the tip. It reduces stress. A stressed lawn is an open invitation for weeds and disease, which means you might feel the need to use more products. A sharp blade is one of the simplest, most effective things you can do for a thick, resilient lawn. It’s a win for you, your grass, and everything living in it.
Your Blade Care Questions, Answered
Can I just “eyeball it” to know when to sharpen?
Absolutely. After a few mows, tip your mower safely and run your thumb lightly over the blade’s edge-if it feels rounded and slick, not crisp and grabby, it’s time. Your lawn’s ragged, torn appearance is the other dead giveaway.
Do my grass clippings actually tell me anything?
They’re your best informant. Grab a handful after mowing; if they feel mushy and wet, your blade is tearing. Crisp, clean clippings mean you’re getting that greedy, healthy slice we’re after.
Is there one perfect time of year to sharpen?
Start sharp in spring and give it a mid-season check, but let your conditions dictate the real schedule. Hitting sandy soil or debris means sharpening more often than mowing pristine, deep loam.
Does storing my mower for winter dull the blade?
No, but a dirty, damp deck leads to rust and corrosion. Always store it clean and dry to protect the metal, so you’re not starting spring with a pitted, weakened blade.
Should I just pay someone to sharpen it for me?
If you’re handy, a file and balancer are cheap and it’s a simple skill. But if tools aren’t your thing, a professional sharpen is a small price for a season of clean cuts-just always insist they balance it, too.
Wrapping Up Your Blade Care Routine
From my weekends with Max, I’ve learned that a sharp blade is non-negotiable for a thick, healthy lawn – check it every month in peak season and sharpen it at the first sign of a ragged cut. If the grass looks frayed or the mower vibrates oddly, don’t hesitate to replace the blade; your lawn will thank you with lush, green growth.
Keeping your tools in top shape is a simple way to care for your yard responsibly, supporting a pet-safe and pollinator-friendly environment right outside your door. I’m always tweaking my approach based on what Sunny and Patch teach me, and I encourage you to stay curious and adapt your own lawn care journey.
Research and Related Sources
- 4 Signs Tell You When to Change Lawn Mower Blade
- When to Replace Lawn Mower Blades – MOWRATOR
- When to Replace Your Lawn Mower Blades: 5 Warning Signs – Ego Power+
- When to Replace Lawn Mower Blade | 4 Signs You Need a New Lawn Mower Blade – DIY Repair Clinic
- How to Sharpen Lawn Mower Blades | Lowe’s
Written by Ria Carrington. Ria is an avid lawn care enthusiast and advisor. No lawn is unsalvagable when Ria is at work. She has helped countless homeowners breath new life into their dying lawns. She has a B.Sc in Agriculture and brings practical advice combined with knowledge of plant science and her decade worth of hands on experience.