
How Do I Remove and Replace My Lawn Mower Blade Safely?
Hearing a clunk or seeing torn grass tips can spike your worry, but a blade change is simpler than you think.
This guide walks you through critical safety steps, the few tools you need, removing the old blade correctly, installing the new one for a balanced cut, and a final check to ensure everything runs smooth.
I know this drill from keeping my own mower, Max, sharp and reliable for five straight years.
Gather Your Tools and Make It Safe: Your Pre-Game Checklist
Before you even think about touching that blade, get your gear together. I learned this the hard way years ago, halfway through a job with grass-stained hands, rummaging for a wrench. A few minutes of prep saves a ton of hassle.
Here is your essential tool list:
- Socket Wrench & Correct Socket: Most mower blades use a ½-inch, ⅝-inch, or 15/16-inch bolt. Check your manual or the old bolt head to be sure.
- Breaker Bar or a Length of Pipe: That center bolt is on tight. A breaker bar gives you leverage. No breaker bar? Slip a sturdy pipe over your wrench handle.
- A Solid Block of Wood (2×4 works great): This is your safety chock. You’ll wedge it between the blade and the mower deck to stop the blade from spinning when you try to loosen the bolt.
- Work Gloves: Blades are sharp, even dull ones. Protect your hands.
- Safety Glasses: Grass, rust, and debris can fall into your eyes. Just wear them.
The single most important step is to disconnect the power source completely. For a gas mower like my Max, pull the spark plug wire off the plug. For an electric mower, physically remove the battery. This guarantees the mower cannot start, even by accident. I do this every single time, no exceptions.
One pro tip from my garage: if that center bolt has been on for a few seasons, it’s probably seized. The night before you plan to work, give it a generous spray with a penetrating lubricant like PB Blaster or Liquid Wrench. Let it soak overnight. You’ll thank yourself in the morning when the bolt breaks free without a fight.
How Do You Prepare the Mower for Blade Work?
Now, you need safe access to the underside of the deck. For a walk-behind mower, this means tilting it. But you can’t just tip it on its side any which way.
Always tilt your mower so the air filter and carburetor are pointing to the sky. On a standard side-discharge mower, this usually means tipping it onto its side, with the wheels that were on the discharge chute side now off the ground. Tipping it the wrong way can let oil and fuel flood into the air filter or cylinder, which leads to a cranky mower that won’t start later. I’ve made that mistake for you, so you don’t have to.
Before you tilt it, take two minutes to scrape out the caked-on grass underneath the deck. A putty knife works wonders. This does two things: it makes your workspace much cleaner, and it lets you clearly see the blade, the bolt, and the mounting point for your inspection.
For a riding mower, you typically don’t tilt it. Instead, you’ll need to drive the front or rear wheels onto sturdy car ramps or use a jack and jack stands designed for the mower’s weight. Your mower’s manual will have the approved method. The goal is the same: stable, secure access to the blade from below.
How Do You Remove the Old Lawn Mower Blade?

Let’s get that old blade off. Safety first. I disconnect the spark plug wire every single time. It’s a five-second habit that prevents a lifetime of regret.
Now, you need to stop the blade from spinning freely when you try to loosen the bolt. A simple scrap of 2×4 lumber is my tool of choice. Tilt the mower on its side, with the air filter and carburetor facing up to prevent oil leaks. Wedge the wood block firmly between the blade and the mower deck. You should feel it lock the blade in place with a solid thud.
Next, grab your socket wrench and the correct socket size for the center bolt. This is where many folks get stuck. That bolt is almost always reverse-threaded. This means you turn it clockwise to loosen it, which feels completely backwards. Think “righty-loosy.” A little penetrating oil sprayed on the threads beforehand can save a lot of grunt work.
If the bolt is really seized, a breaker bar is your best friend. It slips over the end of your ratchet handle to give you incredible leverage. Apply steady, firm pressure. You’ll hear a satisfying *crack* when it finally lets go.
Once the bolt is off, carefully pull the blade straight down and away. Even a “dull” mower blade has edges sharp enough to give you a nasty cut. I always wear a sturdy pair of gloves for this part. Handle it like you’re carrying a dinner plate covered in grease. Set the old blade aside so you can match its shape and mounting hole exactly with your new one. This is also a good moment to review basic lawn mowing grass cutting techniques. Keeping a consistent cutting height and mowing in straight, even passes helps your lawn recover and look its best.
How Do You Install a New Blade Correctly?
You have the new blade in hand. This next part is about precision, not just brute force. Getting it wrong can lead to a poor cut or, worse, a dangerous situation.
First, let’s talk orientation. It’s the most common mistake. The sharp cutting edge of the blade must face the mower deck when you look down from above. The wings or lift curves on the ends of the blade should always arc upward toward the engine, not down toward the grass. If the wings point down, your mower will just beat the grass flat instead of cutting and lifting it cleanly. Also, the blade’s rotation direction matters: the edge must meet and cut the grass as the blade spins. Installing it for the opposite rotation will undermine performance.
Before you slide it on, take a second to wipe a thin coat of anti-seize compound on the cleaned spindle bolt threads. I keep a little tub in my shed. It fights rust and makes the next change much easier. A stuck blade bolt is a real headache you can avoid.
The Right Way to Tighten the Bolt
Now, slide the blade onto the bolt and thread the nut or bolt on by hand until it’s snug. This ensures you don’t cross-thread anything. Once it’s hand-tight, it’s wrench time.
You’ll hear debates about exact torque specs. For most homeowners, the goal is “good and tight.” Use your wrench and pull firmly until you feel solid resistance. You want it secure enough that vibration won’t loosen it, but you’re not trying to shear the bolt. If you have a torque wrench and your manual’s spec, use it. If not, a firm, decisive pull with a standard wrench will do the job.
Always follow the manufacturer’s pattern if you have a multiple-blade mower. Tighten in a criss-cross pattern, like lug nuts on a car tire, to ensure even pressure.
A Quick Balance Check (It’s Easier Than You Think)
An unbalanced blade causes vibration that wears out your mower’s spindle bearings. You can check it in a minute with a simple method.
Find a nail, a screwdriver, or even a cone-shaped socket in your toolbox. Stick it vertically in a bench vise or a block of wood. Slide the center hole of your new blade onto the nail.
If the blade stays level, you’re golden. If one side consistently dips down, it’s heavier on that end. A slightly unbalanced blade will make your mower shake, and you’ll feel it in your hands and hear it in the engine sound. You can often fix this by carefully filing a small amount of metal off the end of the heavy wing. Just a few strokes with a metal file, re-check, and repeat. Most quality blades are balanced from the factory, but it never hurts to verify.
Run your finger lightly along the edge of the new blade before you put it on. Sometimes there’s a small burr from manufacturing. A few passes with a file smooths it right out for a cleaner cut.
The Crucial Post-Installation Check and First Test

You have the blade back on. The socket wrench is back in the toolbox. The hardest part is over, but the job isn’t done. This next part is about making sure you did everything right before you commit to mowing the whole yard.
Think of it like a pilot’s pre-flight checklist. It’s quick, it’s simple, and it prevents a minor mistake from becoming a major headache.
Step 1: Power Back On, But Only When It’s Safe
Remember that spark plug wire or battery you disconnected? Leave it alone for one more minute.
First, you need to lower the mower deck back to its normal mowing height. If you had it propped up on blocks or a jack, remove those now. Let the deck sit flat on the ground. Only after the mower is resting normally on all four wheels should you reconnect the spark plug wire or battery cable. This is a critical safety step. You never want the engine to accidentally start while the deck is raised and your hands are near it.
Step 2: The Driveway Listen Test
Now, take the mower to a flat, open area like your driveway. Clear away any loose gravel or sticks. Start the engine.
I let Max, my zero-turn, idle here for a full minute. I’m not listening to the radio; I’m listening to the mower. Lean in a bit. What you want is the familiar, steady hum you’re used to.
What you don’t want is a new, fast ticking, a heavy vibration you can feel through the handles, or a sound like metal lightly scraping. These can be signs the blade isn’t seated perfectly, the bolt isn’t tight enough, or something is slightly out of balance. If you hear anything unusual, shut it off immediately and double-check your work.
Step 3: The Proof is in the Cutting
If the mower sounds right, it’s showtime. Pick a small, visible patch of lawn for a test drive. I often use the area by my sidewalk or a corner of the front yard.
Engage the blades and make a slow, steady pass. Then stop and look behind you.
You’re looking for a clean, even carpet of clippings. The grass should look uniformly cut, not whispy on one side and ragged on the other. A ragged or uneven cut is a telltale sign the blade is still dull, damaged, or installed incorrectly.
If the test strip looks good, you’re golden. You’ve successfully given your mower a fresh start. If it doesn’t, well, you caught it on a 10-foot test strip instead of halfway through your entire backyard. That’s a win, too. It just means it’s time to revisit the sharpening or installation steps.
Mower Blade Maintenance: Sharpening, Timing, and Choosing Blades

Think of your mower blade like a kitchen knife. You can sharpen a dull knife, but you have to replace one that’s broken or bent. The same rule applies here. If the blade is just dull, you can sharpen it. If it’s bent or damaged, replace the lawn mower blade.
New Blade or Just a Sharpening?
You need a sharpening if your grass looks ragged and torn after a cut, not cleanly sliced. A dull blade bruises the grass tips, turning them brown. You’ll also hear your mower, like my Max, working harder with a deeper, labored groan. Keeping the cutting height right and the blade sharp helps the grass recover quicker. It’s the balance of grass healing, cutting height, and blade sharpness that supports a healthier lawn.
You need a brand new blade when you see deep nicks, a noticeable bend, or the cutting edge is worn back more than a quarter-inch.
Run your finger along the edge (carefully, and only after you’ve disconnected the spark plug). If it feels rounded and smooth instead of having a distinct, sharp corner, it’s worn out. A severely damaged blade throws off the balance, causing vibrations that can wreck your mower’s spindle bearings.
How Often Should You Sharpen?
For a typical quarter-acre lot, plan to sharpen your blade once or twice per mowing season. I do mine in late spring and again in early fall.
Your schedule depends on your lawn’s toughness. Mowing sandy soil acts like sandpaper on the blade. Hitting fine gravel or twigs dulls it faster. If you mow weekly, listen for that change in sound and watch the grass quality. It’s a feel you develop over time.
OEM vs. Aftermarket Blades: What’s the Difference?
OEM stands for Original Equipment Manufacturer. This is the exact blade that came on your mower.
An OEM blade is guaranteed to fit your model’s deck and spindle perfectly, but you’ll pay a premium for that exact match.
A high-quality aftermarket blade from a reputable brand is often a great value. The key is to match the part number or specifications exactly length, center hole size, and thickness. A poorly made blade can be thinner metal that dulls or bends quickly, so don’t just buy the cheapest one you find.
The Best Times to Change Your Blade
The absolute best time is early in the spring, before your first real mow. Starting the season sharp sets your lawn up for healthy growth.
The other critical time is immediately after a major impact. If you hit a rock, a curb, or a buried garden stake, stop. Don’t just finish the yard. That’s when you get bends and chips that demand a new blade right away. Consider it a necessary cost, like changing a flat tire.
Swapping in a fresh blade mid-season gives you a noticeable boost in cut quality, almost like your mower got a tune-up.
Common Problems and Fixes After a Blade Change
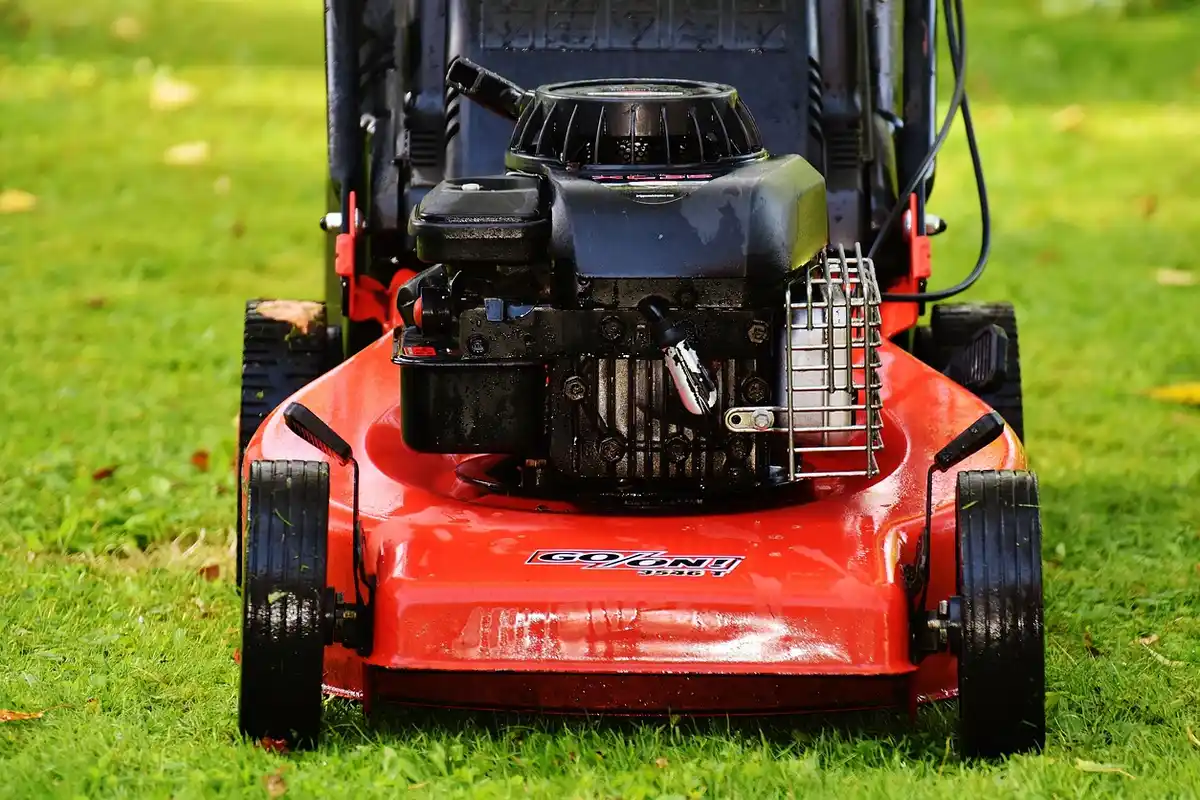
You got the new blade on. Great work. But sometimes, the first test run shows a few issues. Don’t worry, these are normal and almost always easy to fix.
Diagnosing an Uneven Cut
You fire up Max, take a nice straight pass, and look back. Instead of a clean carpet, you see strips of taller grass or a wavy, scalloped pattern. This is frustrating, but the cause is simple.
An uneven cut almost always points to one of two issues: an unbalanced blade or a mower deck that’s out of level.
First, check the blade balance. Even new blades can be off. I take the blade off again and use a simple nail-in-the-wall trick. Hang the blade horizontally on the nail through its center hole. If one side consistently dips down, it’s heavier. You’ll need to file a small amount of metal off the end of the heavy side, check it again, and repeat until it hangs level.
If the blade is balanced, your deck is likely tilted. This is like a table with one short leg—the cutter doesn’t travel evenly. To check this, park your mower on a flat driveway or garage floor. Measure from the floor to the edge of the deck on the left and right sides. If there’s more than a 1/4-inch difference, you need to adjust the cutting height.
Consult your mower’s manual, but usually, you’ll find a lift rod or adjustment nut on each side of the deck near the wheels. A few turns with a wrench is all it takes to level it out.
Addressing a Stubborn, “Welded” Bolt
Sometimes, the old blade bolt refuses to budge. Years of grass, moisture, and heat can literally weld it to the spindle. If your socket wrench just won’t cut it, don’t force it and strip the bolt head.
Your first move is more penetrating oil. Soak the top and bottom of the bolt where it meets the spindle and blade. Let it sit for at least an hour, even overnight if you can. Tap the bolt head a few times with a hammer to help the oil creep into the threads.
If oil doesn’t work, you can apply careful heat. Using a small propane torch to heat the spindle (not the bolt itself) for 30-45 seconds can break the rust bond. Let it cool slightly, then try your wrench again. Remember, you’re near gasoline and possibly dry grass clippings. Have a fire extinguisher close by, work in a clear area, and be extremely cautious.
Your last resort is an impact wrench. The sudden, powerful bursts can break bolts free that steady pressure cannot. Use a quality socket that fits perfectly to avoid rounding the bolt head. If even this fails, it might be time to call a small engine shop-they have the tools to extract it without damaging your mower’s spindle.
Covering Vibration Issues
A new vibration is an alarm bell you should never ignore. It sounds and feels wrong, like something is loose or off-center. It usually is.
Vibration means something is out of balance or not secured tightly. Start by going back to the basics you just finished. Is the blade installed right-side up? Is it centered perfectly on the spindle? Is the mounting bolt and any washers tightened to the manufacturer’s specification? A loose blade is a common culprit.
Next, re-check your blade balance with the nail test. An unbalanced blade spinning at high speed will shake the whole machine.
Finally, look beyond the blade. Did you bump the mower deck while working? Ensure all the deck hangers and belts are secure. Give the deck a shake by hand-there shouldn’t be excessive play. A vibration that starts after blade work almost always traces back to the installation, so methodically retrace your steps.
When Should You Call a Professional for Mower Blade Replacement?
I’m all for a good DIY project. But part of being a smart homeowner is knowing when to wave the white flag. There are a few clear signs it’s time to pack up Max and head to the shop.
The Bolt Head is Stripped or Rounded Off
This is the most common roadblock. You’re leaning on that breaker bar, and instead of a satisfying crack, you just hear a sickening grind. The bolt head is now a smooth, useless circle. If your socket or wrench spins freely without grabbing, stop immediately. Forcing it will only weld the bolt in place or damage the spindle threads, turning a $20 blade swap into a $200 repair bill.
You See Visible Spindle or Deck Damage
After you get the old blade off, take a hard look at the spindle-the metal post the blade mounts to. Does it wobble when you try to move it by hand? Are the threads visibly mangled? Is there a deep crack or bend in the mower deck around the spindle? These aren’t fixes for a socket set. Spindle and deck issues require specialized tools and parts you likely don’t have in your garage. Trying to mount a new blade to a damaged foundation is unsafe and will ruin your new blade fast.
You’re Just Not Comfortable with the Safety Steps
There is zero shame in this. If disconnecting the spark plug, safely tipping a several-hundred-pound machine, and wrestling a sharp, heavy blade under tension makes you uneasy, call a pro. Your peace of mind and your fingers are worth more than the savings. A good rule from my weekends in the garage: if your gut is saying “I’m not sure about this,” your brain should agree to get help.
What Does This Cost?
Let’s talk numbers so you can weigh the value. Doing it yourself, a quality replacement blade typically runs $15 to $40. The tools are a one-time cost. Having a professional handle it usually includes the blade and labor. You’re looking at roughly $50 to $100 total, depending on your area and the mower model. The professional fee is for their expertise, guarantee on the work, and getting you back to mowing without the headache. For me, if I’ve already spent an hour fighting a stripped bolt, the $40 premium for a pro starts to look like a bargain.
Where to Take It: The “Near Me” Solution
Skip the big-box store service counters for this. You want a local outdoor power equipment dealer or a dedicated small-engine repair shop. These folks live and breathe mowers. They have the specific blade lock tools and torque wrenches for your model, whether it’s a Craftsman R105 rider or a Toro Timecutter zero-turn. They can spot underlying issues you might miss and get the right OEM or high-quality aftermarket blade on there. Just give them a call first-many will even pick up and drop off for a small fee.
Your Greedy Grass Blade Replacement FAQs

How often should I really replace my mower blade?
For a greedy, thick lawn, inspect your blade monthly and plan to sharpen it 1-2 times per season. Replace it immediately if you see deep nicks, a bend, or if the cutting edge is worn back more than a quarter-inch.
Is replacing the blade on my Craftsman R105 or Toro Timecutter different?
The core safety steps and process are identical-disconnect power, block the blade, and remember the bolt is often reverse-threaded. The main difference is accessing the deck; always consult your specific model’s manual for the approved lifting or tilting method to avoid fluid leaks.
What’s the realistic cost to replace a mower blade?
Doing it yourself, a quality blade runs $15-$40. Having a pro do it typically costs $50-$100 total, which includes the blade, labor, and their guarantee on the work-a fair price to skip the hassle if you’re stuck.
How do I use a mower blade replacement chart?
A replacement chart cross-references your mower’s make, model, and deck size to give you the correct part number. Always match the blade’s length, center hole size, and shape to your old one for a perfect, balanced fit. For broader verification, consult our lawn mower parts compatibility guide to ensure compatibility across brands and models before purchasing.
How do I find a reliable “mower blade replacement near me”?
Skip the big-box stores and search for a dedicated outdoor power equipment dealer or small-engine repair shop. These local experts have the right tools and knowledge to handle your specific mower and can often spot other issues you might miss. A local lawn mower repair service can provide quick diagnostics and convenient drop-off or on-site options.
Sharp Blades, Happy Lawn
The best advice I can give is to make checking your mower blade a quick, regular task, just like checking the oil. A sharp blade on Max is the difference between a ragged tear and a crisp, clean cut that lets your grass heal fast and grow thick, especially when you use professionally sharpened mower blades.
Taking good care of your tools is a quiet way to care for your whole yard, reducing stress on the grass and creating a better home for bees and butterflies. I still pick up new tips each season, and that willingness to learn is what turns a patchy lawn into a point of pride.
Sources and Additional Information
- Lawn Mower Blades – The Home Depot
- Mower Blades
- How much does it cost to get the blade replaced on a lawn mower at a shop? – Quora
- Lawn Mower Blades | O’Reilly Auto Parts
- Parts & Accessories – Tagged “Mower Blade”– American Lawn Mower Co. EST 1895
Written by Ria Carrington. Ria is an avid lawn care enthusiast and advisor. No lawn is unsalvagable when Ria is at work. She has helped countless homeowners breath new life into their dying lawns. She has a B.Sc in Agriculture and brings practical advice combined with knowledge of plant science and her decade worth of hands on experience.