
Can You Actually Grow Grass in Hard, Clay Soil? Here’s My Step-by-Step Fix.
If your soil feels more like a brick patio than a welcoming bed for grass seed, I get it. I’ve stood in those same hard, sun-baked spots and wondered if anything would ever grow.
We will cover testing what you’re really working with, the right way to loosen compacted ground, affordable amendments that actually help, picking the toughest grass seed for the job, and my exact seeding routine for success.
I’ve turned my own dense, clay-heavy yard into a thick lawn through trial, error, and a lot of time with a shovel.
What You’re Up Against: Clay and Compaction 101
Let’s talk about what’s really happening under your feet. When we say “hard soil,” we’re usually dealing with two separate issues that love to team up.
First, there’s clay soil. Think of the clay in your soil like the clay used for pottery. When it’s wet, it’s sticky and holds its shape. When it dries, it becomes a hard, cracked block. Sandy soil, in comparison, is like a sieve-it lets water and air flow right through it, but it doesn’t hold onto nutrients or moisture for your grass.
The second culprit is compaction. This isn’t about what your soil is made of, but what’s been done to it. Years of foot traffic, playing with the kids, or even just mowing with a heavy riding mower (I’m looking at you, Max) presses those soil particles tightly together. It squeezes out the vital air pockets.
Together, clay and compaction create a hostile world for grass seed. Water pools on the surface or runs off instead of soaking in. Grass roots struggle to push through the concrete-like ground and can’t find the oxygen they need. Seeds just wash away or rot in the cold, wet muck.
This is the key thing to remember: fixing a lawn on this ground is a soil project first, and a seeding project second. If you just throw seed on top of hardpan, you’re setting yourself up for a season of frustration and wasted money. We’re going to fix the foundation and make sure you prepare the soil properly for lawn seeding success.
Tools and Materials You’ll Need to Get Started
You don’t need a shed full of pro-grade equipment, but a few key items will make this job effective and save your back. Here’s your checklist.
Essential Tools
- Core Aerator (rental): This is your MVP. It’s a machine you walk behind that pulls out plugs of soil, about the size of your finger. Renting one for a weekend is your most important step. It creates instant channels for air, water, and roots.
- Garden Rake (or a sturdy leaf rake): You’ll use this to break up the soil plugs left by the aerator and to level the area before seeding.
- Wheelbarrow: For moving bags of compost or topdressing. A simple garden cart works too.
- Seed Spreader: A broadcast spreader gives the most even coverage. A handheld model is fine for small areas like my problem-spot, Patch.
Essential Materials
- Soil Test Kit: This is the smart, upfront move. A basic kit from your local garden center can tell you if your soil is wildly acidic or lacking key nutrients. It guides everything else you add.
- Grass Seed: Get a high-quality seed blend suited for your region and sunlight. For tough areas, look for mixes that include fine fescues, which are a bit more tolerant of poor soil.
- Compost (or a Sand/Compost Mix): This is your soil medicine. After aerating, you’ll spread a thin layer (about 1/4 inch) over the entire area. Compost adds organic matter to loosen clay and feed microbes. A mix with sand can improve drainage in severe cases.
- Starter Fertilizer: This is different from regular lawn food. It’s high in phosphorus, which is the nutrient that specifically encourages strong, fast root growth for your new seedlings.
Step 1: The Soil Test – Don’t Guess, Know
Working on hard soil feels like arguing with a brick wall. You can throw seed and water at it all day, but nothing good happens. The first move is to stop guessing and start knowing exactly what you’re dealing with. This step saves you money and backache.
Grab a clear jar, a tablespoon of dish soap, and some soil from a few inches down. Fill the jar about one-third with soil, then add water until it’s two-thirds full. Drop in the soap, screw the lid on tight, and shake it for a solid minute. Let it sit for a full day.
You’ll see the soil settle into layers. Sand is the heavy, gritty stuff at the bottom. Silt is the finer, cloudy layer in the middle. Clay is the thin, sticky film on top. If that top clay layer is more than a quarter of the jar, you’ve confirmed your main adversary.
Clay soil often has another issue: it tends to be acidic, which locks away nutrients from grass roots. A simple pH test kit from the garden store tells you this in minutes. If the test shows a pH below 6.0, you’ll know you need to add lime later to sweeten the soil.
For the full picture, send a sample to your local cooperative extension office. For a small fee, they send back a report telling you exactly what nutrients your dirt lacks. This report is your cheat sheet, telling you precisely what to add in the next step instead of wasting money on random bags of fertilizer.
Step 2: The Big Fix – Aeration and Soil Prep
How and When to Aerate Heavy Soil
Think of compacted clay like a packed-down sponge. Water and air can’t get in, and roots can’t get out. Aeration is the process of poking holes to fix that. But not all holes are created equal.
Spike aerators just poke solid tines into the ground. They can actually make compaction worse by pressing soil tighter around the holes. For clay, you need a core aerator, the machine that pulls out actual plugs of soil about the size of your pinky finger. It’s the difference between poking a straw into a milkshake and scooping out a spoonful. You need to remove material to create real space.
Timing is everything. Aerate when the soil is moist, like a well-wrung-out sponge, not bone-dry or soggy wet. If it’s too dry, you’ll break tines. If it’s too wet, you’ll make a muddy mess and tear up the ground. I aim for a day or two after a good rain or a deep watering with Sunny.
My zero-turn, Max, is a beast, but his weight is part of the problem. For a seriously compacted area, one pass isn’t enough. Go over the lawn once, then go over it again in a perpendicular direction to create a checkerboard pattern of holes. This doubles the open space for your amendments and new grass roots.
Amending Clay Soil: What to Add (and What to Avoid)
Now you have thousands of open holes. This is your one chance to get good stuff down into the root zone. What you add here changes the game.
Organic compost is your best friend. It doesn’t just feed the grass; it feeds the soil life that binds particles into crumbly, airy clumps. Spread a thin, even layer about half an inch to an inch thick over the entire aerated lawn.
Take a rake and vigorously work the compost down into the aeration holes. You want to fill those cores with this good stuff. This mixture of compost and soil plugs will break down and act like little fertility tunnels right where your grass needs them.
Many people think adding sand will loosen clay. This is a dangerous gamble. If you don’t add enough, you can create a concrete-like mix. If you try it, you must mix a huge amount of compost with the sand first. Honestly, for most homeowners, compost alone is the safer, more effective path.
You might see pelletized gypsum as an option. It can help break apart tight clay particles over time, improving drainage. It’s not a magic fix, but spreading it according to the bag instructions alongside your compost can give you an extra edge. Think of it as a helpful supplement, not the main meal.
Your goal is simple. Aim for that 1-inch layer of compost raked into the holes. This physically changes the structure of your topsoil, making it softer, drain better, and ready to welcome new grass seed. It’s the hard work now that makes every future step easier.
Step 3: Choosing and Planting the Right Grass Seed
Best Grass Types for Tough, Clay, or Shady Spots
Picking seed is not a one-size-fits-all job, especially with clay. The first choice is between cool-season and warm-season grasses. Cool-season grasses (think northern lawns) grow most in spring and fall. Warm-season grasses (southern lawns) green up in summer heat. Both have champions for clay.
For cool-season areas, Tall Fescue is your best friend. Its roots dive deep, which is perfect for punching through dense soil to find water and nutrients. I rely on Tall Fescue for the toughest parts of my lawn because those deep roots just don’t quit. Kentucky Bluegrass is another good option, especially in a blend. It spreads to fill in thin spots, but it likes sun. Look for a blend of Tall Fescue and Kentucky Bluegrass for a lawn that’s both tough and thick.
In the South, Zoysia grass is a top pick for clay. It’s tough, spreads to choke out weeds, and handles foot traffic well. It just needs warm soil and full sun to really thrive.
Now, for that shady, damp clay spot (I’m looking at you, Patch). This is a special challenge. Clay already holds water, and shade slows evaporation, creating a soggy, compacted mess. Fine Fescues are the answer here. Varieties like Chewings, Hard, or Creeping Red Fescue have fine blades and tolerate low light and poorer soil. For problem shady areas, a “shade blend” containing Fine Fescues is your safest bet to get anything green to grow.
When you’re at the store, turn that bag over. Look past the pretty picture. You want to see words like “clay tolerant,” “deep-rooted,” or “self-repairing.” These tell you the grass is bred for the exact battle you’re fighting.
Seeding and Feeding for Success
You’ve improved the soil and picked your seed. Now let’s get it growing. Doing this right makes all the difference.
First, figure out your seed. Most bags list a rate, like 4-6 pounds per 1,000 square feet. For patch repairs or overseeding, you can use a bit more. I split my seed in half. I spread one half walking north-south, and the other half walking east-west. This cross-hatching gives me the most even coverage and avoids thin stripes.
Next, food. New grass seedlings need a strong start, especially in hard soil. You must use a starter fertilizer high in phosphorus, the middle number on the bag (e.g., 10-20-10). Phosphorus is like a root growth hormone, telling those tiny new roots to push down into your prepared soil. Apply it right after seeding, following the bag’s rate.
Don’t just leave the seed sitting on top. After spreading, take a leaf rake and turn it over so the tines are facing up. Gently drag it across the area. You’re not burying the seed, just nudging it so it’s in firm contact with the soil. Good seed-to-soil contact is what triggers germination.
If you’re seeding a slope or it’s very dry out, a thin protective layer helps. A quarter-inch of peat moss or a light scattering of straw (not hay, which has weeds) will hold moisture and prevent washouts. Just don’t smother the seed. You should still see some soil peeking through.
Step 4: Watering and Early Care in Heavy Soil

This is where many projects fail. Clay is tricky to water. Too much and you get a muddy swamp that drowns seeds. Too little and the surface crusts over, locking seeds out.
The first week is critical. Your goal is to keep the top half-inch of soil constantly damp, like a wrung-out sponge. This usually means light mistings 2-3 times a day for 5-10 minutes, just enough to dampen the surface without causing runoff. If you see puddles forming, you’re putting down too much water at once. Stop, let it soak in, and shorten your watering time.
You’ll start to see germination in 7-21 days, depending on the grass type. It looks like tiny, bright green threads poking through. Once you see that green fuzz everywhere, you can start to change the routine. Transition to deeper, less frequent watering to encourage the roots to chase moisture down into the soil. Try one longer session in the morning, watering until the top 2-3 inches are wet. Let the soil dry out a bit between waterings. This teaches the grass to grow deep, strong roots.
Your first mow is a milestone. Mow your newly seeded lawn when the grass is about one-third taller than your desired mowing height. If you want a 3-inch lawn, let it grow to about 4 inches. Make sure your mower blade is razor-sharp. A dull blade will tear and pull up the tender seedlings. Take only the top third off. This gentle first cut tells your new lawn it’s time to start thickening up and growing strong.
Common Mistakes and How to Avoid Them
Even with the best shovel work, a few simple errors can undo all your progress. I’ve made most of these myself, especially in my early years with Patch. Learning these lessons saves you time, money, and a whole lot of disappointment.
Tilling Pure Sand Into Clay
It sounds logical. Clay holds water, sand drains it, so mix them for perfect soil. The reality is much messier. Tilling sand directly into heavy clay often creates a dense, concrete-like layer as it settles. Think of mixing flour and water to make paste, not cake batter.
The fix is to always mix sand with a generous amount of compost or other organic matter first. The compost acts as a buffer, coating the clay particles and sand grains to create a crumbly, open structure that lets roots breathe and water flow. A good rule is a 1:1:1 ratio by volume if you’re amending: one part sand, one part compost, one part native soil.
Seeding at the Wrong Time of Year
Grass seed isn’t just sitting around waiting for you. It germinates based on soil temperature, not the calendar date. Throwing seed on hard ground in the peak summer heat or the dead of winter is a waste. The seed either cooks, rots, or sits dormant until conditions are right, leaving it exposed to birds and weather.
Follow the ideal seasonal windows for your specific grass type to give seeds the best chance at a strong start. For cool-season grasses like fescue or Kentucky bluegrass, aim for early fall when soil is warm but air is cooling. For warm-season grasses like Bermuda or Zoysia, late spring into early summer is your sweet spot. A simple soil thermometer takes the guesswork out. Targeting the ideal temperature for grass seed germination helps seeds sprout more reliably. Monitoring soil temperatures ensures you time sowing for optimal germination.
Overwatering and Drowning Seeds
New seeds need consistent moisture, but their roots are tiny and fragile. A common panic move is to blast the area with the hose several times a day. This washes away seed, packs down your prepared soil, and creates a soggy environment where fungus thrives and roots rot instead of grow.
Use the “knuckle test” to check moisture without overdoing it. Stick your finger into the soil up to your first knuckle. If it feels damp like a wrung-out sponge, you’re good. If it’s dry, give it a light, gentle watering. Your goal is to keep the top inch of soil consistently moist, not wet, until the grass is about two inches tall.
Using a Cheap, Weak Grass Seed
That bargain bag from the big-box store is tempting. But it often contains high percentages of “crop” or “annual” grass varieties and weed seed. These sprout quickly to give the illusion of success, but they die off in a season or can’t handle foot traffic, leaving you back at square one with more weeds.
Invest in a quality, named blend or variety suited for your specific conditions of sun, shade, and traffic. Look for a tag that lists zero weed seed, low inert matter, and perennial varieties rated for your region. It costs more per pound, but you’ll use less seed and get a lawn that actually lasts. I learned this the hard way before my lawn under Max looked anything respectable.
When This DIY Fix Isn’t Enough
Sometimes, the problem is bigger than a shovel and a few bags of compost can handle. Recognizing this early saves you from pouring effort into a project that’s doomed to fail. There’s no shame in calling for backup. I had to do it once for a drainage issue that was far beyond my paygrade.
Signs of a Bigger Problem
If you notice any of these, your soil issue is likely structural:
- Severe Drainage Issues: Water pools and stands for more than 24 hours after a rain, creating a swampy patch. This indicates a compacted hardpan layer far below the surface or a very high water table.
- Large-Scale Soil Contamination: You find construction debris, an old asphalt patch, or suspect chemical contamination from prior land use. This isn’t just poor soil, it’s damaged soil.
- Significant Slopes or Erosion: The area washes out every time it rains, or the slope is so steep that water and topsoil simply run off before grass can establish. This needs regrading.
What a Professional Might Do
Pros have heavy equipment and specialized knowledge for these scenarios. Their solutions are more permanent but also more invasive.
- Install Subsurface Drainage: They might trench in perforated pipe (French drains) connected to a storm drain or dry well to actively pull water away from the problem area.
- Bring In Large Quantities of Topsoil: For severe contamination or very shallow topsoil over bedrock, they may scrape away the bad soil and replace it with 6+ inches of certified clean topsoil.
- Use a Power Renovator or Subsoiler: For deep compaction, they’ll use a tractor-pulled implement that fractures soil 8-12 inches down without flipping it like a tiller, which is far more effective for breaking up hardpan.
Cost and Effort Comparison
Let’s be real about what you’re signing up for. My DIY soil fix for a 500 sq. ft. area cost me about $150 in compost, sand, and seed, plus a brutal weekend of manual labor. It was hard, satisfying work.
Calling a professional is a different scale of investment, but it solves problems you physically can’t. For a similar-sized area with a serious drainage issue, expect quotes starting around $800 to $2,000+ for regrading and drain installation. The machine work might only take an afternoon, but you’re paying for expertise, insurance, and heavy equipment transport.
The decision comes down to scope. If the problem is isolated and you’re willing to sweat, DIY. If water sits for days across your entire backyard, or you’re looking at a major regrade, getting a few professional quotes is the smart first step. It’s better to know the true scale of the job before you dig that first hole.
Your Top Questions: Planting Grass Seed in Hard, Clay Soil
1. How much grass seed do I actually need for a clay soil lawn?
For tough clay, don’t skimp. Use 5-6 pounds of quality seed per 1,000 square feet to ensure enough seedlings take root and establish a thick, greedy lawn. Beyond the seed amount, the way you spread it matters—use a spreader for even coverage or try slit seeding on clay. The spreading method aids seed-to-soil contact and germination.
2. Is a product like “Clay King” grass seed worth it for my yard?
Yes, specially formulated mixes like Clay King are worth the investment. They contain deep-rooted, clay-tolerant grass varieties that are bred to punch through dense soil where standard seed fails.
3. When is the absolute best time to sow grass seed on clay soil in the UK?
The ideal window is early autumn (late August to mid-October). The soil is still warm for germination, and autumn rains provide consistent moisture without the summer heat that bakes clay into brick.
4. What’s the best grass seed for a shady spot with heavy clay soil?
You need a fine fescue blend. Look for a UK “shade & clay” mix containing varieties like Creeping Red Fescue, which tolerates low light and dense soil better than any sun-loving grass.
5. Can I just buy my clay-friendly grass seed from B&Q?
You can, but read the label carefully. Go past the brand and check the seed tag for high percentages of perennial ryegrass and fescues, not just cheap filler annuals that will give up after one season.
Your New Lawn Foundation
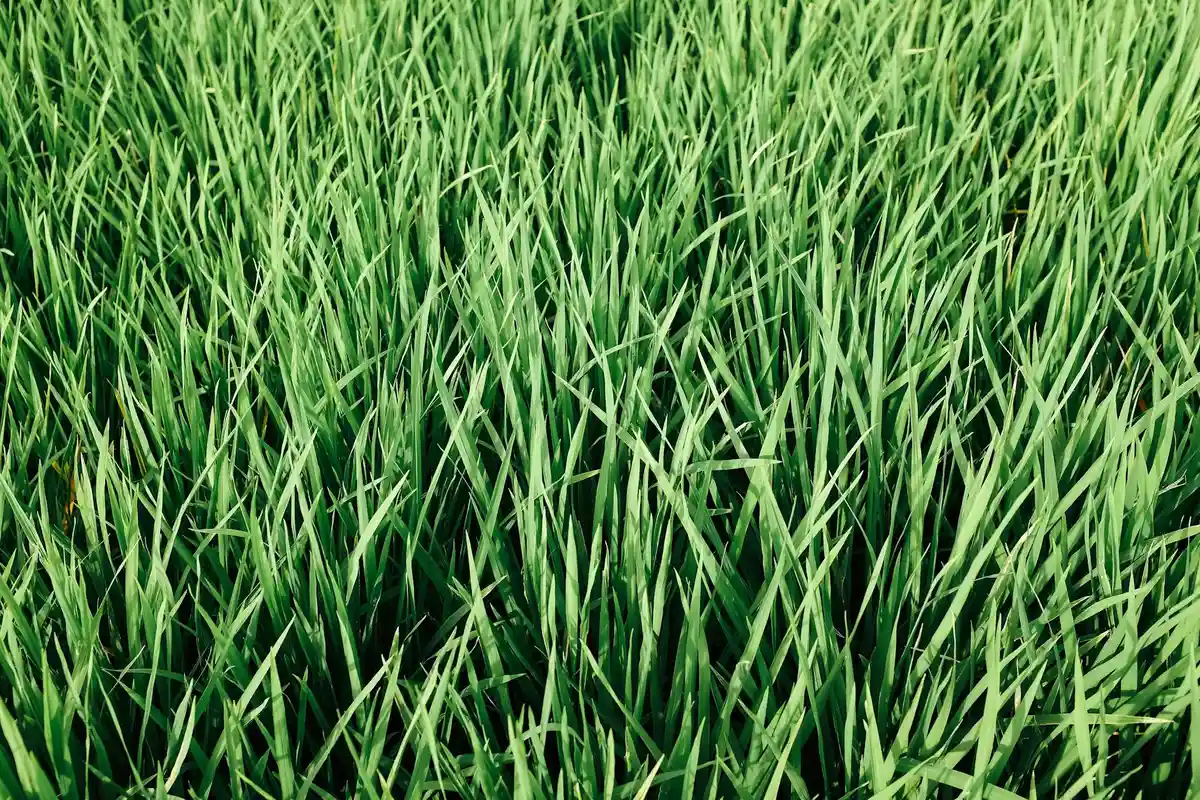
The most important step is the first one: breaking up that hard soil and mixing in compost. Getting air and organic matter down to the root zone turns a hostile patch of ground into a welcoming home for grass. Do that work well, and the seeding and watering you do afterwards will actually pay off. That means preparing the soil to the right planting depth for grass seed. When the soil is ready, you can sow evenly and cover lightly, which supports uniform germination.
Remember to water gently and keep it pet-safe, letting your new lawn grow strong from the roots up. I’m always testing things out on my own grass with Max and Sunny, so check back on the blog for more hands-on tips as your lawn settles in.
Further Reading & Sources
- Growing a Beautiful Lawn on a Clay Soil – FertiLawn
- r/HomeImprovement on Reddit: Any tips on growing grass in almost all clay soil?
- Best Sod for Clay Soil: Find the Right Grass for Your Lawn
- lawn – How can we grow grass in our heavy clay yard? – Gardening & Landscaping Stack Exchange
- The Best Grass Seed for Clay Soil and How to Plant It – Men’s Journal
- Best Grass Seed for Clay Soil | Lawn Synergy
- What grass for clay heavy soil? | Lawn Care Forum
Written by Ria Carrington. Ria is an avid lawn care enthusiast and advisor. No lawn is unsalvagable when Ria is at work. She has helped countless homeowners breath new life into their dying lawns. She has a B.Sc in Agriculture and brings practical advice combined with knowledge of plant science and her decade worth of hands on experience.