
How Do You Plant Grass on a Steep Slope and Keep It From Washing Away?
Staring at a bare, eroding hillside can make a green lawn seem impossible. I can tell you from experience that it’s not, and you can fix it without spending a fortune.
This article breaks it down into simple steps, covering selecting the toughest grass seed, using affordable erosion control tricks, and watering so every drop sticks.
I know this works because I’ve turned my own troublesome slope into a thick, stable lawn that handles rain without a fuss.
What Tools and Gear Do You Need for a Sloped Lawn Project?
You need the right crew for this job. On flat ground, you can get by with less. On a slope, the right tools keep you safe and make the work stick.
First, gather your core tools. I keep mine in a five-gallon bucket so I’m not running back and forth.
- Soil test kit: This is non-negotiable. Guessing wastes money and effort.
- Sturdy, metal rake: A flimsy leaf rake won’t cut it. You need a bow rake or garden rake to move soil without fighting it.
- Seed spreader: A hand-held broadcast spreader works best for most slopes. It gives you control.
- Erosion control blankets or mats: These are your secret weapon. They hold seed and soil in place. Biodegradable straw or coconut fiber ones are my go-to.
- Landscape stakes and a rubber mallet: You’ll use these to pin those blankets down tight.
- Watering system: A soaker hose is good. Parts to build a temporary drip line like my setup, Sunny, is even better for slow, deep watering that won’t wash your seed away.
Safety Gear You Should Not Skip
This isn’t a flat backyard. A tumble here is a real problem.
Treat your boots, gloves, kneepads, and safety glasses as essential equipment, not optional extras. I learned this after slipping on a dewy morning. Good boots with deep treads are your foundation. Gloves protect your hands from the rough blanket material and stakes. Kneepads are a back-saver. Safety glasses keep flying dirt out of your eyes when you’re hammering stakes on an angle.
If your slope is very steep, consider a safety harness tethered to a secure anchor at the top. If that sentence makes you pause, listen to that feeling.
Smart, Cost-Effective Alternatives
You don’t need a pro-grade budget. For a small slope, you can spread seed evenly with a homemade sieve. Use an old kitchen colander or punch small holes in the bottom of a plastic bucket. It’s slow, but it works. Instead of buying dozens of landscape stakes, you can often use thick, bent wire or even sturdy, forked sticks to hold the blanket edges. The goal is to keep it all in place, not win a beauty contest.
How Do You Safely Prep Your Slope for Seeding?
Good prep is 80% of the battle on a hill. Rushing here means watching your work wash down the drain.
The very first step is to stand at the bottom, look up, and be honest with yourself about the steepness and your comfort. If your heart jumps into your throat at the thought of walking on it, stop. Hire a pro for the prep work. There’s no shame in that. It’s smarter than a trip to the emergency room.
If you’re good to go, remember one rule: always work from the top of the slope down. Gravity is your enemy, so never give it a head start. Start by clearing debris like sticks and rocks from the top, tossing them to the side at the bottom. For existing weeds, pull them by hand from the top down. Avoid using a tiller or aggressive tool that loosens large amounts of soil all at once.
The Simple 3-Step Soil Test
Don’t skip this. Soil on a slope is often poor and washed out.
- Using a hand trowel, take 4-5 samples from different spots on the slope, from top to bottom. Dig down about 4 inches.
- Mix these samples in a clean bucket and let them dry. Send this mix to your local cooperative extension service. It’s cheaper and more accurate than most kits.
- They’ll send back a report telling you your soil’s pH and what nutrients it lacks. It’s like a prescription for your lawn.
This report tells you exactly what to add, so you’re not throwing random bags of fertilizer at the problem.
Is Terracing Needed?
This is the big question. For a gentle slope, the answer is no. Your erosion blankets and proper seeding will do the job. My mower, Max, can handle a gentle incline without a second thought. Just ensure to maintain your lawn properly to prevent erosion.
For a very steep slope, the answer is yes. Terracing-creating flat, stepped levels-is a major landscaping project. It often requires retaining walls, professional grading, and serious drainage work. That’s a different league of DIY. If your slope is that severe, establishing a lawn with seed might not be the best solution. Consider groundcovers or other landscaping designed for hillsides.
When to Seed Your Slope
Timing is your best friend for germination.
For cool-season grasses like Kentucky Bluegrass or Fescue, early fall is the golden hour. The soil is still warm, the air is cooler, and fall rains help with watering. For warm-season grasses like Bermudagrass or Zoysia, aim for late spring, when soil temperatures are consistently above 65°F. If you’re considering spring, the best time to plant grass seed in spring is when soils have warmed and moisture is reliable. That window helps seeds germinate and establish before the heat and drought of summer. Seeding at the right time gives the grass a fighting chance to establish roots before heat or cold stress hits.
Getting Your Slope’s Soil Ready for Seed
Now, based on your soil test, you’ll add amendments like compost or lime. The key is to do this gently. Don’t rototill. Instead, spread a thin layer (about 1/4 to 1/2 inch) of compost over the soil. Using your metal rake, lightly drag it from side to side to work it in just an inch or so. You’re dressing the soil, not tearing it up.
Think of grading your slope like smoothing a crumpled blanket on a bed. You’re not trying to flip the mattress. Use your rake to fill in obvious ruts or washouts by pulling soil from the high side into the low spot. Only minor leveling is a safe DIY task. If you need to move more than an inch or two of soil across the slope, that’s a sign you might need a professional grader.
Your final surface should be firm but not hard-packed. If you walk on it, your heel should sink in no more than half an inch. This gives the seed a stable, welcoming bed to call home.
Which Grass Seed Is Best for Holding a Hillside?
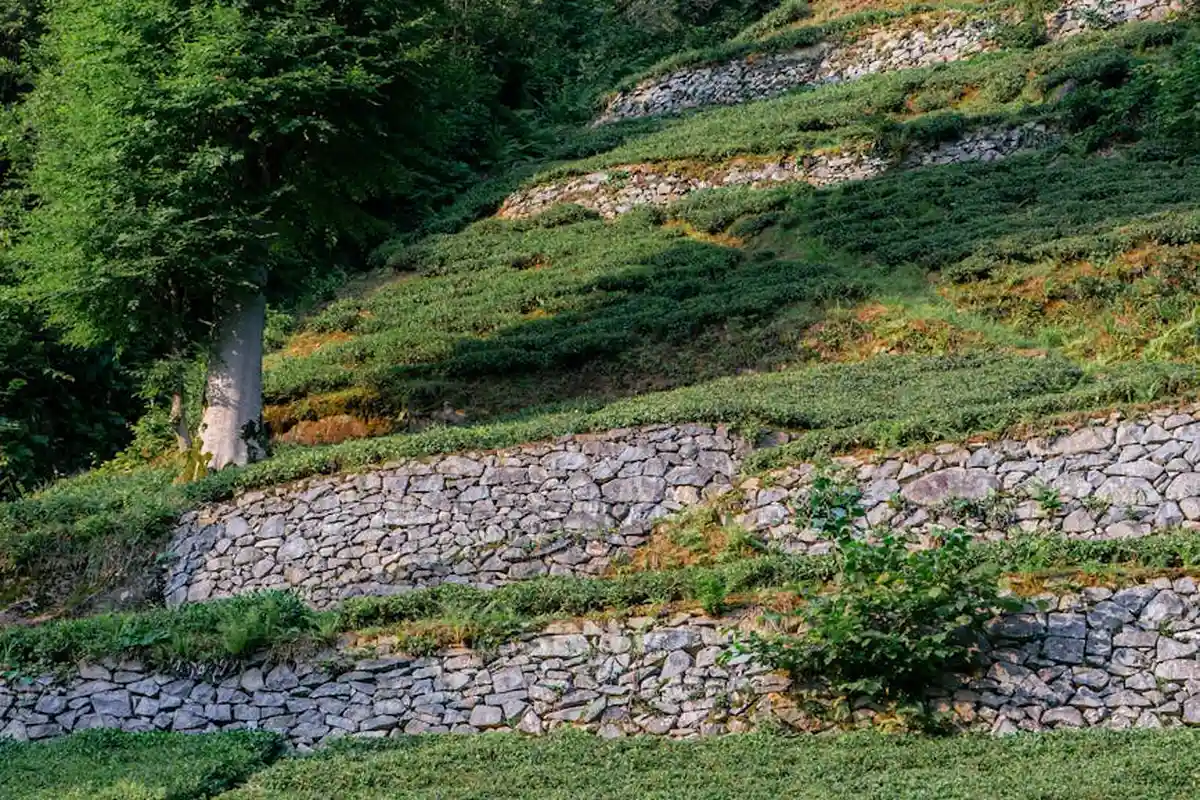
Picking grass for a hill isn’t about color or how fast it grows. It’s all about the roots you can’t see. You want a dense, fibrous root mat that acts like netting, holding soil in place. Shallow roots might look fine on a flat lawn, but they’ll let your hillside wash away in the first good storm.
Your best choice depends entirely on your climate. For cool-season areas, turf-type tall fescue is the undisputed champion. Its roots dig deep, and individual blades are famously tough. For warm-season regions, look to zoysia or bermuda grass. They spread with aggressive runners (stolons and rhizomes) that knit the soil surface together, and they handle drought like nothing else.
A pollinator-friendly mix with white clover or fine fescues is a brilliant choice for a slope, as these plants develop a web of roots that excel at binding soil and preventing erosion. Don’t get tricked by a cheap “contractor mix” bag. Those often contain fast-growing but weak grasses like annual ryegrass that die off and leave your slope bare and vulnerable again.
Cool-Season vs. Warm-Season Champions for Slopes
Here’s a quick look at the top contenders. Think of root depth like the foundation of a house-deeper is always more stable on a hill.
| Grass Type | Root Depth | Best For This Slope |
|---|---|---|
| Tall Fescue (Cool) | Very Deep (2-3 ft+) | Sunny, dry slopes. Look for “turf-type” or “dwarf” cultivars in a blend for thickness. |
| Fine Fescues (Cool) | Moderate to Deep | Shadier, drier slopes. Excellent in mixes for soil binding. |
| Kentucky Bluegrass (Cool) | Moderate | Sunny slopes with good moisture. Use in a blend with tall fescue for resilience. |
| Zoysia (Warm) | Deep | Sunny, high-traffic slopes. Slow to establish but forms a tough, dense carpet. |
| Bermuda (Warm) | Very Deep (up to 6 ft) | Full-sun, hot, dry slopes. Its aggressive spread is perfect for erosion control. |
What’s the Smart Way to Seed a Steep Incline?
Throwing seed on a hill is a recipe for a muddy mess. You need a strategy. First, split your seed bag in half. Make your first pass walking horizontally across the slope (along the contour). Then, make your second pass walking vertically (up and down the fall line). This cross-hatch pattern is the single best way to get even coverage and prevent thin stripes where seed washed away.
You will need more seed. I use about one and a half times the rate recommended for flat ground. It accounts for seed that inevitably rolls or washes to the bottom. Dump that heavy wheeled spreader. A lightweight handheld broadcaster gives you much better control and balance on an uneven hill.
Watch the weather. Seed on a perfectly calm day. Wind will blow your expensive seed right into your neighbor’s yard or the nearest storm drain.
How to Prevent Seed Roll-Away Before It Happens
After spreading, those seeds are just sitting on a slippery slide. They need to be anchored to the soil that has been properly prepared for seeding. Take a leaf rake, turn it over so the tines are facing up, and drag it ever so gently over the area. You’re not burying the seed, just working it into the top 1/8 inch of soil. If you have a lawn roller (even a water-filled one), a light pass can also press seed into the soil for excellent contact.
This simple step of raking or rolling makes a huge difference in germination and stops seed from moving at the first sign of rain. It’s the perfect setup for the next critical phase: covering the whole area with an erosion control blanket to lock everything in place.
How Do You Lock Seed and Soil in Place?

After you’ve prepped and seeded your slope, the next few weeks are a race against the rain. Your goal is to keep every seed right where you put it. You have a few main tools for this job, and they are not created equal.
Let’s compare the options:
- Straw Mulch: This is the cheap and classic choice. It helps shade the soil and retain moisture. On a flat lawn it’s fine, but on a slope, loose straw will absolutely wash away in the first good downpour.
- Tackifiers: Think of these as a glue-like spray. You mix them with water and spray them over your seedbed (or over a light straw layer). They form a thin, flexible crust that locks everything down until the grass roots take over. It’s a very effective, pet-safe option.
- Erosion Blankets: My go-to for serious slopes. These are rolls of biodegradable material, like jute or coconut fiber. They physically hold the soil and seed in place, protect from washout, and eventually decompose. They are the security blanket your new lawn needs.
- Plastic Netting or Mats: These are the permanent, heavy-duty option. They’re plastic mesh you stake down. They work, but you have to remove them later, and they don’t add any organic matter to the soil like a jute blanket does.
So, can you use mulch? Yes, but with a big caveat. Loose mulch on a hill is a slide waiting to happen. Only use a light layer of straw or compost if you’re covering it with a blanket or spraying it with a tackifier first. The tackifier binds it all together.
All these methods work by breaking the fall of raindrops. Instead of a hard hit that dislodges soil, the water’s energy is dispersed. It’s the difference between pouring a bucket onto bare dirt versus onto a sponge. The blanket or crust soaks it up and lets it seep in slowly.
Step-by-Step: Staking Down an Erosion Blanket
Doing this right is the difference between success and a tangled mess at the bottom of your hill. Here is exactly how I do it.
- Start at the very top (the crest) of the hill. This is non-negotiable. If you start in the middle, water will get under the top edge and wash everything out.
- Unroll the blanket straight down the slope, never side to side.
- Secure it immediately. Use landscape staples or stakes every 3 feet along the edges and down the center. Staple the top edge extra well.
- When you start the next roll, overlap it over the first one by a good 6 inches. Staple through the overlap.
As you work, press the blanket down so it has a snug hug with the soil. If it billows like a sail, wind and water will get underneath it and cause problems. You want it tight and in full contact.
How Do You Water a New Slope Without Washing It Away?

This is where most slope projects fail. You need constant moisture for germination, but a strong stream will undo all your erosion control work. This is a job for gentle patience.
Let me introduce you to Sunny, my drip irrigation setup. Sunny is the hero for slopes. Drip lines or soaker hoses apply water slowly, right at the soil level, with no forceful droplets to cause splash erosion. They mimic a soft, soaking rain that gives water time to sink in instead of running off. That makes Sunny a great example for a diy drip irrigation system lawn. Stay tuned for a simple diy lawn drip guide you can build yourself.
Your watering schedule has two phases:
- Germination Phase (First 2-3 weeks): Your goal is to keep the top inch of soil constantly damp, like a wrung-out sponge. This usually means very light watering 2 to 3 times a day for just 5-10 minutes at a time.
- Establishment Phase (After germination): Now you train the roots to grow deep. Switch to deeper, less frequent waterings. Soak the soil for longer periods every other day, then gradually space it out to twice a week.
How do you know if you’re washing it away? Watch the bottom of the slope. If you see water pooling or muddy runoff, you’re applying water too fast. Stop, let it soak in, and shorten your watering time. Always water early in the morning. You’ll lose less water to evaporation, and there’s usually less wind to blow your gentle spray off target.
Setting Up a Temporary Slope Watering System
You don’t need a permanent irrigation system. A simple temporary setup works perfectly.
Get a soaker hose. Run it along the contour of the hill (side to side, not up and down), spacing the lines a foot or two apart. Hook it to a timer on your spigot. The water weeps out along the entire length, evenly soaking a wide band.
If you use a sprinkler, place it at the TOP of the slope on a very low, mist-like setting. Let the water gently trickle down. A sprinkler at the bottom will just push water uselessly against the hill.
This is where your erosion blanket earns its keep. It holds that initial light misting in place, giving the water a chance to penetrate instead of instantly sheeting off. The blanket and gentle watering are a perfect team.
How Do You Keep a Hill Lawn Healthy Long-Term?
Getting grass to grow on a slope is one thing. Keeping it thick and healthy for years is another game. It’s all about smart routines that protect the soil and encourage deep roots.
Your mowing routine is the single most important habit for a sloped lawn. You must mow across the slope, side to side, like you’re drawing lines on it. Mowing straight up and down invites water to run down those tire tracks, carving gullies and washing away your topsoil. I learned this the hard way on a small incline in my backyard, creating a muddy channel that took a season to fix. Mow when the grass is about one-third taller than your target height, and keep that mower blade sharp. A dull blade tears the grass, leaving ragged, brown tips that stress the plant.
Mowing Your Slope Without Taking a Tumble
Let’s talk safety. Mowing a hill has real risks. My zero-turn, Max, is a beast on flat ground, but he stays in the garage for anything steeper than a gentle rise. For a slope, use a self-propelled walk-behind mower with big, treaded rear wheels for traction. Wear shoes with aggressive grip, like hiking boots or dedicated mowing shoes. If the hill feels precarious, have someone spot you. There’s no shame in it.
The goal is to mow across the contour of the hill, never with it. This prevents the mower from slipping downhill and stops those straight-line ruts from forming. Think of it like laying a blanket over the hill; you want the fibers to run across it to hold it in place, not straight down it where it can slide off.
Seeding is usually the best way to cover a slope, but it’s not your only option. Sod gives you instant grass and erosion control, but installing it on a slope is tricky. You need to stake it down with landscape pins so it doesn’t slide before the roots knit into the soil. Plugs are a slow-but-steady choice, great for erosion-fighting grasses like Bermudagrass or zoysia. You plant small plugs across the hill, and they slowly spread to fill in.
Common Sloped Lawn Mistakes and Simple Fixes
We all make mistakes. On a hill, small errors can lead to big problems. Here are the common ones I see and how to fix them.
- Mistake: Seeding at the wrong time. Fix: Seed cool-season grasses in early fall and warm-season grasses in late spring. This gives seeds the best weather to germinate and establish before stress hits.
- Mistake: Skipping erosion control. Fix: Never leave bare soil exposed. Always cover seeded slopes with a biodegradable erosion control blanket or a thin layer of straw tacked down with netting.
- Mistake: Watering like it’s a flat lawn. Fix: Water slopes with short, frequent cycles. Think of five minutes on, ten minutes off, repeated two or three times. This lets water soak in instead of running off. My drip system, Sunny, is perfect for this with its slow, steady output.
- Mistake: Mowing too short or with a dull blade. Fix: Keep grass taller to shade roots and protect soil. Always sharpen your mower blade. Longer, cleanly cut grass is more drought-tolerant and resilient.
- Mistake: Letting weeds take over. Fix: Use a pet-safe, spot-treatment herbicide on young weeds. Pulling large weeds can disturb the fragile soil on a slope, creating an erosion spot.
Long-term care requires a different mindset. Core aeration with a heavy machine is tough and dangerous on a hill. For root health, consider liquid aeration products in the spring, or if you must core aerate, do it carefully in the fall when the soil is moist and use a walk-behind model. It’s like poking holes in a wet sponge versus a dry brick; you want the soil to give way easily.
Know when to call a pro. If your slope is very steep (imagine struggling to walk up it without using your hands), if you think you need terracing or retaining walls, or if you’re simply uncomfortable with the physical risk, hire a professional. A landscaper with experience in slopes can install the right solutions safely. Your safety is more important than any lawn.
Your Steep Slope Seeding Questions, Answered
Should I terrace my slope or would creating switchbacks be better?
Terracing is for severe, un-walkable slopes and is a major construction project. For most homeowners, if you can safely walk on your slope, skip the terraces and focus on switchbacks-simple, zig-zagging paths for maintenance that reduce erosion and make your life easier.
Do I really need more seed for a slope than for flat ground?
Absolutely. Use about one and a half times the normal flat-lawn rate. This accounts for seed that naturally migrates downhill, ensuring you still get the thick, greedy coverage you need to lock the soil in place. Understanding grass seed spreading characteristics helps with lawn establishment. It guides you toward even, durable coverage as the lawn takes root.
What’s the trick to staking erosion blankets so they don’t fail?
Always start at the TOP of the slope and staple the upper edge first, extra tight. Then, staple down the sides and center every 3 feet, making sure the blanket lies flat against the soil-if it billows, water will get underneath and wreck your work.
Can I use regular mulch, or do I need something special?
Never use loose mulch like straw by itself; it will wash away. If you mulch, use a thin layer of compost or straw and immediately cover it with an erosion blanket or spray it with a tackifier to glue it all down.
What’s the most important safety rule when working on a hill?
Always work from the top of the slope downward. Gravity is your constant opponent; never give it a head start by working uphill or across the middle, where a slip can turn into a dangerous tumble.
Final Thoughts on Your Hillside Lawn
Getting a lawn started on a steep hill is all about holding the ground in place first. Use a quality erosion blanket and water with a gentle trickle to give those seeds the secure, damp home they need to turn into a strong, living mat of grass.
Taking care of a sloped lawn means being a good steward of your whole yard. Pay attention to how water moves, choose practices that keep soil and pollinators safe, and remember that the best lawns come from patient, observant care that adapts to the land. With these steps, you can achieve a healthy, beautiful lawn. Consistency and care on slopes lead to long-lasting curb appeal.
Industry References
- How to Prevent Seed and Soil Erosion on Slopes and Hills
- How to Control Erosion in Your Yard | Lowe’s
- Slope Stabilization / Erosion Control Mixes – OPN Seed
- Plant-forward Solutions for Erosion | | IzelPlants.com
- Using Grass and Seed for Erosion Control – Southland Organics
Written by Ria Carrington. Ria is an avid lawn care enthusiast and advisor. No lawn is unsalvagable when Ria is at work. She has helped countless homeowners breath new life into their dying lawns. She has a B.Sc in Agriculture and brings practical advice combined with knowledge of plant science and her decade worth of hands on experience.