
What Lawn Care Basics, Tools, and Terms Should Every Homeowner Know?
Does lawn care seem complicated with all the gear and confusing words? I promise it’s simpler once you know the real essentials.
We will cover the simple rules for healthy grass, the few tools worth your money, and the key terms that make sense of it all.
I’ve tested this advice on my own lawn, saving cash and time for years.
What Is Turfgrass, Really?
Think of your lawn as a tight-knit neighborhood. Turfgrass is that community of individual grass plants, all living together and managed as a single green carpet.
It’s a team sport. Each blade supports the others to create a dense, durable surface for your family to enjoy. In the world of home lawn care, people use “lawn” and “turf” to mean the same thing. If you’re talking about your yard, they’re interchangeable.
When you look at your lawn, you’re seeing a living system, not just a green decoration. You manage it as a whole, even though it’s made of millions of small parts. By the way, if you’re ever chatting with a neighbor who prefers Spanish, the common word for this green carpet is “el césped.”
The Four Pillars of a Healthy Lawn
Your grass needs four fundamental things to thrive. Ignore one, and the whole system gets shaky. Think of these as the non-negotiable basics.
1. Soil: The Foundation
Bad soil means a struggling lawn, every single time. You wouldn’t build a house on a weak foundation. Your grass feels the same way. Good soil holds nutrients and water but also lets excess drain away, like a damp sponge.
You’ll often hear about soil pH, which is just a measure of how acidic or alkaline your dirt is. Most grass likes it right in the middle, or neutral.
Testing your soil is the single best first step you can take, because it tells you exactly what your lawn’s foundation is made of. You can’t fix what you don’t measure. If your soil is too compacted, water and air can’t get to the roots. That’s when you meet problems like my stubborn friend, Patch.
2. Water: Deep Drinks, Not Sips
Grass roots grow deep when they have to search for water. Frequent, shallow sprinklings train them to stay lazy and weak. I aim to water deeply and less often, so the moisture soaks down 6-8 inches into the soil.
My drip system, Sunny, is great for garden beds, but for the lawn, a consistent soak is key. Early morning is the best time to water. You lose less to evaporation, and the blades dry quickly, which helps prevent fungus.
3. Air: Let It Breathe
Compacted soil suffocates roots. Over time, foot traffic and mowing press the soil particles tightly together. There’s no room for air or water. You might notice water puddling quickly or grass that seems thin.
This is where aeration comes in. It pulls small plugs of soil out, creating holes for air, water, and nutrients to reach the root zone. Core aeration is like opening all the windows in a stuffy room it gives your lawn a deep, revitalizing breath of fresh air. I do it once a year, and the grass always responds with a surge of green growth.
4. Sunlight: The Energy Source
Grass is a solar panel. It uses sunlight to make its own food through photosynthesis. Most types need at least 4-6 hours of direct sun daily. Less than that, and it becomes weak, thin, and eager to let moss or weeds move in.
If you have heavy shade from trees, you have two choices: prune branches to let in more light, or choose a grass seed blend specifically designed for shade. There’s no magic bullet for deep shade sometimes, you manage expectations, just like I do with Patch in his corner.
A thick, healthy lawn grown on these four pillars is your most effective and safest defense against weeds, disease, and drought. Weeds are opportunists. They can’t compete with dense, vigorous grass. Focus on these basics first, and you solve most problems before they even start.
Grass Types: Picking the Right Plant for Your Place

The first thing to know is that all lawn grasses are not created equal. They fall into two main families: cool-season and warm-season. Getting this right solves half your problems before you even start.
Think of cool-season grasses as marathon runners. They thrive in the cooler temperatures of spring and fall, going strong when other plants are slowing down. Warm-season grasses are the sprinters. They love the heat, hitting their peak growth in the blazing summer sun while cool-season grasses are taking a nap.
I learned this the hard way years ago. I tried pushing my old northern grass mix in a new, hotter yard. It was a constant battle against brown patches every July. Once I understood this basic split, everything else clicked into place.
Quick Snapshot: Common Home Lawn Grasses
Here’s a simple breakdown of the grasses you’ll most likely encounter at the garden center or in your neighborhood. This table cuts through the noise.
You might hear about Bentgrass or Saltgrass, but those are really for putting greens and specialty coastal areas. For your backyard, stick with the workhorses listed above.
How to Choose Your Grass
So how do you pick? It’s not about the prettiest picture on the seed bag. You need to match the grass to your specific spot.
Start with your climate by finding your USDA Plant Hardiness Zone. A quick online search with your zip code will tell you. If you’re in zones 3-7, you’re likely in cool-season territory. Zones 8 and up are typically warm-season country. This is your non-negotiable starting point.
Next, be honest about your sun. Watch your yard for a full day. Does that area get 6+ hours of direct sun, or is it mostly dappled light under trees? Grasses like Bermuda need a full day of sun, while Tall Fescue can handle the shade in my “Patch” area.
Finally, look for blends. A bag of seed is rarely just one type. A good “Sun & Shade” mix might combine Kentucky Bluegrass for sunny spots, Ryegrass for quick cover, and Fescue for tougher areas. These blends are smarter than a single grass because they create a lawn that can handle different conditions across your yard. They are far more reliable than trying to score a bargain “contractor” mix that might just be cheap filler. It’s like having a team with different strengths instead of just one player.
The Homeowner’s Lawn Equipment Checklist
Think of this as your tool shed starter pack. You don’t need everything at once. Start with the basics, then add tools as your confidence (and your lawn’s demands) grow.
The Absolute Must-Haves
These are the non-negotiables. If you have grass, you need these five things to keep it from looking like a wilderness outpost.
- Mower (Cortacésped): This is your workhorse. For most lawns, a rotary mower is perfect. It spins a blade horizontally to cut the grass. A reel mower gives that super crisp, putting-green cut, but it demands a perfectly flat lawn and more frequent mowing. My zero-turn, Max, is a rotary type. He’s a beast.
- String Trimmer (Weed Whacker): The mower can’t get everywhere. A trimmer cleans up edges along fences, sidewalks, and around trees. It’s what makes your lawn look intentional instead of accidental.
- Leaf Rake: Not just for fall. A sturdy, flexible-tine rake is perfect for gently dethatching small areas, clearing clippings, and prepping soil for seeding. It’s a simple tool that does a dozen jobs.
- Hose with Adjustable Nozzle: Water is life. A good hose and a nozzle that can switch from a gentle shower to a jet stream are vital. You’ll use it to water in seeds, wash off your mower deck, and give a drink to new plants. My drip system, Sunny, handles the heavy lifting, but I still grab the hose almost every time I’m out there.
- Spreader: This is how you apply fertilizer and seed evenly. A broadcast spreader throws material in a wide arc for big, open areas. A drop spreader releases it straight down beneath the hopper, giving you surgical precision along driveways and flower beds. Using the wrong one can waste product or burn your grass edges.
Remember, “cortar el césped” means to mow the lawn, and you’ll be doing that often. Getting these five tools right is 80% of the battle for a clean, healthy yard.
Tools for the Next Level
Once you’ve mastered the weekly mow and trim, these tools help you solve problems and build a thicker, stronger lawn.
- Core Aerator: This machine pulls small plugs of soil out of your lawn. It relieves compaction, letting water, air, and nutrients reach the roots. If your soil feels hard as a sidewalk when you walk on it, you need this.
- Dethatcher (Power Rake): Thatch is a matted layer of dead grass stems between the soil and green blades. A little is good; too much is a barrier. A dethatcher uses vertical blades or tines to slice through and pull up that excess thatch.
- Soil Test Kit: Guessing what your lawn needs is a waste of time and money. A simple test kit tells you your soil’s pH and key nutrient levels. It’s the roadmap for everything else you do.
Greedy Grass Pro Tip: Don’t buy the big, expensive machines outright. You might use a core aerator once or twice a year. Rent it from your local garden center or tool library. You save money, storage space, and maintenance headaches. I rent one every fall to tackle my compacted areas, including that stubborn Patch in the back corner.
The Big Five Lawn Care Tasks Explained
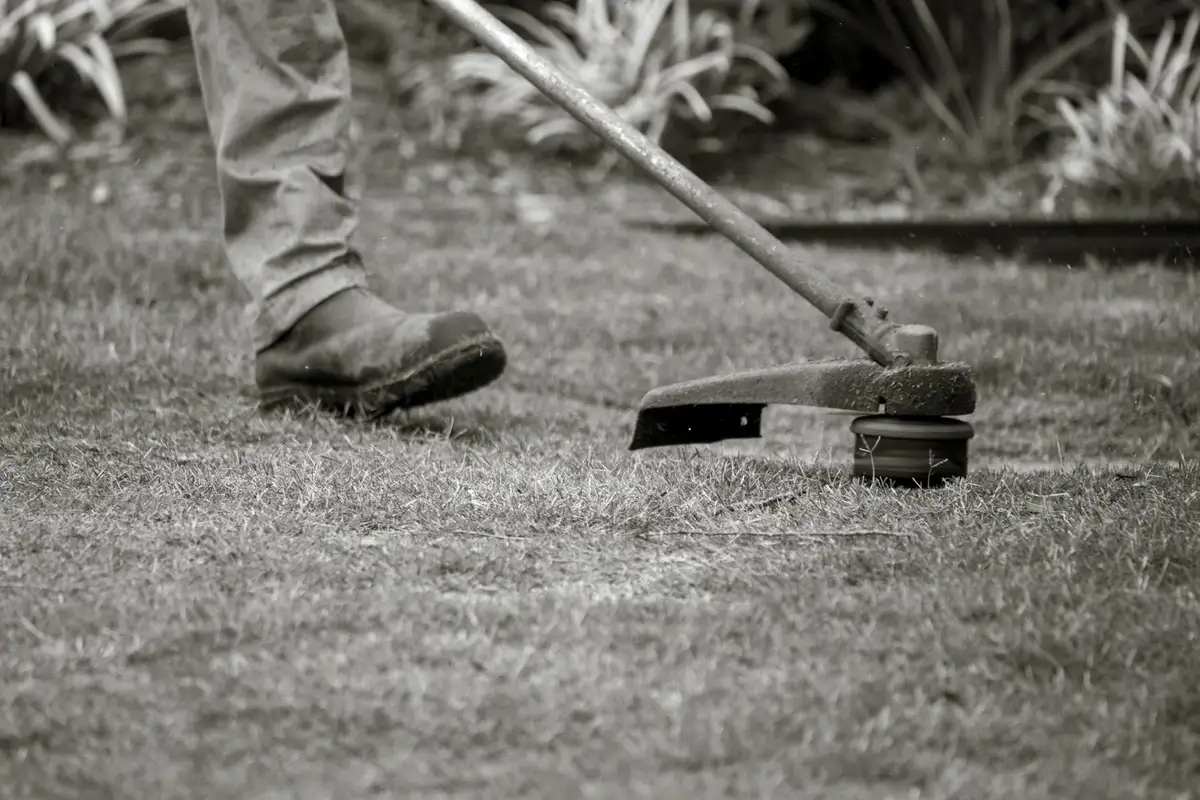
Think of lawn care like a simple, repeating tune. Once you learn the notes, you can play it every season. The core rhythm is five tasks: Mow, Feed, Water, Aerate, and Dethatch. Get these right, and you build a lawn that fights off weeds and drought on its own. This cycle isn’t about constant work, it’s about smart, timely actions that let your grass thrive with less help from you.
How to Mow Like a Pro (Without Scalping)
Mowing is where most folks go wrong, usually by cutting too short. Let’s clear that up. Your “mowing height” is simply how tall you set your mower deck. “Scalping” is what happens when you set it too low and cut into the green, growing part of the grass blade, leaving brown, stressed stems behind.
The golden rule I follow with my mower, Max, is this: never cut more than one-third of the grass blade height in a single mow. If your grass is 3 inches tall, only take off 1 inch. This prevents shock and keeps the lawn healthy.
Most grasses do best when kept taller than you might think. Here are some common ranges:
- Tall Fescue & Kentucky Bluegrass: 2.5 to 4 inches
- Perennial Ryegrass: 2 to 3 inches
- Bermuda Grass (warm-season): 1 to 2 inches
Mowing at the proper height encourages grass plants to grow thicker by sending out side shoots, and that dense carpet is what naturally shades out weed seeds trying to sprout. A sharp mower blade is key too; it makes a clean cut instead of tearing the grass, which I can always hear and see in the quality of the stripe.
What Feeding (Fertilizing) Your Lawn Really Means
Feeding your lawn isn’t about dumping mystery powder. It’s about giving it the specific nutrients it’s hungry for. Check any bag of fertilizer and you’ll see three numbers, like 24-0-6. This is the NPK ratio.
- N (Nitrogen) is for green, leafy growth. It’s the main ingredient for color and thickness.
- P (Phosphorus) supports strong root development, especially important for new grass.
- K (Potassium) is for overall plant health, helping it resist disease, drought, and cold.
Before you buy anything, get a soil test. Your local cooperative extension office usually offers them for a small fee. A soil test takes the guesswork out and tells you exactly what nutrients your soil lacks, so you don’t waste money or over-apply, which can harm the environment.
For a family-friendly lawn, I look for pet-safe, slow-release fertilizers. These products feed the grass gradually over weeks, reducing the risk of burning the lawn and making it safer for pets and pollinators to be around soon after application.
Watering Deeply vs. Sprinkling Frequently
This is where I saved the most water and effort. The goal is “deep and infrequent” watering. Sprinkling every day for ten minutes only wets the top inch of soil, training roots to stay shallow and lazy. Watering deeply once or twice a week encourages roots to grow down, searching for moisture, which builds a drought-tolerant lawn. It’s definitely one of the best lawn watering methods.
My drip system, Sunny, is perfect for this, but a regular sprinkler set on a timer works too. A simple tip: aim for about 1 inch of water per week, including rainfall. You can measure this by placing an empty tuna can or a rain gauge in your sprinkler zone; when it’s full, you’ve hit your inch.
When and How to Aerate Your Lawn
Core aeration is like giving your lawn a deep breath. It uses a machine with hollow tines to pull out small plugs of soil and thatch. This creates holes that let air, water, and nutrients punch through compacted soil and reach the root zone.
You’ll know you need it when the soil feels rock-hard, like a parking lot, and water starts to pool or run off instead of soaking in. I usually check my problem area, Patch, first-if it’s compacted, the whole lawn probably is.
The best time to aerate is during your grass’s peak growth season, so it can recover quickly. For cool-season grasses, that’s early fall or spring. For warm-season grasses, aim for late spring to early summer. You can rent a core aerator from a garden center for an afternoon. Between fall and spring aeration, the best choice depends on your climate and lawn goals. In cool climates, fall aeration often helps prepare roots for winter, while spring aeration can maximize recovery and growth.
Dethatching: What It Is and When to Do It
Thatch is that spongy, brown layer of dead stems and roots that builds up between the green grass and the soil. A thin layer (less than 1/2 inch) is actually good-it acts like a mulch. But when it gets too thick, it blocks water, fertilizer, and air from getting to the soil.
If your lawn feels bouncy underfoot or water seems to sit on top, poke a finger through the grass. If you hit a matted layer over half an inch thick, it’s time to dethatch.
A dethatcher, often called a power rake, uses spinning blades or tines to comb through the lawn and pull up that thick thatch layer. It’s a vigorous process, so only do it when your grass is actively growing and can handle the stress, typically in the early fall or spring for cool-season lawns. Afterward, you’ll have a mess of debris to rake up, but your lawn will drink in water and nutrients like never before.
Lawn Lingo: A Glossary of Terms You’ll Actually Hear

You don’t need a degree in horticulture to have a great lawn. You just need to know what people are talking about. This is the language we use in the driveway while looking at a patch of grass.
Overseeding
This is your best friend for a thin lawn. Overseeding is simply spreading new grass seed over your existing turf. You do this to fill in bare spots, crowd out weeds, and keep the lawn young and vigorous. I do it every fall to keep things thick. The sound of seed hitting the thatch from a broadcast spreader is the sound of future grass getting ready to grow.
Soil pH
Think of your soil as a kitchen sponge. pH is a measure of how acidic or alkaline that sponge is. Grass likes its sponge to be just slightly acidic. If the pH is off, your grass can’t soak up the food and water you give it, no matter how much you put down. A simple soil test tells you where you stand. It’s the first thing I check when something seems off.
Turfgrass
This is just the fancy name for the types of grass we grow as a lawn. It’s not the wild meadow grass or the wheat in a field. Turfgrass species are the team players bred to handle foot traffic, mowing, and looking uniform. When you buy a bag of seed, you’re buying a blend of turfgrass varieties.
Cool Season vs. Warm Season Grasses
This is the biggest split in the lawn world, and it’s all about temperature. Knowing which one you have dictates your entire yearly schedule.
Cool-season grasses (like Kentucky Bluegrass, Fescue, Ryegrass) thrive in the spring and fall when it’s cool. They green up early, may struggle in summer heat, and often go dormant (turn brown) in winter. They’re common in the northern U.S., including the Northern Midwest.
Warm-season grasses (like Bermuda, Zoysia, St. Augustine) love the heat. They green up later in spring, hit their stride in the blazing summer, and go dormant and turn brown after the first hard frost. They’re common in the southern U.S.
I work with cool-season grasses, so my big tasks are in spring and fall. My cousin in Texas is on the opposite schedule, working on his Bermuda in the summer.
A Quick Note on Spelling and Terms
You’ll see it both ways, but the proper term for the machine is a lawn mower (two words). It’s a small thing, but getting the basics right matters.
You might also hear old terms from a different era. For instance, a “lawn jockey” statue is a historical item you might see in very old neighborhoods, but its imagery is widely considered offensive and has no place in modern lawn care. We focus on the grass and the soil, not outdated ornaments.
Finally, be careful with old lawn games. Modern “lawn darts” are often sold with blunted, safer tips because the original versions were rightfully banned for being dangerous. Always check what you’re buying, especially if kids are around.
Troubleshooting Common Lawn Problems

Your lawn talks to you. You just need to know how to listen. Instead of seeing a problem and panicking, I try to see it as a symptom. It’s your grass telling you something is off with its soil, water, or care. Diagnosing the issue is the first step to fixing it for good.
Is It a Disease, a Pest, or Just Thirsty?
Look at the pattern. This is your biggest clue. I get down on a knee and really look. Circular or donut-shaped patches, especially ones that seem to expand, often point to fungus. Irregular, scraggly bare spots where the grass pulls up like a loose carpet? That’s a classic sign of grubs or chinch bugs feasting on the roots.
Brown Patch is a fungus you’ll likely meet, showing up as circular areas of browned or blighted grass, sometimes with a darker “smoke ring” border on the outer edge in the early morning. It loves hot, humid nights. Another common one is Dollar Spot, which shows as small, silver-dollar-sized bleached patches, often with hourglass-shaped lesions on individual grass blades.
Before you reach for a chemical, rule out the simple stuff. A lawn that looks wilted, has a blue-gray tint, or shows footprints that don’t spring back is just screaming for water. I learned this with Sunny, my drip system. A zone was clogged, and the grass looked diseased, but it was simply parched.
The best defense against disease and pests isn’t a spray bottle, it’s a thick lawn grown from healthy soil and cut with a sharp mower blade. Stressed, scalped grass is an open invitation for trouble. I keep Max’s blades sharp to make clean cuts that heal fast, and I never cut more than one-third of the grass blade height at once. This simple practice prevents more problems than any product in my shed.
Weeds Are Messengers
Weeds aren’t just invaders. They’re indicators. They grow where your grass is weak or the soil conditions are wrong. Learning what they signal helps you fix the root cause.
Crabgrass sprawling in the sun? That’s a message that your turf is too thin. It’s an annual weed that needs bare soil to germinate. A thick lawn blocks its sunlight. Clover popping up everywhere? It often means your soil is low in nitrogen. Clover grabs nitrogen from the air and fixes it in the soil, essentially trying to fertilize the area for you. Dandelions with their deep taproots can indicate compacted soil they’re trying to break up.
Your primary weed control strategy should be growing grass so dense and vigorous that weeds can’t find a place to start. This means proper feeding, correct mowing, and smart watering. I spend more time building up Patch, that shady corner, with the right grass seed and aeration than I do spraying the weeds there. When the grass fills in, the weeds have nowhere to go. Spot-treat the stubborn ones, but listen to their message first and change the environment so they don’t want to come back.
Starting From Scratch: How to Plant a New Lawn from Seed
Planting a new lawn from seed is a rite of passage. I remember the first time I did it, staring at a muddy rectangle where an old patio used to be. It felt overwhelming. But a few weeks later, seeing those first green shoots was pure magic. It’s a project you can absolutely handle with a weekend of work and some consistent follow-up.
The goal isn’t perfection on day one. It’s about creating the right conditions for tiny seeds to become a thick, resilient carpet of grass. Think of it like baking bread. You need the right ingredients, you need to mix and prep well, and then you need a warm, moist environment for it to rise.
Required Materials & Prep
First, gather your tools. You don’t need anything fancy, but having the right items makes the job smoother. Here’s your shopping list:
- High-Quality Seed: This is your most important choice. Don’t grab the cheapest bag. Look for a mix suited to your sun/shade conditions and labeled for your region. A good mix will have minimal “crop seed” or “weed seed” listed on the tag.
- Starter Fertilizer: This is different from your regular feed. It’s high in phosphorus, which is like a super-vitamin for young root development.
- A Metal Rake (or Garden Weasel/Cultivator): For breaking up soil and creating a fine, level seedbed.
- A Roller (Optional): You can rent a lawn roller to gently firm the soil. If you don’t have one, your feet work just fine. I’ve seeded entire areas just by walking in grid patterns.
- Hose with a Gentle Spray Nozzle or Oscillating Sprinkler: You need a soft, rain-like shower, not a jet stream that will wash your seeds away. My drip system, Sunny, isn’t right for this job. I use a simple sprinkler on a timer.
- Straw or Biodegradable Seed Mat: A thin layer of straw (not hay, it has weed seeds) holds moisture and protects seeds from birds. Seed mats are cleaner and easier but cost more.
The single biggest factor for success happens before a single seed is dropped: soil preparation. You must loosen the top 2-3 inches of soil. Use your rake or a rental tiller for large areas. This breaks up compaction so tender new roots can push down easily. As you work, pick out rocks, old roots, and debris. You’re aiming for a surface that looks like fluffy, moist chocolate cake crumbs. If your soil is hard clay, this step is non-negotiable. It’s the difference between grass thriving and just surviving.
The Step-by-Step Seeding Process
With your materials ready and your soil fluffy, it’s go time. Follow these steps in order for the best results.
-
Test and Amend Your Soil
I know, I know. It sounds like a chore. But a simple soil test from your local cooperative extension office is like getting a cheat sheet. It tells you exactly what your soil lacks. Is it too acidic? You might need lime. Is it dense clay? Adding a thin layer of compost (about a 1/4 inch) during tilling can work wonders for drainage and nutrient holding. Doing this first prevents problems you can’t fix later.
-
Spread Seed Evenly
Use a broadcast spreader for large areas. For small spots, you can hand-sow. Check the seed bag for the recommended seeding rate. To get even coverage, split your seed in half and spread it in two directions: walk north-south for the first half, then east-west for the second. This cross-hatch method avoids thin stripes and missed spots. Walking behind Max with the spreader attachment is my preferred method, but a simple push spreader works perfectly.
-
Lightly Rake Seed Into Soil
This is the “soil contact” step. Seeds sitting on top of hard soil will dry out or get eaten. Using the back of your metal rake, gently drag it over the entire seeded area. You’re not burying the seeds, just nudging most of them so they are nestled into the top 1/4 inch of soil. You should still see some seeds on the surface. That’s okay.
-
Roll or Tamp the Seedbed
Now, firm everything down. If you have a roller, fill it halfway with water and make one pass. If you’re using your feet, put on some flat-soled shoes and walk over the entire area. You’re pressing the seed into good contact with the moist soil, which is essential for germination. The ground should feel firm but not concrete-hard underfoot.
-
Apply Straw and Start Watering
Spread a very thin layer of straw-you should still see about 50% of the soil underneath. The straw conserves moisture and protects from erosion. Now, water gently but immediately. Keep the top inch of soil consistently moist, like a damp sponge. This usually means light watering 2-3 times a day for the first 7-10 days, especially if it’s sunny and warm. Never let the seeds dry out.
-
Execute the First Mow
Patience is key here. In 1-3 weeks, you’ll see green. Let the grass grow until it reaches about 3 to 4 inches tall. Before you mow, make sure the soil is not soggy. Set your mower to its highest setting (3.5 to 4 inches) and only take off the top 1/3 of the grass blade. Make sure your mower blade is sharp. A dull blade will rip the tender young grass out. This first mow signals to the grass to start thickening up and spreading.
You’ll have some bare spots. Every new lawn does. That’s normal. Just sprinkle a little more seed on those areas, keep them moist, and they’ll fill in. Remember my shady corner, Patch? It taught me that some areas need a second seeding a few weeks later. It’s all part of the process.
Greedy Grass FAQ: Your Quick Path to a Lusher Lawn

What is the difference between a broadcast spreader and a drop spreader?
Use a broadcast spreader for wide, open lawns to scatter seed or fertilizer efficiently, and a drop spreader for precise edges where you want zero waste. Picking the right one feeds your grass greedily, not your sidewalk.
What does “dethatching” mean and when is it necessary?
Dethatching removes the matted layer of dead stems that smothers your soil, blocking water and food. Do it when your lawn feels bouncy or water runs off-it’s like unclogging a drain so your grass can drink deep and thicken up.
What are NPK ratios in fertilizer?
NPK stands for Nitrogen, Phosphorus, and Potassium-the key nutrients your grass devours. Nitrogen fuels green growth, phosphorus builds strong roots, and potassium toughens it up against stress; when you shop, note the fertilizer bag numbers—the N-P-K values—on the label. Those N-P-K ratios guide you to the right mix, especially when you tailor it to a soil test to feed that greedy thickness.
What is “scalping” a lawn and why is it harmful?
Scalping is cutting grass too short, which shocks the plants and invites weeds by exposing bare soil. Always mow high to encourage dense, greedy turf that crowds out problems and stays resilient.
What is the meaning of “soil pH” and why is it important for turf?
Soil pH measures how acidic or alkaline your dirt is, and turf thrives when it’s slightly acidic. If pH is off, your grass can’t absorb nutrients, so test it first to keep your lawn greedy for food, not faltering.
Your Lawn Care Foundation
Focus on the basics first: mow at the right height for your grass type and water deeply to train the roots down. Once that rhythm feels natural, the equipment names and soil terms will click into place as you use them.
A vibrant lawn should be a safe space for kids, pets, and bees, so I always reach for pet-friendly weed control and slow-release fertilizers. My own lawn keeps teaching me, especially from that lesson-prone corner I call Patch, and yours will too as you grow with it.
Research and Related Sources
- 6 Essential Lawn Care Tools for Homeowners
- r/lawncare on Reddit: What yard tools should every lawn enthusiast invest in?
- Essential Lawn Care Tools Every Homeowner Should Own | TLC
- 8 Essential Outdoor Tools and Equipment Every Homeowner Should Own | TruGreen
- 13 Essential Lawn Care Tools for New Homeowners | Farm Bureau Financial Services
- 14 Essential Lawn Care Tools for Your Yard This Season
Written by Ria Carrington. Ria is an avid lawn care enthusiast and advisor. No lawn is unsalvagable when Ria is at work. She has helped countless homeowners breath new life into their dying lawns. She has a B.Sc in Agriculture and brings practical advice combined with knowledge of plant science and her decade worth of hands on experience.