
Lawn Looking Rough? How Do You Really Fix a Damaged Yard?
Seeing brown patches, thin grass, or bare dirt in your yard can feel defeating, but I can tell you from my own lawn that every problem has a practical fix.
We will cover what type of damage you have, the smartest repair method for it, how to prepare your soil, the right way to seed or sod, and a watering plan that actually works.
I’ve spent the last five years fixing my own lawn’s trouble spots, learning what saves money and what just wastes a weekend.
At a Glance: Key Factors for Lawn Repair Success
Before you buy a single bag of seed, you need a game plan. Think of it like a simple recipe. You have three main ingredients to choose from. Picking the right one saves you time, money, and frustration.
| Method | Best Use Case | Best Season | Cost | Effort Level |
| Spot-Seeding | A few bare patches, dog spots, or small damaged areas. | Cool-season: Early Fall. Warm-season: Late Spring. | Low | Low |
| Overseeding | A thin, tired lawn that needs thickening up overall. | Cool-season: Early Fall. Warm-season: Late Spring. | Medium | Medium |
| Laying Sod | Instant repair, fixing large bare areas, or establishing a new lawn quickly. | Cool-season: Early Fall or Spring. Warm-season: Late Spring to Summer. | High | High |
Fixing your lawn is a weekend project with a month of follow-up care, not a one-and-done spray job. The process always follows four steps.
- Find the ‘why’. (We’ll tackle this next.)
- Fix the dirt underneath.
- Pick the right grass for the spot.
- Baby it with water and care as it grows.
No matter which method you pick from the table, one rule is absolute. Good seed-to-soil contact is the golden rule for any repair with seed. If that seed is just sitting on top of old thatch or compacted dirt, it’s bird food. It needs to snuggle into the soil to germinate.
First, Play Detective: How Do I Identify the Real Cause of Lawn Damage?
I learned this the hard way with Patch, my stubborn shady corner. I kept throwing seed at it every fall, only to see it fail again by summer. I was treating the symptom, not the cause. Skipping this step is like putting a bandage on a splinter without pulling the splinter out first. The problem will come right back.
Start with this simple checklist. Put on your detective hat and walk your lawn.
- Look for Patterns: Are the dead spots in random circles (maybe fungus or grubs)? Are they in stripes (dull mower blade or fertilizer spill)? Is it one big, soggy area (drainage)?
- Feel the Soil: Get on your knees. Is it spongy and thick with thatch? Is it hard as a rock (compaction)? Is it soggy hours after watering (poor drainage)?
- Consider Recent Events: Did the kids set up a slip-n-slide? Did you just put down a weed killer? Did you have a big party? Has your dog claimed a new favorite spot?
Here’s a breakdown of common culprits and how to spot them fast.
How to fix a burnt lawn: This usually comes from heat stress or chemical burn. Heat burn looks like large, yellowed areas during a drought. Chemical burn from misapplied fertilizer or herbicide often creates sharp, geometric patterns or stripes. The fix starts with gentle, deep watering to flush the soil.
How to fix a muddy lawn: If a spot turns to mud with any traffic, you have compaction. The soil particles are smashed together so tight that water and air can’t move. It feels like concrete. You can’t seed this successfully until you aerate it first.
How to fix a soggy lawn: This is a drainage issue. Think of your soil like a coffee filter. If it’s clogged with clay or has a hardpan layer underneath, water just sits on top. You’ll see moss or algae, and the ground feels perpetually wet. The long-term fix often involves improving the soil or even installing a French drain.
Other quick identifiers:
- Grubs: Grab a handful of dead grass and pull. If it lifts up like a loose carpet, peel it back. Look for white, C-shaped larvae in the soil.
- Fungus: Often shows as rings, spots with colored edges, or a powdery substance on grass blades, especially in humid weather.
- Dog Spots: The center is often completely dead (burned by urea), surrounded by a ring of dark green, overly-fertilized grass.
- Dull Mower Blades: Instead of a clean cut, the grass tip is shredded and turns white or brown a day or two after mowing.
- Shade: The grass is thin, leggy, and struggles even with care. It’s not damaged, it’s just the wrong plant for the place.
What Tools and Materials Do I Need to Get Started?
The good news is you probably own most of this already. You don’t need fancy gear, just the right basics.
The Basic Tool Kit:
- A sturdy garden rake (bow rake), not a flimsy leaf rake. This is for roughing up soil and removing debris.
- A hand cultivator or “garden weasel” for breaking up small, compacted areas.
- A lawn roller (optional but helpful). Filled with water, it’s perfect for pressing seed into soil for that critical contact. Don’t use it on soggy ground.
- A broadcast or drop spreader for evenly applying seed and fertilizer.
- A hose with a gentle spray nozzle. You want a soft rain, not a jet stream that will wash your seed away.
The Materials You’ll Choose:
- Seed or Sod: Match the type to your existing lawn and the sunlight in the repair area. For shady spots, I use a fine fescue blend.
- Starter Fertilizer: This is high in phosphorus, the root-growing nutrient. It gives new grass a strong start.
- Compost or Topsoil: A thin layer (1/4 inch) of screened compost over seeded areas protects seeds and improves the soil food web, which is great for a healthy, resilient lawn.
- Biodegradable Erosion Blanket: Only needed for slopes. It holds seed and soil in place while the grass establishes.
The Make-or-Break Prep: How Do I Get the Soil Ready for Repair?
I see it every season. Homeowners get a bag of seed or a roll of sod and just put it down on top of the problem. Preparing your soil is the core of fixing a damaged lawn, and skipping it is the number one reason repairs fail. It’s not glamorous work, but it’s what separates a quick fix from a lasting solution. I learned this with Patch, my stubborn shady spot. I seeded it twice with no luck until I finally got down and felt the soil. It was hard as a rock, which made me realize that I needed to amend and loosen the compacted soil before trying anything else.
Think of this whole process like caring for a wound. You wouldn’t put a bandage on dirty skin. First, you clean it out.
How do I remove dead grass and debris from the damaged area? Get everything out of the way.
- Grab a stiff garden rake or a thatching rake. Scrape aggressively to pull up all the dead, matted grass and thatch.
- Clear away any leaves, twigs, or old mulch. You want to see bare, dark soil.
- Bag up the debris for compost or disposal. Leaving it there invites pests and disease back in.
Now you have a clean slate. How do I prepare the soil for reseeding or sodding? You need to loosen the top 2 to 3 inches of earth. Walk on your soil for a year and it gets compacted. It’s like a kitchen sponge that’s been stepped on and left to dry. It can’t hold water or let roots breathe.
For small areas, I use a garden fork. I push it in, wiggle it back and forth, and work my way across the patch. For bigger spots, a core aerator or a hand tiller saves your back. You’re done when the soil is crumbly and loose, with a damp, earthy smell.
Next, grab the back of your rake. Leveling the area is non-negotiable. A dip will become a permanent puddle, and a mound will dry out and scorch your new grass. Drag the soil until it’s smooth and even with the surrounding lawn. I use a long, straight 2×4 to check my work.
Finally, consider a top dressing. A thin layer of compost, no more than a half inch, acts like a fluffy blanket for moisture and a light snack for emerging roots. Don’t smother the area. Just a light sprinkling does the trick.
What is the Best Time of Year to Repair My Lawn?
Forget the calendar for a minute. Think about soil temperature. The best time to repair is when the soil is warm enough for seeds to wake up, but the air is mild enough to keep them from frying.
For cool-season grasses like fescue and Kentucky bluegrass, early fall is the sweet spot. The soil is still warm from summer, the nights are cooler, and weed pressure drops. It’s the perfect recovery window.
For warm-season grasses like Bermuda and Zoysia, aim for late spring or early summer, when the soil is consistently above 70°F for ideal temperature for grass seed germination.
If you have a burnt lawn in July, the best fix might be to prep the soil now and wait. Sometimes, the most proactive thing you can do is prepare the site and bide your time for the ideal planting window. I’ve done this. It feels odd to leave dirt bare, but the fall results are always thicker.
Choosing and Applying Your Fix: Seed, Sod, or a Little of Both?
This choice boils down to your budget and your patience. Seed is your budget-friendly, high-variety option, but it asks for time. Sod is your instant gratification button, but it costs more and offers fewer choices.
With seed, you can find blends for sun, shade, drought, or foot traffic. With sod, you’re often limited to what the local farm grows, usually a hardy Bermuda or a standard fescue.
Always read the seed tag. A “sun & shade mix” is a blend of different grasses, some better for sun, some for shade. It’s a team, not a superhero. Avoid the cheapest bags. They often contain annual ryegrass. It greens up fast but dies with the first frost, leaving you back at square one.
I lean towards tougher, low-maintenance options. Where I can, I use native grass blends or add micro-clover to my seed mix. It builds a lawn that survives my kids, needs less water, and gives bees something to love. It’s a smarter, greener approach.
How Do I Properly Sow Grass Seed Over Bare Spots?
Follow these steps. Do not just throw it from the bag.
- Measure the area. Use your steps for a rough idea or a tape measure for accuracy.
- Calculate the seed. You want a light covering where you can still see the soil underneath. A dense, white blanket is too much.
- Sow in two directions. Walk north to south scattering seed, then east to west. This cross-hatching prevents thin spots.
- Gently rake the seed into the top quarter-inch of soil. You’re tucking it in, not burying it.
- Lightly tamp it down. Use the flat part of your rake or your foot to press the seed into contact with the soil. Good contact means germination.
The “throw and go” method is just feeding the birds. Seed needs to be in contact with soil, not sitting on top of thatch or debris. For slopes or large patches, a whisper-thin layer of straw or an erosion control blanket holds everything in place until the roots take over.
How Do I Lay and Care for New Sod?
Lay sod like you’re building a brick patio. Start the second row with a half-piece, stagger the seams, and press each piece tightly against the next. Gaps will dry out, turn brown, and let weeds in.
Water is the first and most important step. The moment you lay a section, water it until it’s soaked through. Within an hour, it should feel squishy underfoot. Those roots are shocked and desperate for a drink. My Sunny irrigation setup gets a real workout on sod day.
Then, keep everyone off. Give it a solid 2 to 3 weeks with no foot traffic at all. This lets the roots knit firmly into your soil. I put garden flags around the area. Even Max, my zero-turn, has to steer clear until I’m sure the sod won’t peel up. Water it daily to keep the soil beneath consistently damp, not swimming.
The Tender Loving Care Phase: Protecting Your New Grass
You did the hard work. The soil is prepped, the seed is down, or the sod is laid. Now comes the part where patience pays off. Think of this like caring for a newborn. It needs constant, gentle attention, but the right kind. Too much love (water) can be just as bad as neglect. This guide walks you through it.
How Do I Water a Newly Repaired Lawn (Without Drowning It)?
The goal for the first two weeks is simple: keep the seed and soil surface consistently damp, never soggy. Imagine you’re trying to grow a sponge, not drown it.
For new seed, I use a light misting twice a day, early morning and late afternoon. You want the top half-inch to inch of soil to feel like a wrung-out sponge. The key is frequent, shallow watering to germinate the seeds without washing them away.
For new sod, you water deeper but less often. Give it a good, long drink right after installation to soak the roots and the soil underneath. Then, for the next 10-14 days, water once a day to keep the roots and soil beneath the sod moist.
After those first critical weeks, you need to change tactics. You transition to deeper, less frequent watering. This teaches the grass roots to reach down for moisture instead of staying lazy at the surface. It’s like switching a toddler from a bottle to a sippy cup. Start watering every other day, then twice a week, giving it a solid half-inch each time.
This is where my drip system, Sunny, really shines. It delivers a slow, steady soak right to the soil without any runoff or puddling. If you’re hand-watering, set out a tuna can to measure how long it takes to fill it with half an inch of water.
When and How Should I Mow New Grass for the First Time?
This is a big moment. Mow too soon or too hard, and you’ll undo all your progress. The grass needs to be firmly rooted before it faces Max, my zero-turn.
Wait until the new grass is at least one full inch taller than your target mowing height before you even think about the mower. For most cool-season grasses, that’s about 3 to 3.5 inches tall for a first cut. Even then, be careful when you mow newly seeded lawns for the first time to avoid damaging the grass.
Follow the one-third rule religiously. Never cut off more than one-third of the grass blade height in a single mowing session. If your target height is 3 inches, don’t mow until the grass hits 4 inches, and then only take it down to 3.
This first cut demands a razor-sharp mower blade. A dull blade doesn’t cut grass, it tears it. Those ragged, white tips are open wounds, stressing the young plant and inviting disease. A clean slice from a sharp blade heals fast. I sharpen my blade every spring before the first mow, without fail.
How Do I Fertilize and Deal with Weeds After Repair?
Fertilizer gives your new grass the boost it needs. Use a starter fertilizer when you seed or lay sod. These mixes are higher in phosphorus (the middle number on the bag), which is the nutrient that specifically encourages strong, deep root growth.
Do not use a standard weed-and-feed or post-emergent herbicide on your new lawn for at least 6-8 weeks, or until after you’ve mowed it 4-5 times. Those chemicals can easily kill or stunt tender young grass.
Weeds will pop up. They see bare soil as an invitation. Your best defense for the first month is simple: a sharp mower blade and your fingers. Mowing at the proper height shades the soil, making it harder for weed seeds to sprout. Any brave weeds that do appear can be carefully hand-pulled.
Keep an eye out for fuzzy white mold or patches of seedlings that seem to melt away. That’s damping-off disease, caused by too much moisture and poor air flow. You prevent it by sticking to your watering schedule and not overdoing it. If your soil stays a swamp, you’re asking for trouble.
Common Lawn Repair Mistakes (and How to Sidestep Them)
I’ve made a few of these myself. Patch, my weedy corner, taught me most of them. Learn from our errors so your repair sticks.
- Skipping Soil Prep. Throwing seed on hard, compacted dirt is wasting money. Tip: Loosen the top 2-3 inches of soil with a rake or tiller. Mix in a thin layer of compost if you can. It gives seeds a soft bed to root into.
- Repairing at the Wrong Time. Seeding in the July heat or laying sod right before a hard freeze is a battle you’ll lose. Tip: Seed cool-season grasses in early fall. Lay warm-season sod in late spring. Work with your grass’s natural growth cycle.
- Overwatering New Sod. Yes, you can drown it. Soggy roots rot. Tip: After the initial deep soak, lift a corner of the sod. If the soil underneath is muddy, skip watering the next day. You want moist, not wet.
- Mowing Too Soon and Too Low. This scalps the lawn, shocking the young plants and letting sunlight bake the soil. Tip: Be patient. Wait for the height signal, use a sharp blade, and follow the one-third rule.
- Forgetting About Pets. A dog’s traffic or urine can destroy new seed and uproot fresh sod. Tip: Block off the repaired area with garden stakes and string until the grass is fully established and you’ve mowed it several times. Always choose fertilizers marked as pet-friendly.
When This Guide Isn’t Enough: Signs You Need Bigger Solutions
Sometimes, you do everything right. You fill the spots, you water carefully, you wait patiently. But nothing seems to stick, or the problems just pop up somewhere else. That can feel incredibly frustrating.
It usually means you’re putting a band-aid on a bigger issue. You’re treating the symptom-the bare patch-instead of the actual sickness in your lawn’s soil or structure.
The Clear Signs It’s Time for a Tactic Change
Watch for these red flags. They’re your lawn’s way of asking for more help.
- The Damage is Everywhere: If thin, dead, or weedy areas cover more than 40% of your space, spot-repairing is a losing battle. You’re trying to fix the majority of the lawn.
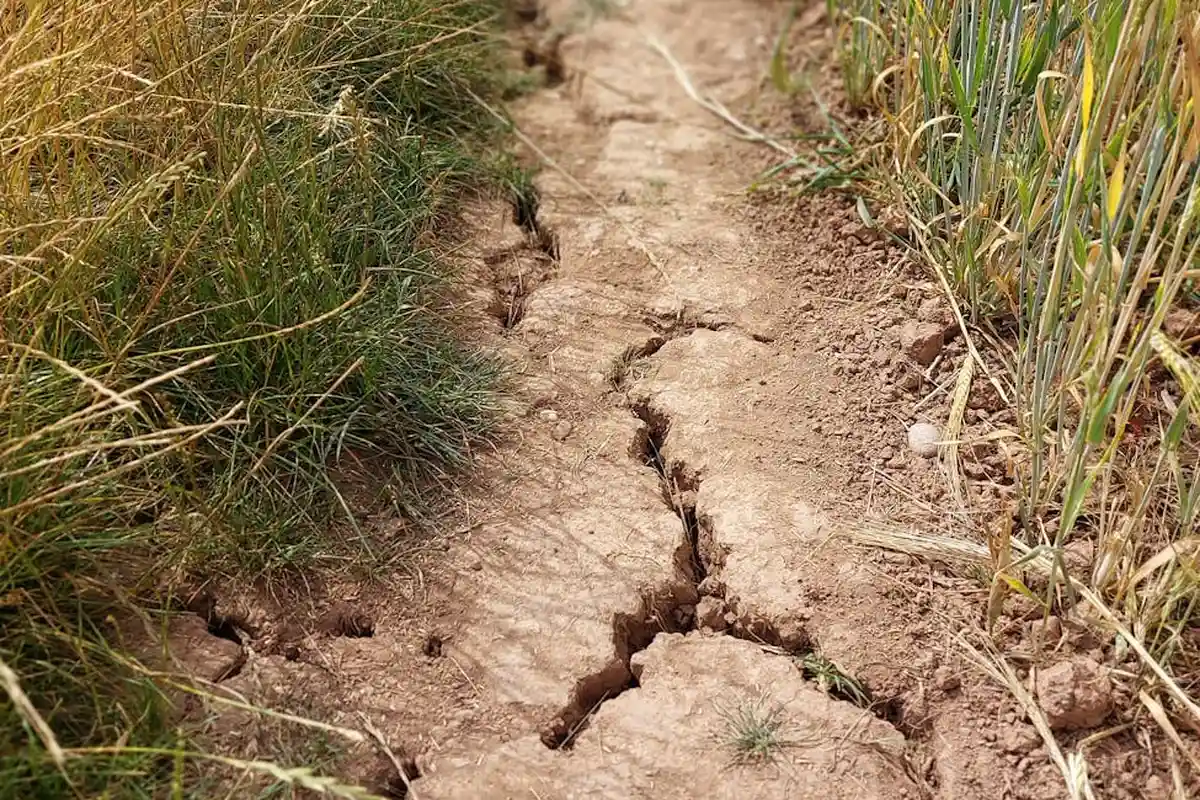
- The Ground Feels Like a Sponge or a Brick: Walk across it. If the whole area squishes and water pools for days, you have a severe drainage issue. If it’s rock-hard and your shovel just bounces, that’s severe compaction. These are soil-wide problems.
- Your “Soil” Isn’t Really Soil: Dig a small hole. If what you pull up is pure, sticky clay that holds water like a bowl, or loose, dry sand that drains like a coffee filter, you have a foundational issue. Good grass needs good, loamy soil to anchor into.
- You Have a Thick, Spongy Blanket on Top: If you rake the grass and pull up more than half an inch of dry, tangled stems and roots (thatch), you’ve found the problem. This layer blocks water, air, and seed from reaching the soil.
Your Smart Next Steps
When you see these signs, it’s time to shift gears. Here are the bigger solutions that actually work.
For Compaction: Core Aeration. This isn’t just poking holes. A machine like the one I rent every fall pulls out actual plugs of soil, about the size of your finger. It immediately creates space for air, water, and roots. I always do it right before overseeding so the new seed falls into those perfect little holes.
For Total Lawn Failure: Full Renovation. This sounds intense, but it’s often the fastest path to a new lawn. You use a safe herbicide to clear the old, struggling grass and weeds, then till the soil, add amendments, and start fresh with seed or sod. It’s a weekend project with a big payoff.
For Drainage or Grading: Call a Pro. If water always pools in the same spot or runs toward your house foundation, you likely need grading work. This is heavy machinery and precise slope calculation territory. Knowing when to hire this out saves you money and backaches in the long run.
Recognizing these limits doesn’t mean you failed. It means you’re paying close attention. A smart homeowner knows that some jobs need a different tool, or a different set of hands. Getting the foundation right first is what turns a constant repair job into a lawn that just… grows.
Greedy Grass FAQ: Your Lawn Repair Questions, Answered
How do I choose the right grass seed or sod for my lawn?
Match it to the sunlight first — don’t put a sun-loving grass in the shade. Read the seed tag or ask your sod farm for a variety that fits your climate and matches your existing lawn’s texture and color. Also, check the sunlight requirements for proper seed germination.
How long does it take for new grass seed to germinate?
Patience is key-most quality seed blends will sprout in 5 to 14 days, depending on soil temperature. Don’t panic if it’s a little slow; keep the soil surface moist and wait for that greedy green fuzz to appear.
How do I protect newly repaired areas from foot traffic and pests?
Use physical barriers like garden fencing or flags to keep people and pets completely off for at least 3-4 weeks. For pests like birds, a very light layer of straw or an erosion blanket can deter them without smothering your seed.
What are common lawn diseases and how can I prevent them after repair?
New grass is vulnerable to “damping off” (a fuzzy mold) and leaf spot, often caused by too much moisture. Prevent them by watering in the morning so grass dries during the day, and ensure your soil isn’t constantly soggy.
How can I prevent future damage to my lawn?
Build a resilient lawn by mowing high, watering deeply but infrequently, and aerating compacted soil annually. A thick, greedy lawn is its own best defense-it will out-compete weeds and recover from stress on its own.
Wrapping Up Your Lawn Repair Journey

The most important thing I can tell you is to keep it simple and stay patient. A great lawn comes from a few good habits-adjusting your water, getting the right seed in contact with good soil, and consistent mowing-not from a single miracle product. Preparing the soil sets you up for lawn seeding success. When you prep the soil well, germination and establishment have a stronger start.
I always try to remember that my little patch of green is part of a bigger neighborhood ecosystem. Choose methods that are safe for pets and pollinators, and you’ll be rewarded with a lawn that’s not just thicker, but truly alive.
Citations and Authoritative Sources
- r/lawncare on Reddit: Where to start. Low budget lawn repair.
- 8 Steps to Fix a Lawn That’s All Weeds and Bare Patches
- TruGreen | America’s #1 Name in Lawn Care
- Summer Damage Repair
Written by Ria Carrington. Ria is an avid lawn care enthusiast and advisor. No lawn is unsalvagable when Ria is at work. She has helped countless homeowners breath new life into their dying lawns. She has a B.Sc in Agriculture and brings practical advice combined with knowledge of plant science and her decade worth of hands on experience.