
Thinking of Laying Sod Over Your Old Grass? Here’s the Real Deal.
You stare at your tired lawn and dream of a quick fix, rolling out fresh sod right over the top to skip the messy removal.
This article will cover why that shortcut usually backfires, the crucial steps to take if you attempt it, and more reliable ways to get a thick, healthy lawn without wasting cash.
I’ve tested this myself through years of weekend lawn projects with my zero-turn mower, Max, and learned what truly works.
At a Glance: Key Factors to Weigh First
Think of laying sod over old grass as a quick fix, not a magic wand. Here’s what you need to know right away.
- This method only works for small, specific problems. It is not a cure for a whole lawn that’s struggling.
- Your success hinges on preparation. Skipping steps like mowing short and raking is a sure way to waste money.
- You risk creating a layered lawn. This can lead to poor drainage, uneven rooting, and a hidden thatch problem that chokes out new grass.
- It is often a temporary solution. Without addressing the underlying issue, you might be back to square one in a season.
- It only makes sense if your existing grass is healthy. If you have weeds or disease, you are just burying trouble.
Should You Lay Sod Over Your Old Grass?
This is the big question. The answer isn’t a simple yes or no. It depends entirely on what your lawn looks like today. Grab your coffee, walk outside, and let’s diagnose your specific situation. We’ll break it into two clear scenarios.
When It Might Be a Quick Band-Aid
There are a few times when this shortcut can save you a weekend of backbreaking sod removal. I’ve used it myself to fix a sunken spot where my neighbor’s dog always cuts through, and for a worn path from the shed to the garden.
Picture your existing lawn like a slightly threadbare area rug. Laying sod over it is like sewing in a new patch of fabric exactly where the wear is. It blends in and covers the thin spot without replacing the entire thing.
For this to have any hope, the old grass underneath must be in good shape. It needs to be weed-free, relatively dense, and growing in soil that isn’t compacted or soggy. You are giving a healthy lawn a cosmetic upgrade on a small scale, not rescuing a disaster.
When It’s Almost Guaranteed to Fail
Now, let’s talk about the red flags. If you see any of these in your yard, put the sod truck on hold. Laying new grass now will just waste your effort and cash.
- Thick Thatch: If you feel a spongy layer more than half an inch thick under your grass, that’s a barrier. New sod roots cannot punch through it to reach soil.
- Widespread Weeds: A lawn taken over by crabgrass, dandelions, or other invaders means the environment favors weeds, not grass. Burying them just lets them regroup.
- Obvious Disease or Pests: If you see brown patches, fungus, or grub damage, you have an active problem. Sodding over it is like putting a clean bandage on an infected wound.
- Very Bumpy or Uneven Ground: Your lawn needs a flat surface. If it’s a series of mounds and dips, new sod will not make contact with the soil, and it will dry out and die.
This is why laying sod over an old lawn often leads to the issues people ask about, like the sod dying or turning yellow. It’s the same reason you would never lay a beautiful new carpet directly over a lumpy, moldy old one. The lumps show through, the mold spreads, and you end up with a bigger mess to clean up later.
The Real Pros and Cons: What Happens Under the Sod
Laying new sod over old grass is a common question I get, usually from a tired neighbor holding a coffee cup and looking at their patchy lawn. It seems like a shortcut, and in some ways, it is. But you have to know what you’re signing up for. What happens under those fresh, green rolls is the real story.
Think of it like this: you’re putting a new, thin carpet directly over an old, lumpy one. It might look good for a bit, but you’ll feel every bump underneath eventually. Here’s a straightforward look at what you gain and what you risk.
| The Tempting Upsides | The Downside Nobody Talks About |
|---|---|
|
You get that “instant lawn” gratification. This is the biggest pro. One day it’s brown, the next it’s a lush, green carpet. It’s faster than waiting weeks for seed to germinate and fill in. |
The old grass turns into a wet sponge. The existing lawn underneath will die without light and air. As it decomposes, it creates a soft, spongy layer that holds too much water. This layer can prevent your new sod’s roots from reaching the real soil and can become a soggy mess after rain. |
|
You save your back from a full tear-out. Renting a sod cutter, hauling away the old turf, and prepping bare dirt is a brutal weekend project. Skipping that step saves immediate sweat and rental costs. |
Roots fight for space in a shallow bed. Your new sod has a root depth of about an inch when you lay it. It’s trying to grow down, while the old grass roots are decaying or struggling upward. They compete in a cramped, thin layer of soil, which often leads to weak establishment. |
|
These benefits are real, but they are short-term. They address the immediate “look” of the lawn, not its long-term health. To truly achieve a healthy, beautiful lawn, you need ongoing care and proper turf management. In the following steps, you’ll find practical tips to support long-term lawn health. |
You’re building a perfect pest hotel. That dark, moist, layered space between the old and new turf is a dream home for insects like grubs and fungal diseases. It’s a hidden problem that can surface months later. |
When people ask “can turf be laid over existing lawn,” they’re usually hoping the answer is a simple “yes.” The physical answer is yes, you can do it. But the practical outcome often includes these hidden headaches that show up after the initial green-up fades.
How to Prep Your Lawn for Sod: A Bare-Minimum Guide
If you’ve weighed the cons and still want to move forward, I get it. Sometimes you need a fix now and are willing to manage the consequences later. If that’s your call, then this prep is your damage control. Do not skip these steps. They are the difference between a two-year lawn and a two-month lawn.
Step 1: Mow It Lower Than You Ever Have
This isn’t a regular mow. This is a tactical scalping mission. I take Max, my zero-turn, and set the deck to its absolute lowest setting. You’re aiming to cut the existing grass down to about half an inch or less.
Bag every single clipping. The goal is to remove as much green, leafy material as possible to reduce competition and create the flattest surface you can for the new sod to contact. You want the sod to meet soil, not a cushion of old grass blades.
Step 2: Attack the Thatch Layer
After mowing, get on your hands and knees. Stick your fingers into the grass base and pull up. Do you feel a springy, brown layer of tangled roots and stems between the green grass and the soil? That’s thatch.
If it’s more than a quarter-inch thick, you must deal with it. For a small area, a heavy-duty garden rake can work you to death but will do the job. For anything bigger, rent a power dethatcher. It’s a loud, aggressive machine that pulls up this layer and tosses it to the surface. Rake it all up and remove it. This step is critical to prevent a double-thatch nightmare later.
Step 3: Level and Fill Like You’re Spackling a Wall
Now, walk your lawn. Look for dips, holes, and low spots. These will become visible puddles or dead spots under your new sod. Fill them with a sandy topsoil mix, which drains better than heavy clay soil.
My simple leveling trick? Use a long, straight 2×4. Drag it across the filled areas. The board will show you the high and low spots like a giant ruler. Add or remove soil until the board glides over without catching. You’re not seeking golf-course perfection, just eliminating major valleys where water will pool and roots will drown.
Installing Sod Over Grass: The Step-by-Step Layering
If you’ve decided to move forward, the actual day of the install is all about layering correctly. For best lawn seeding success, start with proper soil preparation—level the soil, amend as needed, and ensure it’s evenly moist. Here is how to install sod on an existing lawn with a solid sequence.
Start early in the morning to beat the heat. Have your sod delivered and laid out in a shaded spot if possible. Your goal is to get it from the pallet to the ground as fast as you can.
- Lightly water the existing grass. This gives the sod a cool, damp surface to sit on.
- Start along a straight edge, like a driveway or sidewalk.
- Unroll the first piece snugly against that edge.
- Continue laying full rolls end-to-end in your first row.
Laying the Rolls: Stagger Your Seams
Think of laying sod like laying bricks. You never want all the seams to line up. Start your second row with a half or a third of a roll. This staggers the joints.
Butting those edges tightly together is non-negotiable; gaps will dry out and die, creating a welcome mat for weeds. Use your hands to push the ends and sides firmly against each other as you go.
For curves around tree beds or gardens, a sharp utility knife is your best friend. I keep one in my back pocket. A clean cut looks professional and helps the sod fit like a puzzle piece. My tricky spot, Patch, taught me that a ragged tear from garden shears just leads to uneven edges that are harder to keep alive.
The Roller Step: Getting Intimate with Your Soil
This step is where many DIYers hesitate, but don’t skip it. After the sod is down, you need to rent a water-filled sod roller from your local equipment store.
The roller’s job is to press the roots of the new sod into intimate contact with the soil and grass beneath. It removes air pockets that will dry out and kill the roots. Pushing it across your new lawn is a unique feeling.
You’ll hear a soft, squishing sound and feel the weight settle everything into place. It’s a satisfying confirmation you’re doing it right. This contact is what allows the new grass to “knit” down and start establishing.
Watering In: The First 48 Hours Are Everything
Your new sod is thirsty and stressed. Watering starts the second the roller is put away.
Give the entire area a deep, thorough soaking so that moisture penetrates through the sod and into the soil below. Lift a corner to check. For the next two weeks, the sod must never dry out. This isn’t a light sprinkle.
Water multiple times a day in the absence of rain. The schedule is intense but temporary: think early morning, midday, and late afternoon for about 10-15 minutes per session in moderate temperatures. This is where my setup, Sunny, earns its keep. Setting a simple timer on a drip or sprinkler system takes the guesswork out and ensures consistency, which is everything for new roots.
Common Sod-Layering Mistakes and How to Dodge Them
I’ve seen these errors play out in my own yard and my neighbors’. Here’s how to spot and stop them.
Skipping the Dethatch Step
The Mistake: Thinking the old grass is a fine base and laying sod directly on a thick, matted layer of thatch and dead grass.
The Fix: Always dethatch first. Even a vigorous raking is better than nothing.
Thatch is like a waterproof straw mat. New sod roots cannot penetrate it. They’ll be trapped in the sod roll, with no access to soil moisture or nutrients. The sod will green up briefly using its own reserves, then turn brown and die. I learned this the hard way in a corner I rushed. The fix was pulling up dead sod, doing the prep I skipped, and starting over. Do it once.
Watering Like It’s Established Grass
The Mistake: Giving your new sod the same “once every few days” drink you give your old lawn.
The Fix: Treat it like a seedling that needs constant, shallow moisture. Use the finger test.
Established grass has deep roots that seek water. New sod has roots that are barely an inch long, sitting on top of the ground. They can’t reach down yet. If the top inch dries out, the roots die. Stick your finger between the sod seams. If it doesn’t feel damp an inch down, it’s time to water. After two weeks, you can start to gradually stretch the time between waterings.
Assuming “No Prep” Means Less Work
The Mistake: Believing that laying sod over grass is a shortcut that saves you time and effort.
The Fix: See prep as an investment. The half-day you “save” will become a weekend of fixing dead sod later.
This is the biggest mental hurdle. Laying sod over grass isn’t a zero-prep method. It’s a *different* prep method. You’re swapping the massive labor of hauling away old turf for the focused labor of dethatching, leveling, and feeding what’s there. Skipping those steps doesn’t mean less work. It just defers the work, and the cost of replacement sod, to a near future where you’ll be much more frustrated.
What Else Can You Do? Honest Alternatives to Layering
Laying new sod directly on top of your old grass is a shortcut. Like most shortcuts, it often leads to more trouble down the road. If your goal is a truly healthy, resilient lawn, consider these more reliable paths forward. A key step after installation is to fertilize newly installed sod to help establish roots. This quick step can help your lawn take hold faster and stay vigorous.
We will compare them based on the sweat you will invest, the cost from your wallet, and the long-term health of your green space.
The Full Renovation: Killing the Old Lawn First
This is the big reset button. It is more labor upfront, but it gives your new grass the absolute best foundation. Think of it like painting a room. You can paint over the old color, but sanding and priming first gives you a flawless, lasting finish.
You have two main, chemical-free ways to clear the slate: smothering and solarization.
- Smothering: This is my go-to method. You cover the entire lawn with a thick, light-blocking layer. I use overlapping cardboard or a dozen layers of newspaper, then top it with 3-4 inches of compost or topsoil. It takes 4-8 weeks for everything underneath to decompose. The result is a soft, fertile seedbed teeming with earthworms.
- Solarization: This uses the sun’s heat. You mow the lawn very short, water it deeply, and then cover it with clear plastic sheeting, sealing the edges. Over 4-6 weeks in peak summer heat, the sun bakes the soil, killing grass, weeds, and many seeds. It leaves the soil very clean but also sterile, so you will need to add compost back in before planting.
This full renovation is the opposite of wondering how to add sod to existing lawn; it is about respectfully removing the old to properly welcome the new. The work is significant, involving renting a sod cutter or waiting weeks for decomposition. The payoff, however, is a lawn that can thrive for a decade without the layering problems of sinking, drowning roots, or hidden thatch.
Overseeding: The Patience-Pays-Off Approach
Is your lawn just thin, patchy, or tired-looking, not a complete disaster? Overseeding might be your answer. This is the process of spreading new grass seed directly over your existing lawn to thicken it up and introduce newer, more vigorous grass varieties.
I do this every fall in my own yard. The steps are straightforward but require timing.
- Mow your existing grass shorter than usual.
- Rake or dethatch to loosen soil and remove dead material so seed can contact earth.
- Spread a high-quality grass seed suited to your sun and shade conditions.
- Apply a starter fertilizer that is explicitly labeled as pet-safe.
- Keep the seedbed moist with light, frequent watering from a system like Sunny until the new grass is established.
It is a slower fix. You will not have an instant carpet. You will watch tiny green blades emerge over a few weeks. Overseeding is a sustainable, annual tune-up that gradually builds a thicker, more weed-resistant lawn from the ground up, literally. It works with your existing lawn’s ecosystem instead of trying to bury it. The effectiveness of overseed process equipment can influence seed spread and germination. Using well-chosen equipment helps ensure even coverage and strong establishment.
Exploring a Low-Maintenance Mix
Maybe the constant cycle of feeding, weeding, and weekly mowing has lost its appeal. If so, rethinking what a “lawn” can be is a valid alternative. Many homeowners are blending traditional grass with low-growing plants for a greener, easier life. Exploring no-mow lawn options and their benefits can reveal practical, low-maintenance paths. This shift can also invite pollinator-friendly plantings and wildlife habitats.
A popular choice is mixing fine fescue grass with microclover. The clover stays green during summer droughts, fixes its own nitrogen (acting as a natural, pet-safe fertilizer), and attracts pollinators with its tiny white flowers. I have a test strip of this mix near Patch, and the bees love it.
- Pros: Drastically reduces needed water and fertilizer. Requires far less mowing. Actively supports bees and other beneficial insects. Stays green under stress.
- Cons: It looks different. It is not a perfect, uniform golf course green. It has a softer, more textured appearance with occasional clover flowers.
For large or sloped areas where sod is impractical and seeding is tricky, some professionals use hydroseeding. This technique sprays a slurry of seed, mulch, and fertilizer onto prepared soil. While you can technically hydroseed over an existing lawn, the results are similar to overseeding; it works best on bare, tilled soil where the seed has direct contact with the earth. On an old lawn, much of that costly slurry just sits on top of the thatch, wasting money. When comparing hydroseeding vs traditional seeding, the best option depends on site conditions and budget. Traditional seeding can be more economical on well-prepared, level ground.
Your Top Sod-Over-Grass Questions, Answered
Why does new sod sometimes turn yellow after I lay it over my old lawn?
That yellow is your sod starving for a deeper connection. It usually means the roots are stuck in the roll, failing to knit with the soil beneath because of a thatch barrier or air pockets.
Is using a heavy roller really that important, or can I just walk on it?
Walking doesn’t cut it-you need the roller’s serious weight. It eliminates deadly air pockets and presses those new roots into intimate contact with the ground, which is non-negotiable for establishment.
How do I handle seams between sod rolls to prevent gaps?
Butt each piece tightly against the next like you’re laying bricks, and always stagger the seams between rows. Any gap you leave will dry out faster than a kiddie pool in July, creating a dead line weeds will invade.
Should I fertilize right after laying the new sod?
Hold off on regular fertilizer and use a starter fertilizer instead. This blend is lower in nitrogen but rich in phosphorus, which specifically encourages strong root growth down into that challenging layered base.
What if I feel soft, bumpy spots after the sod has rooted?
Those are likely sinking spots where the old grass is decomposing underneath. You can carefully top-dress them with a sandy soil mix to level, but it’s a telltale sign of the layered lawn issue we warned about.
Getting Your New Sod to Stick
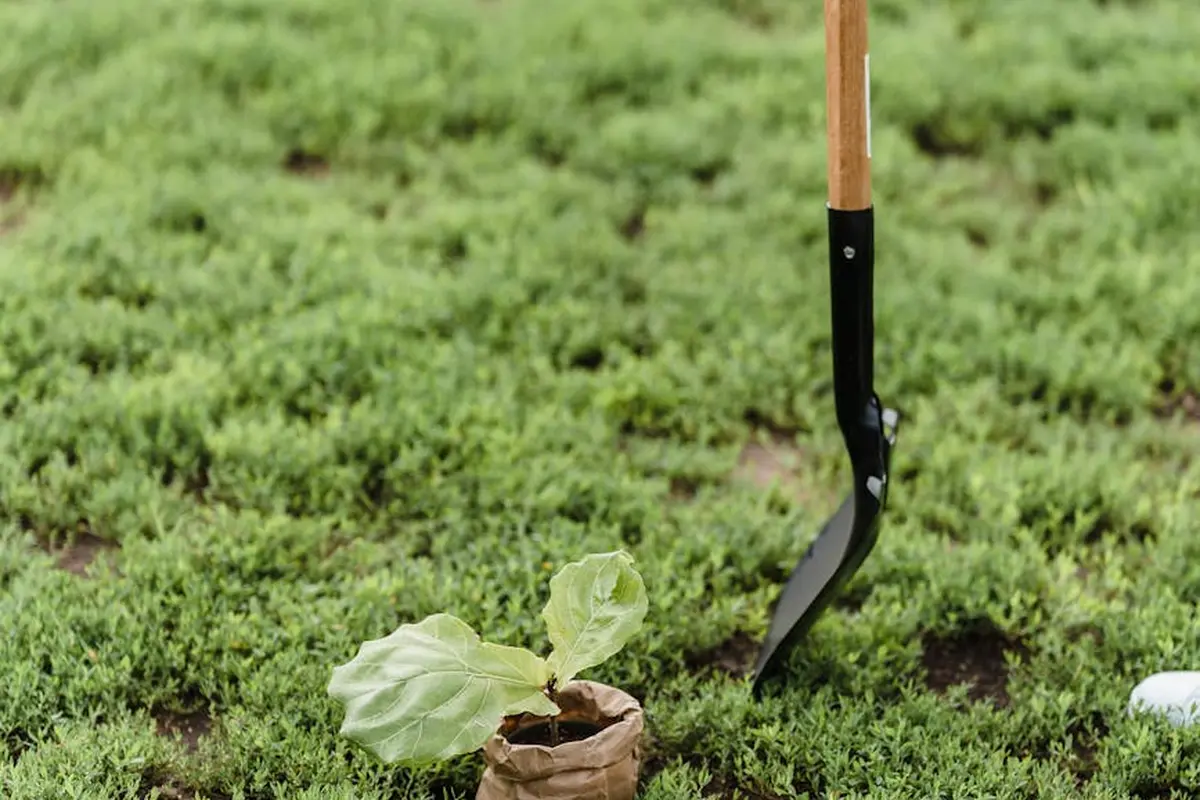
From my weekends wrestling with Patch’s stubborn spots, I know that laying sod over old grass rarely pays off. For a thick, healthy lawn that lasts, remove the existing grass first to give those new roots the clean soil contact they desperately need.
As you move forward, choose pet-safe weed controls and consider leaving some flowering weeds for local pollinators. Your lawn care journey is all about small, smart choices that add up to a greener, more resilient yard.
Deep Dive: Further Reading
- Sod Over Existing Grass: How to do it? – My Landscapers
- Can You Lay Sod Over Old Grass? | TR Sod Florida
- Installing new sod without removing existing grass – RedFlagDeals.com Forums
- Can I Lay Grass Sod Over Existing Grass – Houston Grass – Pearland
- Can You Lay Sod Over Grass? – Quantico Creek Sod Farms
- Can You Lay Sod Over Dead Grass? | Bethel Farms
- Can you just lay sod over existing grass? – Sod Pros Landscaping
Written by Ria Carrington. Ria is an avid lawn care enthusiast and advisor. No lawn is unsalvagable when Ria is at work. She has helped countless homeowners breath new life into their dying lawns. She has a B.Sc in Agriculture and brings practical advice combined with knowledge of plant science and her decade worth of hands on experience.