
Is Your Lawn Soggy or Starving? How to Fix Soil and Drainage
If water pools on your grass after a rain or your lawn feels hard as a parking lot, poor soil quality and drainage are likely the root cause.
We will cover how to test what you’re really working with, the right way to aerate, choosing the best soil amendments, and simple fixes for water flow.
I’ve transformed my own yard from a compacted, muddy mess into a thick, healthy lawn through practical, budget-friendly steps.
At a Glance: Key Takeaways for Busy Homeowners
You can’t build a great house on a bad foundation, and you can’t grow a great lawn on poor soil. The good news is, fixing it is straightforward.
- Aerate your lawn. This relieves soil compaction so air, water, and nutrients can reach the roots.
- Topdress with quality compost. It adds beneficial organic matter that improves both heavy clay and sandy soils.
- Test your soil’s pH and nutrients. It’s the only way to know exactly what your grass is hungry for.
- Consider dethatching if your lawn feels spongy. A thick thatch layer acts like a roof, stopping water from getting to the soil.
For cool-season grasses, aim for early fall. For warm-season grasses, late spring is ideal. This gives the grass a chance to recover during its prime growing season. If you’re planning to plant grass seed in spring, timing varies by region, but early spring often works best. Refer to the best time to plant grass seed in spring for your area to tailor your schedule.
Think of good soil as your lawn’s immune system; it means less watering, fewer weed invasions, and a turf that recovers quickly from stress. This is a gradual, multi-year project, not a weekend miracle. Small, consistent improvements add up to a permanently healthier lawn.
How Do I Know If My Lawn Soil Is the Problem?
Your lawn talks to you. You just need to know how to listen. Poor soil sends clear signals. Look for water that pools and sits for hours after rain, or areas that turn to dust and crack in the summer heat. Moss creeping in is a classic sign of compacted, acidic, and shady soil. Thin, struggling grass that gives up easily is another big clue.
I learned this with my own problem child, “Patch.” It’s a shady corner that stayed muddy long after the rest of the lawn dried. The grass was thin, and moss was moving in. I finally got down on my hands and knees. The ground was so hard I could barely push a screwdriver into it. That was my “aha” moment. The symptom was moss and thin grass, but the cause was concrete-like soil that water couldn’t penetrate.
Here’s how to translate what you see:
- Pooling Water: Likely cause is compaction or heavy clay soil that drains too slowly.
- Moss: Often points to compaction, low soil pH (acidity), and too much shade.
- Hard, Cracked Earth: A sign of severe compaction and lack of organic matter.
- Grass That Wilts Fast or Looks Starved: Could be poor root development from compaction, or a nutrient deficiency tied to pH imbalance.
The Squishy Lawn Test: Checking for Poor Drainage
Forget complicated tools. The best drainage test uses a shovel, water, and a timer. Pick a spot that represents your lawn’s problem area.
- Dig a hole about 12 inches deep and 6 inches wide.
- Fill it with water and let it drain completely. This saturates the soil.
- Fill it a second time and start your timer.
- Measure how long it takes for that second filling to drain away.
If the water is gone in under 4 hours, your soil is sandy and drains very fast. If it takes between 4 and 12 hours, you have ideal, loamy soil. If it takes more than 12 hours, you have drainage problems, typically from compacted or heavy clay soil.
Think of ideal soil like a damp kitchen sponge; it holds moisture but lets excess water drain through easily. Poor soil is either a clogged sponge (compacted clay) that can’t absorb anything, or a sieve (sandy soil) that can’t hold water long enough for roots to get a drink.
Why Is My Grass Not Growing Here? Soil Quality Clues
Walk across your lawn. Does some of it feel hard and unyielding underfoot, like you’re walking on pavement? That’s compaction. Grass roots are suffocating, unable to push through to find water and nutrients. It’s why grass in those spots is thin and gives up during heat or drought.
Bare spots or yellowing can be trickier. They often shout about food. Your grass might be starving because the soil pH is too high or too low, locking up nutrients so the roots can’t absorb them. A nitrogen deficiency turns grass pale green or yellow. I see this when I rely only on quick-release synthetic fertilizers without building the underlying soil health.
My simplest piece of advice is to start a one-page lawn journal. Just jot down dates and what you see. “April 10: Big puddle by the oak tree after rain. July 20: Same spot is brown and crispy.” This log over a single season will show you clear patterns. It turns guesswork into a targeted plan and helps you see the real progress you’re making, one season at a time.
Gathering Your Gear: Tools and Materials You’ll Need

Jumping into lawn improvement without the right stuff is like trying to mow with scissors. I’ve been there, and it’s a fast track to frustration. Let’s get you set up with what works.
Having the proper gear turns a weekend chore into a smooth, effective project you can actually finish.
Start with the tools. You don’t need a garage full of equipment, just a few key items.
- Core Aerator (Rental): This is your heavy lifter for fixing compacted soil. It pulls up finger-sized plugs, letting air and water reach the roots. Renting one for a day typically runs $60 to $100. Check your local hardware store or equipment rental yard; that’s where I found the reliable shop that services Max.
- Garden Fork: Perfect for smaller areas or testing soil firmness before you commit to the big machine. A good one costs about $20. You’ll feel the soil resistance give way with a satisfying crunch.
- Wheelbarrow: For moving mountains of compost or topdressing mix. A basic model is $50 to $100. Mine has hauled more loads than I can count from the driveway to the backyard.
- Rake: A stiff-tined garden rake (under $30) is essential for spreading materials evenly. It leaves behind those nice, smooth lines in the soil.
- Soil Test Kit: Non-negotiable. A simple home kit starts around $15. It’s the crystal ball that tells you what your soil actually needs.
Now for the materials. I always choose options that are safe for pets and pollinators, because a healthy lawn should be safe for everyone who uses it.
- Compost: This is black gold for your lawn. It adds organic matter, feeding the soil life. Look for certified organic, screened compost. It costs $30 to $50 per cubic yard and has that rich, loamy smell of a forest floor.
- Topdressing Sand/Soil Mix: A blend of coarse sand and good loam improves drainage without suffocating roots. Prices vary, but plan for $40 to $60 per yard. Ensure it’s clean and free of weed seeds.
- Lime or Sulfur for pH: You’ll only know which one after your soil test. Pelletized lime is common, easy to spread, and pet-safe when used as directed. A bag is usually $10 to $20.
For renting, my tip is to call a week ahead in spring or fall. These machines book up fast when everyone has the same idea on a sunny Saturday.
The Essential First Step: How to Do a Soil Test for Your Lawn
Fixing your soil without testing it first is just guessing. I learned how to do a soil test for my lawn years ago, and it changed everything. It stops you from wasting money on products your grass doesn’t need.
The soil test tells you the “what” and “why” behind your lawn’s problems, so your fixes hit the target. When you learn to interpret the results for lawn care, you can tailor amendments precisely to your yard. This turns data into practical steps for healthier turf.
Here is a clear path to get your results.
- Gather Samples: Use a clean trowel to take soil cores from 5 to 10 different spots in your lawn. Go down about 4 inches, which is where most grass roots live. Avoid unusual areas like right next to the driveway or where you just fertilized.
- Mix and Dry: Dump all the soil into a clean plastic bucket. Pick out any rocks, twigs, or grass. Mix it all together, then spread it on newspaper to air dry for a day. Don’t use an oven, as heat can skew the results.
- Choose Your Test Method: For a quick check, use a home kit. Follow the instructions, which usually involve adding soil to a vial with a testing liquid. For a detailed report, send a cup of your dried soil to a cooperative extension lab. This costs $20 to $50 but gives expert analysis.
- Interpret the Results: Your report will show numbers for pH and key nutrients like nitrogen (N), phosphorus (P), and potassium (K). Match these numbers to the ideal ranges provided. The pH number is your first clue.
Reading those numbers feels like getting the answer key to a test. For example, when I tested the soil in Patch, my shady trouble spot, I saw the pH was way too low. That explained why grass seeds there just gave up.
What Your Soil pH Result Means for Your Grass
Most common lawn grasses are happiest when the soil pH is between 6.0 and 7.0. Think of this like their favorite room temperature.
If your test shows a pH below 6.0, your soil is acidic. Nutrients become trapped, like books on a shelf your grass can’t reach. If the pH is above 7.0, the soil is alkaline, and it causes a similar lock-up, especially for iron and manganese.
Changing your soil’s pH is a slow process that requires patience, not a quick weekend fix. Applying lime to raise pH or sulfur to lower it works over months. You might not see the full benefit until the next season. I apply amendments based on my test and let Sunny, my irrigation system, help work them into the soil gently over time—especially when applying lime to grass lawns.
Your Action Plan: How to Improve Lawn Soil and Drainage
Think of fixing your soil like fixing your diet. You wouldn’t start supplements without a checkup, right? Your lawn needs the same logic. Follow these steps in order for the best results.
- Test your soil. You have to know your starting pH and nutrient levels.
- Amend based on the test. This might mean adding lime for acidity or sulfur for alkalinity.
- Aerate to relieve compaction and let those amendments work their way in.
- Feed with organic matter to build long-term health from the ground up.
This sequence builds on itself each season. I start every fall with a soil test, because it tells me exactly what my grass needs to eat over the winter.
How to Improve Drainage in a Lawn with Core Aeration
This is your number-one tool for fighting compaction, which is the main cause of bad drainage. Core aeration pulls out plugs of soil, creating real holes for air, water, and nutrients to reach the roots.
Do this in the early fall for cool-season grasses or late spring for warm-season grasses, when the grass is growing strong. First, call 811 to mark any underground utilities. Always.
You can rent a core aerator from any garden center. It’s heavy, so take your time. The sound is a satisfying *thunk-thunk-thunk* as the tines dig in. The smell of those fresh soil cores is the best part, a damp, loamy scent that promises healthier ground.
Leave the plugs on the lawn. They’ll break down in a week or two, topdressing your lawn with your own good soil. Don’t just poke holes with a garden fork. That tool simply compacts the soil sideways, creating a smaller, glazed hole that closes up fast. Core aeration removes material, creating a lasting change.
How to Improve Clay Soil for Lawns with Topdressing
If your soil is thick and sticky, you know the challenge. Water sits on top, then it bakes hard. Topdressing is the slow, steady fix for how to improve clay soil lawn problems. You add a thin layer of a sand-soil-compost mix over your existing grass to gradually improve the structure.
Think of clay soil like a tight sheet. Topdressing, over years, weaves in new threads to create spaces for water to drain. Here’s my go-to recipe for a topdressing mix for lawn drainage clay soil issues:
- 4 parts Sharp or Builders Sand (not play sand, it’s too fine)
- 2 parts High-Quality Topsoil
- 1 part Screened, Fine Compost
Apply it like this:
- Mow your grass a notch lower than usual.
- Spread the mix thinly, no more than 1/4 inch deep. You should still see grass blades poking through.
- Use a stiff lawn rake or a piece of plywood to gently brush the mix down into the turf.
- Water it gently to settle everything in.
Feeding Your Soil: Using Compost and Organic Amendments
Compost isn’t just food, it’s medicine for your soil. It adds beneficial microbes and fungi that help roots absorb nutrients. For clay, it separates the tiny particles to improve drainage. For sandy soil, it acts like a sponge to hold water and nutrients.
When you choose compost, ensure it’s pet-safe and pollinator-friendly. Avoid compost made with treated municipal waste or herbicides. Bagged compost from a reputable garden center is a safe bet, or you can make your own from leaves, grass clippings, and vegetable scraps.
Adding a 1/4-inch layer of compost each fall or spring feeds the soil life, which in turn feeds your grass, reducing your need for synthetic fertilizers that can harm pollinators. Apply it just like a topdressing. Use a broadcast spreader for larger areas or just a shovel and rake for smaller spots like my friend, Patch.
Fixing the Grade: How to Improve Drainage in Your Lawn’s Layout
Sometimes water pools because the ground is simply shaped wrong. The goal is a gentle slope that moves water away from your house’s foundation and toward a safe drainage area.
For a minor fix, you need a long level and some topsoil. Stake one end of the level near your house. Walk 10 feet out and check the slope. You want about a 2-inch drop over that distance.
If the ground is flat or slopes back toward the house, add topsoil to build up the low areas. Spread it, tamp it gently, and seed right away. This is a DIY job for small, annoying puddles, but major regrading that involves moving tons of soil is a job for a professional with the right equipment. A bad grade can cause serious water issues.
When This Guide Isn’t Enough: Signs You Need a Pro
You can do a lot, but some problems are bigger than a rented aerator and a bag of compost. Here’s when to pick up the phone.
- Your entire lawn feels like concrete and aeration barely scratches the surface (severe, widespread compaction).
- You have a persistent swampy area or visible standing water for days after rain (large-scale drainage failure).
- You suspect soil contamination from old construction or other sources.
Consider the trade-off. A total lawn renovation with professional soil amendment and grading is a major investment. For many, a consistent DIY plan over a few years is more realistic. If you do call a pro, find a reputable lawn care service that focuses on soil health. Ask them about their methods for aeration and organic amendments.
For some true clay soil nightmares where water has nowhere to go, the real answer might be a subsurface solution like a French drain, and that’s firmly in professional territory.
Keeping It Great: Simple Habits for Healthy Soil
The heavy lifting is done. Your amendments are in, the soil is breathing easier, and the lawn feels more alive underfoot. Now, it’s about the weekend routines. Think of it like this: you’ve fixed up an old car, and now regular oil changes keep it running smooth for years. The habits you build now protect your investment and stop problems before they start.
Mow Tall and Mow Often
This is the single easiest thing you can do for your soil. I set my mower, Max, to his highest setting for most of the season. Taller grass blades do three critical jobs for the ground below.
- They shade the soil, keeping it cooler and slowing water evaporation on hot days.
- They develop deeper, more extensive root systems that naturally aerate the soil as they grow.
- They crowd out weed seeds by blocking the sunlight they need to sprout.
Follow the one-third rule: never cut off more than one-third of the grass blade height in a single mowing. This prevents shocking the plant and keeps those valuable clippings small. Before you start, check and adjust your lawn mower cutting height to the recommended setting. Proper height helps you apply the rule consistently.
Let the Clippings Lie (They’re Free Food)
I see bagged clippings at the curb every week, and it makes me want to stop and give a little lawn talk. Those clippings after mowing are not waste. When you mow tall and often, the tiny snippets disappear between the grass blades in a day or two. They decompose quickly, returning nitrogen and organic matter directly to the soil surface. It’s a gentle, continuous feeding that builds humus and improves moisture retention. You’re literally recycling your lawn’s nutrients back into the earth.
Water Deep, Not Daily
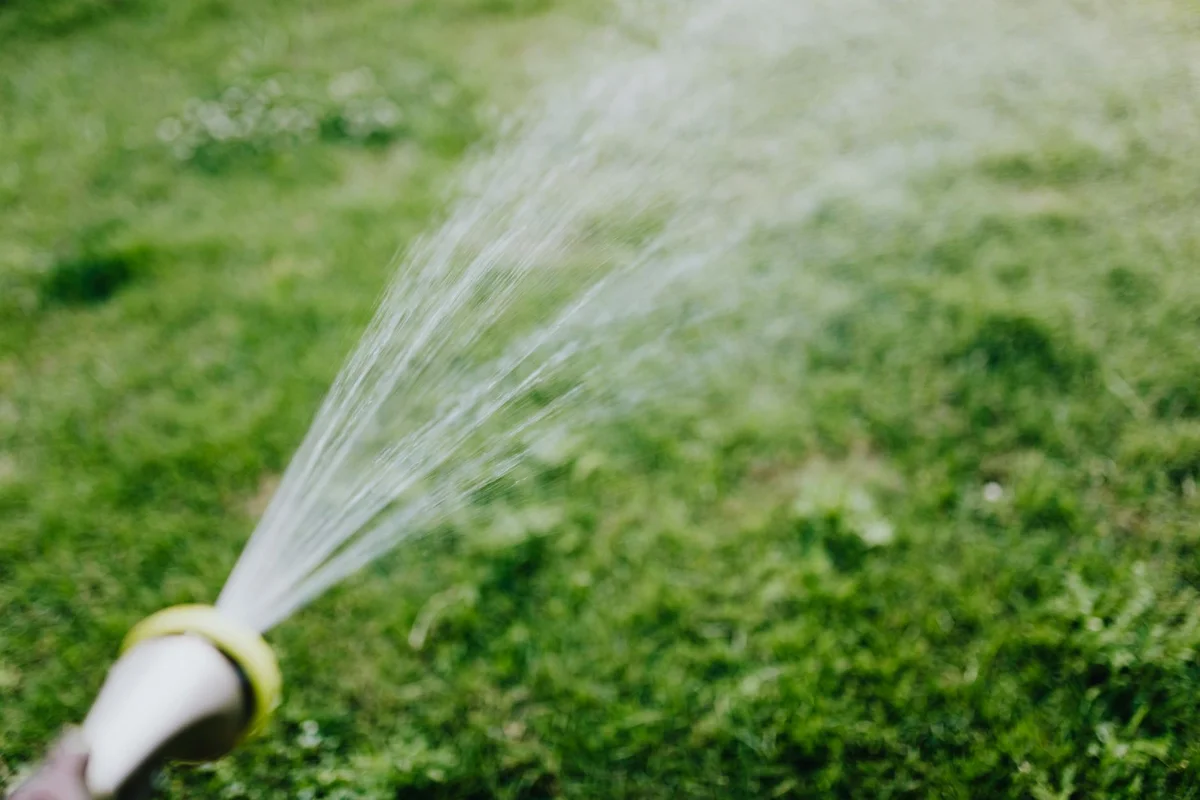
This habit took me a season to really trust. I used to give my lawn a short drink every evening, thinking I was helping. I was training my grass to be lazy. Shallow, frequent watering encourages roots to stay near the surface, right where the heat and drought hit hardest. Instead, I let Sunny, my drip system, run less often but for longer.
Aim to water so the moisture soaks down 6 inches into the soil, which encourages roots to chase it down and become drought-resistant. How do you know? The screwdriver test. About 30 minutes after watering, push a long screwdriver into the ground. It should slide in easily to the hilt. If it stops short, you need to water longer next time. This deep, infrequent schedule builds a resilient lawn that can handle a missed watering or a heat wave.
A Seasonal Rhythm for Soil Health
Your soil’s needs change with the weather. Tuning into this rhythm keeps it in top shape with minimal fuss.
Stick with these simple habits, and your lawn’s foundation will only get stronger. A lawn with healthy soil doesn’t just look good, it fights its own battles, giving you more time to just enjoy it. Knowing the purpose of lawn soil composition helps tailor these practices to your soil. It guides what nutrients to focus on and what amendments to apply.
Greedy Grass FAQ: Your Soil & Drainage Questions, Answered
What’s a quick way to check for poor drainage without digging a hole?
About 24 hours after a good rain, walk your lawn and push a sturdy screwdriver into the ground. If it meets hard resistance or you hit a hidden pool of water, your soil is compacted and draining poorly. Your lawn’s greedy roots can’t thrive in that.
When is the absolute best time to aerate my heavy clay lawn?
Aerate during your grass’s peak growing season-early fall for cool-season grasses, late spring for warm-season types. This gives the roots a powerful window to explode into the new air pockets you’ve created and get greedy with growth.
How often should I topdress my clay soil to see real improvement?
Apply a thin, 1/4-inch layer of a sand-compost mix annually, ideally after core aeration. This steady, slow feeding is the secret; you’ll notice better drainage and softer soil within a couple of seasons as the organic matter works its magic.
I can’t rent a big aerator. Is there another way to help compacted soil?
Yes-use a sturdy garden fork to deeply puncture the soil every 4-6 inches, gently rocking back to create small fractures. It’s manual labor, but it effectively breaks up compaction in small areas so water and air can get down to the root zone.
Can sandy soil have drainage problems, too?
Absolutely. Sandy soil drains *too* fast, starving roots of water and nutrients. The fix is to add generous amounts of compost, which acts like a sponge to hold moisture and feed the soil, making your grass greedier for what you give it.
Your Lawn’s Foundation for the Long Run
The best place to start is by relieving soil compaction with a core aerator, then work on feeding the soil, not just the grass, with organic matter like compost. It’s a simple, powerful one-two punch that tackles drainage and nutrition together.
Remember, a great lawn is a patient project, not a weekend miracle. I still learn from Patch’s stubborn corner every season, and by choosing natural soil amendments and skipping harsh chemicals, you build a healthier yard for kids, pets, and pollinators.
Further Reading & Sources
- The Ultimate Guide to Fixing Lawn Drainage Problems
- 15 DIY Yard Drainage Methods You Should Know Before Spring Weather Hits
- Waterlogged Lawns: Solutions | RHS Advice
- How to Solve Yard Drainage Problems | Lowe’s
- 7 Ways to Improve Drainage in Your Yard
Written by Ria Carrington. Ria is an avid lawn care enthusiast and advisor. No lawn is unsalvagable when Ria is at work. She has helped countless homeowners breath new life into their dying lawns. She has a B.Sc in Agriculture and brings practical advice combined with knowledge of plant science and her decade worth of hands on experience.