
How Can I Make Your Own DIY Lawn Fertilizer at Home?
Seeing the price tag on another bag of lawn food can make any homeowner wince. I get it, and the good news is you can create a custom feed that’s kind to your wallet and your grass.
We will cover what your lawn actually needs to eat, how to turn common kitchen scraps into plant food, my tested mixing methods, and how to apply it all safely for pets and bees.
I’ve dialed in these homemade recipes over years of weekend experiments, with Max the mower showing me the results on the blade and Patch the weedy corner keeping me honest.
At a Glance: Key Takeaways
Deciding to mix your own lawn food isn’t about becoming a chemist. It’s about getting smart with what you already have.
The three biggest reasons to do it are simple: you save money, you know exactly what’s going down for your kids and pets, and you build healthier soil for the long run.
Before you scoop a single ingredient, get a soil test. It’s your roadmap. Skipping it is like guessing how much salt to add to a soup you’ve never tasted.
Is it more work than buying a bag? Sometimes. Think of it like making a meal from scratch versus getting takeout. One is faster, but the other often tastes better and you control the quality.
Your “homemade pantry” might already hold the basics: coffee grounds, banana peels, grass clippings, and even the ash from your fire pit.
Why Bother Making Your Own Lawn Fertilizer?
I started looking into this a few seasons back. I was filling up the spreader with a blue synthetic product when my dog, Sunny, decided to roll right through the granules I’d just spilled. That worry in my gut was all the motivation I needed to find a safer way.
This choice is about control and soil health first, with the cost savings as a nice bonus. When you make your own organic fertilizer, you’re feeding the soil, not just the grass. You’re adding organic matter that improves texture and helps the ground hold water like a sponge instead of shedding it like a coffee filter.
Homemade fertilizers work through a slow, natural process called decomposition, where tiny organisms in your soil break down the materials and release nutrients over weeks or months. It’s a gentle, steady feed that encourages deep roots.
This is completely different from how most synthetic fertilizers are made. Those are manufactured in factories, often from petroleum or mined minerals, to deliver nutrients in a fast, soluble form that grass can use almost immediately. It’s like giving your lawn a shot of espresso versus a balanced breakfast. The quick fix can lead to rapid growth, but also more thatch, runoff into streets, and a lawn that gets hungry again too soon.
What Your Lawn Actually Needs: A Crash Course in Soil & Grass
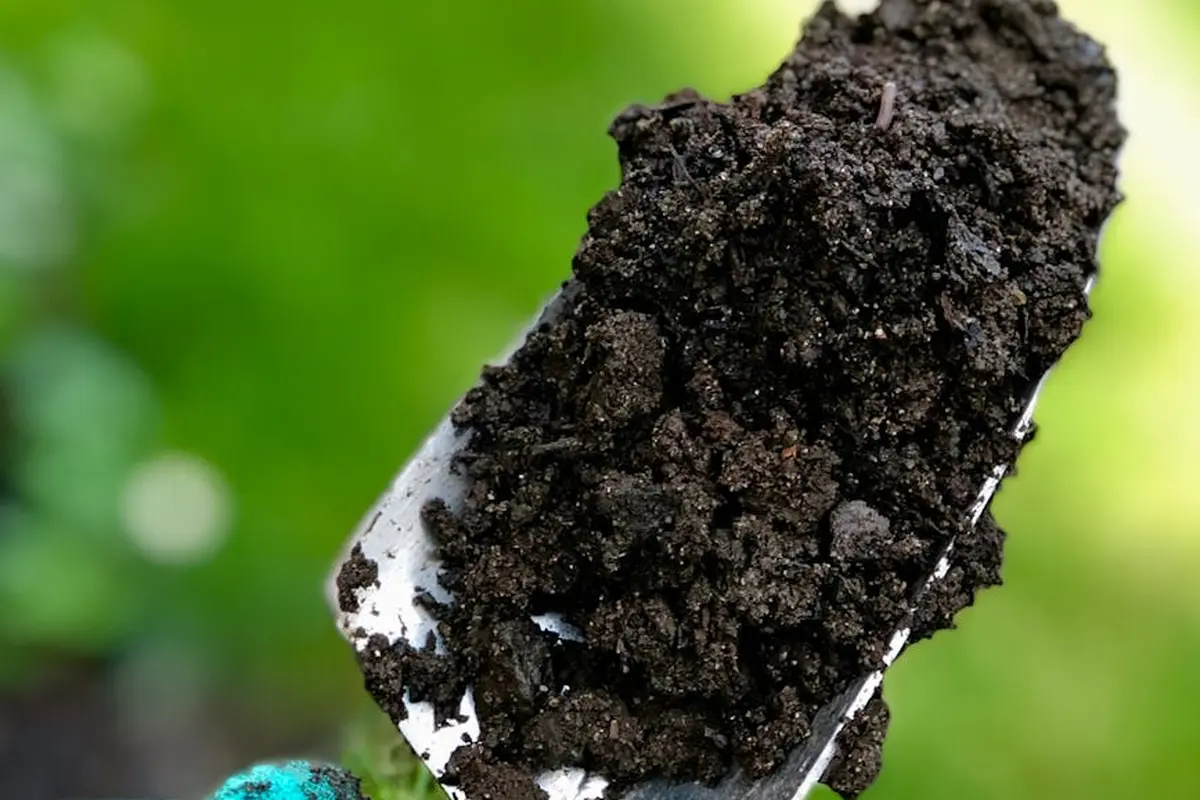
Think of your lawn as a living, breathing rug. It gets hungry and thirsty just like we do. The food it craves comes down to three key letters on a fertilizer bag: N-P-K. Once you know what they do, you stop guessing and start feeding. Yet beware of common lawn fertilization myths debunked to help you feed your lawn wisely.
Nitrogen (N) is the lunch that fuels all that green, leafy growth you see every time you mow. It’s the main ingredient for a thick, vibrant lawn. Too little, and your grass looks pale and tired. Too much applied all at once, and you can burn it, or it grows so fast it gets weak and floppy.
Phosphorus (P) is the backbone builder, working underground to strengthen roots and help new grass get established. It’s especially important when you’re seeding or overseeding. Many mature lawns might not need much extra phosphorus, which is why testing first is a smart move.
Potassium (K) is like the grass’s immune system and hydration manager. It helps the plant handle stress from heat, cold, drought, and even foot traffic. A lawn with good potassium levels is tougher and bounces back faster.
Step 1: The Simple DIY Soil Test
You wouldn’t cook a big meal without checking what’s in the pantry first. Don’t fertilize without checking your soil. A basic test kit from the garden center is perfect for this. Here’s how I do it in my own yard.
- Grab samples from a few spots in your lawn, about 4-6 inches deep. Avoid areas right by the driveway or downspouts. Mix them in a clean bucket.
- Follow the kit’s instructions to the letter. Usually, you add soil to a vial, mix in a chemical powder or solution, shake it up, and let it settle.
- Compare the color of your liquid to the chart provided. This tells you if your soil is low, ideal, or high in each major nutrient and the pH level.
This test is your game plan-it shows you exactly what your soil pantry is missing so you can add only what’s needed.
Cool-Season vs. Warm-Season Grasses: Timing is Everything
Your grass type decides your feeding schedule. I have a cool-season lawn (think Kentucky Bluegrass, Fescue), so my main meals are in early fall and spring. Warm-season grasses (like Bermudagrass, Zoysia) wake up hungry in late spring and feast through the summer heat.
For a DIY fertilizer, this changes your recipe. A cool-season blend in spring might push more nitrogen for green-up, but in fall, I might lean a bit more on potassium to prep for winter. For warm-season lawns, a summer recipe can be higher in nitrogen to support that aggressive growth phase.
Adjusting for Sandy Soil (Looking at You, Florida)
I get a lot of questions about DIY lawn fertilizer in Florida and other sandy regions. Sandy soil is like a sieve-water and nutrients run straight through it. If you have sandy soil, your DIY strategy needs to focus on two things: more frequent, lighter feedings and adding organic matter to help the soil hold onto nutrients and water. (Even if you’re using irrigation).
This means you might use half the strength of a recipe but apply it twice as often. Adding a layer of fine compost when you mix your fertilizer can act like a sponge, giving those nutrients something to stick to instead of washing away after the first rain. My drip system, Sunny, is a lifesaver here, delivering moisture slowly so the food has time to soak in.
Tools You’ll Need for the Job
You don’t need a garage full of pro gear. You probably have most of this already. Gathering it all on the driveway before you start makes the whole process smooth.
- A 5-gallon bucket for mixing.
- A garden sprayer for liquid recipes or a simple watering can with a rose attachment.
- A long, sturdy stirring stick (an old paint stirrer or wooden spoon works).
- A kitchen scale for accuracy with dry ingredients, or reliable measuring cups.
- A pair of gloves. Always wear gloves.
Old coffee cans or rinsed-out milk jugs are perfect for pre-mixing small batches or storing your dry ingredients. I keep my supplies in labeled coffee cans on a shelf in the garage. It keeps everything dry and ready to go.
For spreading, a basic broadcast spreader you can find at any hardware store is a great investment. If you’re in a pinch, you can make a DIY lawn fertilizer spreader from a plastic bucket. Just drill small, evenly-spaced holes in the bottom, hold it waist-high, and walk while tapping the side to shake the fertilizer out in a semi-even pattern. Practice over the driveway first to get the feel for it and calculate the amount of fertilizer you need. My first spreader was a rusty old thing, and it worked for years before I upgraded to something that rolls.
The Homemade Fertilizer Pantry: Common Ingredients & Their Roles
Think of your lawn as a hungry guest. You need to feed it a balanced meal, not just one thing. Store-bought fertilizer bags show three numbers for Nitrogen (N), Phosphorus (P), and Potassium (K). Your kitchen and yard scraps can provide these same nutrients. Let’s break down what works for NPK in lawn fertilizer.
The Nitrogen Boosters (For Green, Thick Growth)
Nitrogen is the engine for green, leafy growth. It’s what makes your lawn look thick and vibrant.
- Fresh Grass Clippings: This is free fertilizer you’re already making. A thin layer left on the lawn after mowing (grasscycling) returns nitrogen directly to the soil as it decomposes. I always leave clippings on Patch, my shady spot, to give it a little consistent nutrient snack between feedings.
- Used Coffee Grounds: They are slightly acidic and contain nitrogen. I sprinkle them thinly around acid-loving plants or mix them into my compost pile. Never dump a thick pile, as they can cake up and resist water.
The Balanced Meal & Special Supplements
Not everything is about the big three. Soil health needs a full pantry.
- Finished Compost: This is your gold standard. Well-made compost is a slow-release, balanced fertilizer that improves soil structure. It’s like turning your soil from a hard dinner plate into a damp, fluffy sponge that holds water and nutrients better.
- Banana Peels (Potassium): Potassium helps with root strength and disease resistance. Chop up peels and bury them shallowly near plants, or let them soak in water for a few days to make a “tea” for watering.
- Eggshells (Calcium): They help neutralize acidic soil and prevent issues like blossom end rot in gardens. Rinse, dry, and crush them into a fine powder before sprinkling. They break down very slowly.
- Epsom Salt (Magnesium & Sulfur): This isn’t a main fertilizer, but a supplement for yellowing lawns that might lack magnesium. Dissolve 2 tablespoons in a gallon of water and apply with a watering can. Use it sparingly, only if you suspect a deficiency.
What to Keep Out of Your Lawn’s Kitchen
Some common “DIY” ideas can cause real harm. Be a protective chef for your grass.
- Fresh, Raw Manure: It’s far too “hot.” It can burn your lawn with excess ammonia and may introduce pathogens or weed seeds. It must be fully composted first.
- Table Salt or Wood Ash: Salt will scorch your grass and poison the soil. Wood ashes from fireplaces are highly alkaline and can radically throw your soil pH out of balance, locking up nutrients.
- Charcoal Grill Ashes: These often contain lighter fluid residues and chemicals you do not want in your soil. Just don’t.
When in doubt, if an ingredient isn’t clearly plant-based and simple, it doesn’t belong on your lawn.
Brewing a Simple Nitrogen “Tea” from Scraps
You can make a fast-acting liquid fertilizer. I use a 5-gallon bucket dedicated to this job.
- Collect Plant Scraps: Gather nitrogen-rich materials like fresh grass clippings, weed leaves (before they seed), or vegetable scraps.
- Fill and Soak: Fill the bucket about 1/3 full with scraps. Top it off with water. Use rainwater or let tap water sit out for a day so the chlorine evaporates.
- Steep: Let the mixture steep for 3-5 days, stirring once a day. It will start to smell earthy (a bit like a pond). If it smells putrid, you’ve let it go too long.
- Strain and Dilute: Strain out the solids and add them to your compost pile. Dilute the dark liquid until it looks like weak iced tea. This is now a nitrogen-rich brew you can apply with a watering can.
This tea gives your lawn a quick, gentle pick-me-up, especially in the early growing season when you need that green-up. It’s not a complete food, but it’s a great supplement that recycles what you already have. Sunny, my drip system, gets a break when I use this, as I apply it by hand right where I need it.
Three Proven DIY Lawn Fertilizer Recipes to Try

Forget the complicated chemistry kits. The best lawn food often comes from stuff you already have around the house or yard. I’ve mixed up more batches than I can count, and these three formulas are my go-tos for feeding the grass without a trip to the garden center.
Think of these recipes like a home-cooked meal for your lawn-simple, effective, and you know exactly what’s in it.
Recipe 1: The Quick Grass Clipping “Weed Tea”
This is instant, free nutrition. When I finish mowing with Max, I never let those fresh clippings go to waste. They’re packed with nitrogen, the very thing that makes grass green up fast. This brew is perfect for a quick mid-season pick-me-up.
You’re literally recycling your lawn’s own clippings back into a concentrated, liquid form of growth fuel.
- Gather one 5-gallon bucket of fresh grass clippings. Make sure they’re from a lawn that hasn’t been treated with weed killer.
- Fill the bucket with water, leaving a few inches at the top.
- Stir it well, cover loosely with a lid or board, and let it sit in a sunny spot for 3 days. You’ll know it’s working when you see bubbles and smell that earthy, fermenting scent.
- Strain the liquid through an old t-shirt or cheesecloth into another bucket. Dilute it until it looks like weak iced tea (about 1 part “tea” to 3 parts water).
- Apply it with a watering can or sprayer directly to your lawn.
Recipe 2: Balanced Compost Brew
If the grass tea is a shot of espresso, this is a full, balanced breakfast. My drip system, Sunny, gets filled with this a couple times a season. It feeds the soil and the grass, which is the secret to long-term health.
This liquid compost extract builds life in your soil, which is the real foundation of a thick, resilient lawn.
- Take two shovelfuls of finished, crumbly compost and place it in a large burlap sack or an old pillowcase. Tie it closed.
- Submerge the bag in a 5-gallon bucket of water.
- Let it “brew” for 5-7 days, giving it a good squeeze and stir every day. The water will turn a rich, dark brown.
- Remove the compost bag. The liquid is ready to use. No need to dilute. You can pour the leftover solids right around your garden plants.
Recipe 3: Simple Slow-Release Granular Mix
Not a fan of mixing liquids? This dry recipe is for you. It’s my set-it-and-forget-it option, especially for that stubborn Patch in the shady corner. The ingredients break down slowly with rain and watering, providing a steady feed.
This granular approach mimics store-bought slow-release fertilizers but uses gentle, predictable ingredients you can find at any grocery or farm store.
- 4 parts soybean meal (excellent slow-release nitrogen)
- 1 part bone meal (for phosphorus, to help roots)
- 1 part kelp meal (packed with micronutrients)
Mix these dry ingredients thoroughly in a large tub. Apply about 10-15 pounds for every 1,000 square feet of lawn. A handheld broadcast spreader works perfectly. Water it in well after application.
Greedy Grass Pro Tip
Patience is the key ingredient in any DIY fertilizer. Letting your mixtures brew for those few days is non-negotiable-it allows the nutrients to leach into the water and for any harsh ammonia to dissipate. Always, always strain your liquid fertilizers through a fine cloth. I learned this the hard way after clogging my sprayer nozzle with a chunk of compost. A clean brew means no clogs and an even application across your whole lawn.
How to Apply Your Homemade Fertilizer for Best Results
Mixing your fertilizer is only half the job. How you put it down makes all the difference. A perfect recipe poured on wrong won’t do a thing for your grass.
Spray vs. Granular: Getting It to the Ground
You have two main choices for application, and each has its place. Your choice often depends on what’s in your bucket and what your lawn needs right now.
Liquid sprays, like our compost tea or the epsom salt mix, are my go-to for a quick nutrient boost. I hook a garden sprayer to the back of Max, my zero-turn, and cover the yard in a fine mist. Liquid sprays are fast-acting because the nutrients are immediately available for the grass blades and roots to absorb. They’re perfect for addressing a specific deficiency you can see, like yellowing, or for giving the lawn a pick-me-up during the growing season. The key is even coverage, so overlap your spray patterns slightly.
Granular applications are for building soil and long-term feeding. This is how you’d apply your dried, crushed eggshells or your coffee ground and compost blend. I use a simple broadcast spreader for this. Granular materials work slowly, breaking down to improve soil structure and feed microbial life, which then feeds your grass. Think of it as a slow-cooked meal for your lawn instead of a quick snack. This method is best for your main seasonal feeding, especially in spring and fall. Your lawn’s fertilizer needs guide should determine when and how much you apply. This keeps growth steady and avoids overload.
| Method | Best For | My Typical Use |
| Liquid Spray | Fast correction, micronutrient boosts, summer applications | Monthly compost tea sprays in early summer to keep things green and healthy. |
| Granular Broadcast | Main seasonal feeding, soil building, calcium/magnesium applications | Spring and fall applications of a compost/meal blend to feed the soil for months. |
A Simple Seasonal Schedule for Your DIY Program
Your lawn’s appetite changes with the weather. Feeding it the right thing at the right time prevents waste and stress. Here’s the basic calendar I follow in my cool-season lawn.
Spring Feeding (Late April – Early May): The grass is waking up hungry. This is your main soil-building feed. Apply a granular mix of screened compost, used coffee grounds, and maybe some crushed eggshells. This gives a slow, steady release of nitrogen and improves soil for the hot months ahead. I avoid heavy nitrogen spikes here, they lead to fast, weak growth and more mowing for me.
Summer Maintenance (June – August): Heat is the enemy. I stop all granular feeding to avoid burning the grass. My summer program is light and liquid. Once a month, I’ll give the lawn a spray of diluted compost tea or an epsom salt solution very early in the morning. This provides a gentle nutrient sip and helps the grass handle heat stress without pushing a big, thirsty growth spurt. Sunny, my drip system, handles the deep, infrequent watering.
Fall Prep (September – October): This is the most important feeding window. The soil is warm, the air is cool, and grass roots are growing aggressively. I go back to a granular soil-builder application, similar to spring. This feeds the roots all autumn and stores energy for a strong spring green-up. It’s the cornerstone of a resilient lawn. Even Patch, my stubborn shady spot, gets this treatment.
The Non-Negotiable Step: Watering It In
This is where many DIY plans fail. You must water your fertilizer in, and I mean thoroughly.
Granular materials need water to start breaking down and move into the soil profile. Without it, they’ll just sit on top, doing nothing, or worse, they could act like a tiny magnifying glass on a sunny day and scorch your grass blades. Always apply granular mixes to a dry lawn, then immediately water deeply so the soil is damp 4-6 inches down. Timing fertilizer with rain helps move nutrients into the root zone. If rain is forecast, applying just before it can improve uptake and reduce the need for extra watering. You want that damp, loamy smell. If you can’t water it in right away, time your application right before a good, steady rain.
For liquid sprays, you have more flexibility. You can let them dry on the leaf, as many nutrients are absorbed directly. But a light watering afterwards helps wash any remaining nutrients down to the soil level. I usually spray in the early evening and let Sunny run a short cycle after I’m done.
Building Your DIY Fertilizer Calendar
Let’s tie the recipes and schedule together into a simple year-long program. Think of this as a rotating menu for your lawn.
- Early Spring (Soil Temp ~55°F): Apply a granular “Soil Builder” blend (compost, coffee grounds, eggshells). Water deeply.
- Late Spring: One spray application of “Weed-Suppressing Compost Tea” to boost grass and crowd out early weeds.
- Early Summer: First monthly spray of “Heat-Help Tea” (compost tea) or “Green-Up Tonic” (epsom salts).
- Mid & Late Summer: Repeat monthly liquid spray. Skip if drought-stressed or dormant.
- Early Fall: Core aerate, then apply your granular “Soil Builder” blend again. Water deeply.
- Late Fall: A final spray application of compost tea to feed roots before winter dormancy.
This program builds soil life, feeds the grass steadily, and avoids the harsh chemical surges that can harm the earthworms and pollinators working in your yard. It’s how I keep my lawn thick and resilient, season after season.
Troubleshooting Your DIY Fertilizer & Lawn Response
Let’s be real for a second. Even the best recipes can go sideways. Your lawn might not react perfectly the first time, and that’s okay. This isn’t a failure, it’s a learning moment. I’ve had my share of them, especially in that troublesome spot I call “Patch.”
Common DIY Hiccups & How to Fix Them
You’ll run into a few typical issues with homemade blends. Here’s how to handle them before you get frustrated.
That smell. Oh, that smell. If your brew has an odor that could clear the deck, you’re likely dealing with anaerobic bacteria. This happens when organic matter decomposes without enough oxygen. To fix it, give your mixture a good stir every day to aerate it. If you’re using something like fish emulsion, just know that a faint earthy smell is normal, but a rancid, sulfurous stink means it’s gone bad.
A sprayer that clogs is a day ruined. If you’re trying to spray a liquid fertilizer and it keeps sputtering, you have solids in your mix. Always strain your tea through a paint strainer or cheesecloth before it goes into the tank. For dry blends, if they won’t flow through your spreader, they might be too clumpy. Let them dry out more or break up the clumps by hand before applying.
Uneven, striped results are a classic sign of application error. This usually means your walking speed was inconsistent or your spreader settings were off. Always do a test run on your driveway first to see the pattern and flow rate. Calibrating your spreader for a coarse, homemade mix takes a minute but saves a season of patchy stripes.
The Slow-Release Difference: Patience is a Virtue
This is the biggest mental shift from store-bought to homemade. A bag of synthetic fertilizer is like a shot of espresso for your lawn. You might see a surge of deep green in just a few days because it’s feeding the plant directly.
Your DIY fertilizer works more like a slow-cooked meal for the soil. You are feeding the microbes and earthworms, which then process those nutrients and make them available to the grass roots. You won’t see that cartoonish “instant green” effect, and that’s by design. Look for steady, even greening over 2 to 3 weeks, and a lawn that feels thicker and more resilient underfoot. It’s a healthier, longer-lasting result.
Is Your Mix Too “Hot”? Spotting Fertilizer Burn
A mix that’s too concentrated can harm your grass. The salts in the fertilizer literally pull water out of the grass blades. Here’s what to watch for:
- Yellow or brown tips on the grass blades within a day or two of application.
- Streaks or patches that match where you applied the heaviest concentration.
- A crusty, white residue on the soil surface if you used a dry blend.
If you see this, don’t panic. Water the area deeply and immediately. This helps dilute the salts and move them down through the soil profile, away from the roots. For your next batch, dilute your mixture with more water or use less of the nutrient source (like manure) in your recipe.
A good rule I follow is the “soup can test”: apply your mix to a small, inconspicuous area and wait 48 hours before treating the whole lawn.
DIY Fertilizer and Weeds: Setting the Record Straight
I hear this question a lot: “Will this homemade stuff kill my weeds?” The honest answer is no. These recipes are not herbicides. They don’t contain any ingredients designed to poison broadleaf plants like dandelions or crabgrass.
What they do is much more strategic. You are building the health and density of your turf so it can naturally out-compete weeds for space, sunlight, and resources. A thick, vigorous lawn is the best defense you have. Think of it as coaching your team to be stronger, rather than trying to foul the other players. For existing weeds, you’ll still need to spot-treat or pull them. But a well-fed lawn will give you far fewer weeds to deal with over time.
Important Safety & Environmental Notes Every Homeowner Should Know
Before you start mixing things in a bucket, we need to have a quick chat. I’ve learned a lot from my own lawn, especially from that stubborn spot I call Patch. The biggest lesson is that good intentions need good information.
The word “organic” is not a magic shield that makes everything harmless in any amount. Even natural ingredients can burn grass, change soil chemistry, or attract pests if you use too much. Think of it like hot sauce, a little can be great, but dumping the whole bottle on your eggs ruins breakfast.
Always Test on Your “Patch” First
You wouldn’t paint your whole house without checking the color on one wall. Your lawn deserves the same caution. Pick a small, inconspicuous area, maybe a corner that’s already a bit fussy. Apply your DIY mix there first and wait a few days.
This simple spot-test tells you how your specific grass and soil will react before you commit the whole yard. It saved me from a major discoloration mishap last summer with a compost tea that was a bit too “robust.”
Know Your Ingredients for Pet & Pollinator Safety
This is the best part of going the DIY route, you control what goes down. You know exactly what’s in it, which means you can make choices that keep everyone safe. I keep my dog in mind with every recipe I try.
Avoid any human or pet medications, harsh soaps, or unknown chemical salts. Ingredients like finished compost, used coffee grounds, or plain grass clippings are safe once applied. Letting any liquid fertilizer soak in fully before letting pets or kids back onto the lawn is a golden rule in my book. For families with pets, I opt for lawn fertilizers labeled pet-safe and always follow the recommended waiting periods before allowing pets back on the lawn. It keeps paws clean and protects the bees and butterflies that visit my clover.
What These Recipes Are (And Are Not) For
Let’s be perfectly clear. The DIY recipes we talk about here are for one purpose, feeding your soil and grass with natural nutrients. They are soil amendments. We are mixing plant foods, not building devices.
These are gentle, slow-release nutrient sources, not a substitute for targeted weed control or a fast-acting synthetic fertilizer. They work with nature’s schedule, not against it. You’re making lawn food, nothing more. Patience is part of the process, but so is the peace of mind that comes with knowing what’s in your yard. For organic lawn health, these inputs can complement an organic fertilizer approach and soil-supporting practices. If a synthetic option is ever needed, opt for a slow-release form that respects soil biology.
Your DIY Lawn Fertilizer Questions, Answered
1. How do I start a simple DIY lawn fertilizer program?
Start with a soil test, then build a seasonal calendar around two granular “soil-builder” feeds (spring and fall) and light liquid sprays (like compost tea) during the summer for maintenance. This mimics nature’s slow-release schedule and builds resilience.
2. Can I combine DIY lawn fertilizer and weed control in one step?
No, these are separate tasks. Your homemade fertilizer feeds the soil and grass to help it out-compete weeds, but it won’t kill existing ones. For weeds, you’ll need to manually pull or use a targeted, pet-safe herbicide as a spot treatment.
3. What’s the biggest adjustment for a DIY lawn fertilizer in Florida or Central Florida?
Sandy soil is your main focus. Use half-strength recipes but apply them twice as often to prevent nutrients from washing away, and always mix in fine compost to help your soil act like a sponge and hold onto the food and water.
4. What’s the best way to spread a chunky DIY lawn fertilizer mix?
For dry, coarse blends like the Simple Slow-Release Granular Mix, a standard broadcast spreader works if you ensure all clumps are broken up. Always test the flow rate on your driveway first to prevent uneven stripes or clogs.
5. When should I use a DIY lawn fertilizer spray versus a granular mix?
Use liquid sprays for a quick nutrient boost or to address a visible deficiency. Switch to granular mixes for your main seasonal feedings in spring and fall, as they work slowly to build soil health-think of it as a steady breakfast versus a quick snack.
Your Lawn, Your Recipe
The best advice I can give is to always test your soil first and start with a small batch. This simple step saves you time and prevents any guesswork, letting you feed your grass exactly what it’s hungry for.
I get a real kick out of seeing Patch get greener after a tailored feeding. It reminds me that taking care of our own little piece of the earth, responsibly and with a bit of curiosity, is what makes a home feel right.
Industry References
- Cheap, Safe, and Incredibly Effective Homemade Lawn Food
- The Ultimate Guide to DIY Lawn Fertilizer
- Homemade Lawn and Garden Fertilizers That Really Work • Everyday Cheapskate
- Effective Homemade Fertilizers for Your Lawn: Recipes for Greener Grass
Written by Ria Carrington. Ria is an avid lawn care enthusiast and advisor. No lawn is unsalvagable when Ria is at work. She has helped countless homeowners breath new life into their dying lawns. She has a B.Sc in Agriculture and brings practical advice combined with knowledge of plant science and her decade worth of hands on experience.