
What Is Lawn Top Dressing and How Do You Do It Without Wasting Money?
If your grass feels spongy or looks patchy, you might be wondering if adding a thin layer of material on top is worth the effort.
This article breaks it all down for you, covering the true purpose of top dressing, the absolute best time to do it, and the correct, cost-effective way to apply it.
I’ve learned this through seasons of trial and error on my own lawn, saving cash and getting better results each time.
At a Glance: Your Lawn Top Dressing Cheat Sheet
Think of this as your quick-start guide. Top dressing is a simple concept, but getting the basics right makes all the difference.
The main reasons I grab my wheelbarrow every year are to fix problems and build a stronger lawn from the ground up.
- Level the playing field. It fills in low spots and smooths out mole hills and old ruts so Max the mower doesn’t scalp the high points.
- Improve soil health. You’re adding organic matter, which is like a superfood for the billions of beneficial microbes and earthworms living under your grass.
- Reduce thatch naturally. A thin layer of quality compost introduces microbes that slowly break down thatch, turning a problem into plant food.
- Create a perfect seedbed. When you overseed, a light top dressing protects new seeds, keeps them moist, and gives them the best start.
- Fix your soil’s personality. For sandy soil that drains like a sieve, it helps hold water. For thick clay that acts like a sponge, it helps create air pockets for better drainage.
Timing is everything, and the rule is simple: do it when your grass is growing its fastest. For cool-season grasses like Kentucky Bluegrass or Fescue, that’s early fall. For warm-season grasses like Bermuda or Zoysia, aim for late spring to early summer. This gives the grass the energy to grow up through the new layer. It’s also the ideal time to apply pre-emergent herbicides, which help prevent weed seedlings from taking over.
More is not better. The golden rule for how much top dressing for a lawn is a layer no thicker than 1/4 to 1/2 of an inch. I use my finger as a rough guide. Any more than that and you risk smothering your existing grass. You can always do a second, lighter application next season.
For anything bigger than a postage stamp, forget the shovel. The one tool that makes this job a breeze is a simple lawn spreader, the same kind you use for fertilizer. Dump your top dressing mix in, set a wide open setting, and walk. It saves your back and gives you a much more even coat than trying to rake it by hand.
What Does Top Dressing a Lawn Actually Do?
Let’s peel back the grass and look at what’s really happening down there.
In plain language, top dressing is like adding a high-quality conditioner to your soil. You’re not just dumping dirt on top. You’re applying a tailored mix-usually a blend of compost, screened topsoil, and sand-that amends the soil you already have.
I think of it like frosting a bumpy cake. The goal isn’t just a smooth look. That thin, even layer of “frosting” fills gaps, covers imperfections, and creates a uniform surface. More importantly, that organic matter acts like a moisture manager, helping the entire “cake” hold water more evenly so every root gets a drink.
The benefits are direct. First, it smooths bumps. You’ll notice a cleaner cut and a safer surface for kids and pets to play on. Second, you’re introducing a whole community of good microbes and organic nutrients that your lawn craves. This is how you build real soil health, not just green grass. Understanding the purpose of lawn soil composition helps you tailor amendments for even better results. In other words, knowing soil composition explains how structure, drainage, and nutrients work together to support a thriving lawn.
Third, it directly tackles your soil’s weaknesses. If your soil is sandy and water vanishes, the compost in the mix acts like a sponge. If you have heavy clay where water pools, the sand and compost create tiny channels, helping it drain. It’s a fix that lasts for seasons.
Here’s what you need to know. Top dressing is not a substitute for core aeration when you have severe compaction. If the ground is rock-hard, you need to pull plugs first to open it up, then top dress to fill those holes with good stuff. It’s also not a magic eraser for a 2-inch thick thatch mat. For that, you need dethatching. But as a yearly habit, it gently manages thatch and prevents compaction from coming back as fast.
It’s a patient game. You won’t see a perfect lawn overnight. But after a few seasons of this, you’ll feel the difference underfoot-a thicker, spongier, more resilient lawn that handles drought, foot traffic, and my clumsy mowing turns with Max much better. Patch, my problem corner, taught me that. A little top dressing each fall didn’t fix it in one go, but it slowly built up the soil quality until the grass could finally outcompete the weeds on its own.
Choosing Your Mix: What Is the Best Lawn Top Dressing?

Think of your top dressing mix like a good breakfast for your lawn. It needs to be nutritious, easy to digest, and free of any nasty surprises. I’ve tried a few combinations over the years, and getting the mix right saves you from a lot of headaches later.
The main players are compost, screened topsoil, and sand. Each one does a specific job.
- Compost is the superstar. It’s packed with organic matter that feeds the tiny life in your soil. I look for compost that’s dark, crumbly, and smells like a forest floor after rain.
- Screened Topsoil is the filler. It’s soil that’s been sifted to remove rocks and big chunks. It gives structure to your mix and helps it blend with your existing lawn.
- Sand is the specialist. I only use it if my soil is heavy clay and drains poorly. For most lawns, it’s not necessary and can make things worse if you add too much.
For a reliable, all-purpose mix that works for 90% of lawns, you can make it yourself. My go-to recipe is a simple 50/50 blend of quality compost and screened topsoil. I mix it in my wheelbarrow until it looks uniform. This gives your grass a boost of nutrients and improves the soil texture without smothering it.
Steer clear of bagged products labeled “garden soil” or “planting mix.” They’re often full of woody chunks and bark that take forever to break down. I made that mistake once in a flower bed, and it was like trying to grow grass on a pile of toothpicks. It doesn’t integrate well with your lawn, especially when preparing soil for lawn seeding.
I always push for finding a local source for compost. Local, weed-free compost supports the beneficial microbes and earthworms that are the true heroes of a healthy lawn. It’s also less likely to contain persistent herbicides that can linger and harm your grass or the pollinators visiting your clover. It’s a safer bet for everyone, including pets.
One question I hear all the time: “Can I just use soil from another part of my yard?” My answer is a firm no. That soil is likely compacted and packed with weed seeds just waiting for a chance. You’d essentially be transplanting your problems. I learned this the hard way with Patch, my weedy corner. Using that soil elsewhere just gave the weeds a new home.
When to Top Dress: Hitting the Seasonal Sweet Spot
Timing isn’t just a detail, it’s the whole game. Aligning top dressing with lawn fertilization and seeding timing can set the stage for a thriving lawn. Apply top dressing at the wrong time, and your grass can’t grow up through it. You’re left with a thin, muddy layer that suffocates your lawn instead of helping it.
The golden rule is to top dress only when your grass is in its prime growing season. You want the blades vigorous and reaching for the sun so they can quickly penetrate the new material you’ve added.
For cool-season grasses like tall fescue, Kentucky bluegrass, and ryegrass, you have two good windows.
- Early fall is the absolute best time. The soil is still warm from summer, the air is cooling down, and grass focuses energy on root growth. It’s the perfect recovery period.
- Spring is your second chance. Aim for early spring, just as the lawn fully wakes up from winter dormancy.
For warm-season grasses like Bermuda, Zoysia, and St. Augustine, the timing shifts.
Late spring to early summer is your target. Wait until the grass is completely green and growing strongly, usually when night temperatures are reliably warm. This timing is also the best time to plant grass seed in spring. Planting then gives seeds the warmth and moisture they need to establish.
A simple, foolproof guideline is to watch the soil temperature. I top dress when my soil thermometer reads a consistent 55°F or higher for a solid week. That’s the signal that grass roots are active and ready to grow. You can find affordable soil thermometers online, or check with your local extension service for regional timing.
Never, ever top dress a dormant lawn. If your grass is brown and not growing in summer heat or winter cold, leave it alone. Adding a layer then is like putting a heavy blanket on someone who’s hibernating. It stresses the plants and invites disease. I time my work with Sunny, my irrigation system, making sure the lawn is actively growing and can be watered properly after the job is done.
Gear Up and Prep: Getting Your Lawn Ready

This isn’t a complex job. You likely have most of what you need already. A weekend project vibe, not a construction site.
Gather these tools first:
- A sturdy wheelbarrow.
- A flat-head shovel.
- A stiff garden rake (like a level-head or thatch rake).
- Your trusty lawn spreader for a smaller area.
- For a big yard, a tow-behind drag mat is the secret for how to top dress a large lawn without spending all weekend. You hook it to your mower and let Max do the heavy pulling.
Now, prep your lawn. Think of it as setting the table before dinner.
Start by mowing your grass a notch shorter than your usual setting. You want those grass blades out of the way so the dressing can reach the soil.
The day before you plan to dress, give the lawn a good, deep watering. You want the soil damp, not soggy or rock hard. It helps the new material settle in.
Take a quick walk. See any big, obvious weed patches? Hit them first. Getting rid of major weeds now means you’re improving the soil for your grass, not their roots. As you go, note the weed types you see so you can tailor your treatment. In the next steps, we’ll cover lawn weed identification and targeted treatment.
For the absolute best results, I strongly recommend you core aerate before you top dress.
It’s like poking holes in a dry kitchen sponge before you pour water on it the channels let the good stuff get deep into the root zone where it matters most. The sand and compost mixture will fill those holes, improving drainage and soil structure directly under the surface.
If your lawn is looking a bit thin or bare in spots, this is your perfect moment. You can scatter grass seed right after aerating and before you add the dressing. The seed gets protected and finds perfect contact with the soil.
The Main Event: How to Top Dress a Lawn, Step-by-Step
Alright, the lawn is prepped and the pile of top dressing mix is waiting. Here’s your simple, five-step guide for how to top dress lawn the right way.
Take your time. Rushing here leads to clumps and uneven results.
Step 1: Calculate Your Material
You don’t want to run out halfway. The goal is a thin layer, about 1/4 of an inch deep. Here’s a simple formula.
Find your lawn’s square footage (length x width). Multiply that number by 0.002 (that’s 1/4 inch as a decimal of a foot). The answer is the cubic feet of material you need.
For a 1,000 sq. ft. lawn: 1,000 x 0.002 = 2 cubic feet of top dressing mix. It doesn’t look like much in the bag, but it goes a long way when spread thin.
Step 2: Dump Small Piles Evenly
Using your wheelbarrow and shovel, place small mounds of the mix all over your lawn. Think of spacing them like a grid.
This makes the next spreading step so much easier. If you dump one giant pile in a corner, you’ll fight it all day.
Step 3: Spread It Thin and Even
This is the raking part. Take your stiff rake and start working each pile flat. Use a back-and-forth, leveling motion.
Your aim is to see a consistent, barely-there layer across the entire lawn, like a light dusting of snow. Don’t try to bury the grass. If you hit a spot where the grass disappears, you’ve put down too much. Rake some to a thinner area.
Step 4: Work It In
Once it’s spread, go over the lawn again with the rake or your drag mat. You’re not just smoothing now. You’re gently brushing and pushing the material down so it sifts through the grass canopy and settles at soil level.
This step helps fill aeration holes and gets the dressing off the grass blades and into the thatch layer where it can do its work.
Step 5: The Final Touch
Grab the hose or turn on Sunny, your irrigation system. Give the whole lawn a gentle, thorough watering.
This settles the dressing completely, prevents it from blowing away, and starts the process of integrating it with your soil. It’s also a good time to apply a light dose of starter fertilizer if you overseeded.
When you’re done, take a look. A properly top-dressed lawn should still show most of its grass blades poking happily through the new layer of soil. If it looks like a dirt lot, you used too much. If you can’t see any dressing at all, you might have been too light. You’ll get a feel for it.
Common Lawn Top Dressing Mistakes and How to Avoid Them
Getting top dressing right is simple, but a few small errors can set you back a season. I’ve made most of these myself, especially in that tricky corner I call Patch. Here’s what to watch for.
Mistake 1: Applying Too Thickly
It’s tempting to dump a heavy layer, thinking more is better. It’s not. A thick blanket acts like a tarp, smothering your grass by blocking light and air. Your goal is to fill holes and smooth bumps, not bury the lawn. Aim for a layer no thicker than 1/4 to 1/2 an inch. You should still see plenty of grass blades poking through after you spread the material.
Mistake 2: Using the Wrong Material
Not all soil is created equal. Using pure sand on dense clay soil is like pouring water through a coffee filter-it just sits on top, creating a hardpan. Pure clay is like cement when it dries. For most lawns, a screened topsoil mixed with compost or sharp sand is your best bet, matching your existing soil type. This blend improves structure without creating a drainage nightmare. Improving lawn soil drainage helps roots access air and moisture more evenly. This, in turn, boosts overall turf health and resilience.
Mistake 3: Top Dressing at the Wrong Time
Timing is your secret weapon. Doing this in the peak summer heat stresses grass that’s already struggling. Doing it in winter when the lawn is dormant is pointless. The sweet spot is during your grass’s prime growing season, when it can quickly grow through the new layer. For cool-season grasses, that’s early fall or spring. For warm-season grasses, aim for late spring to early summer. Climate shapes these windows, as seen with the different growing patterns of cool-season and warm-season grasses.
Mistake 4: Not Leveling the Dressing
Spreading the material is only half the job. If you don’t level it, you trade old lumps for new ones. I use the back of a wide, metal landscape rake, dragging it gently in different directions. Take the extra ten minutes to rake the material smooth, working it down into the turf canopy until the surface is even. Your mower (and your ankles) will thank you later.
Mistake 5: Skipping the Watering-In Step
Never leave the job with dry, dusty material sitting on the grass. That dust can blow away, clog mower filters, or simply wash into piles at the first rain. A gentle, thorough watering settles the dressing into place, locks it around the grass plants, and kicks off the integration process. Use a gentle spray to soak it without creating puddles or washing it all away.
Your Seasonal Top Dressing Checklist
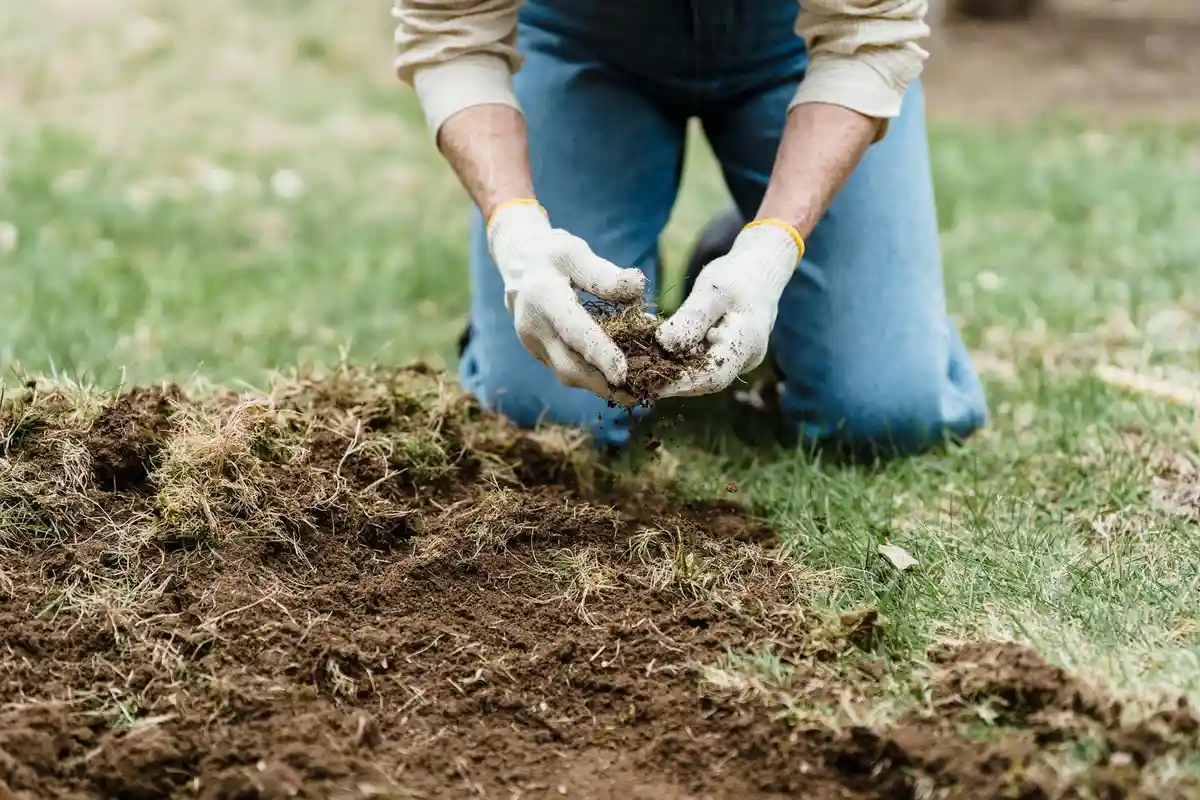
Here’s your straightforward plan. Follow these steps in order, and you’ll nail it every time.
| Task | Cool-Season Lawns (Spring/Fall) | Warm-Season Lawns (Late Spring) |
|---|---|---|
| 1. Test Soil | Check pH and nutrient needs. Amend if needed. | Check pH and nutrient needs. Amend if needed. |
| 2. Mow | Mow the lawn slightly shorter than usual. | Mow the lawn slightly shorter than usual. |
| 3. Aerate | Core aerate if soil is compacted. Highly recommended. | Core aerate if soil is compacted. Highly recommended. |
| 4. Calculate Material | Measure area. You’ll need about 1 cubic yard per 1,000 sq ft for a 1/4″ layer. | Measure area. You’ll need about 1 cubic yard per 1,000 sq ft for a 1/4″ layer. |
| 5. Spread | Use a shovel and stiff rake to drop and spread small piles evenly. | Use a shovel and stiff rake to drop and spread small piles evenly. |
| 6. Rake Level | Use a metal landscape rake to work dressing down and smooth the surface. | Use a metal landscape rake to work dressing down and smooth the surface. |
| 7. Water In | Water thoroughly with a gentle spray to settle the material. | Water thoroughly with a gentle spray to settle the material. |
A Special Note for Fall
Fall is the champion season for cool-season lawns like Kentucky Bluegrass or Fescue. For the best results, combine top dressing with overseeding right after aeration. Spread your grass seed first, then apply your thin layer of top dressing. It acts as a perfect protective blanket for the new seeds, holding moisture and improving seed-to-soil contact for a thicker lawn by next spring.
The Final, Critical Step
Your job isn’t done after the initial watering. Keep the area lightly watered for the next 5-7 days to keep the new material damp and support your grass as it grows through. Think of it like keeping a seedbed moist. This prevents the top dressing from drying out and crusting over, giving your grass the best possible support.
Lawn Top Dressing FAQ: Your Quick-Answer Guide
Can top dressing replace aerating or dethatching?
No, it’s a teammate, not a substitute. Think of aeration as opening the door and top dressing as delivering the goodies inside; you need both for a severely compacted lawn, especially when considering the benefits and safety of lawn aeration.
What if my lawn is on a slope?
You can still do it, but use a drag mat for control and water in gently immediately after. This prevents the material from washing away and ensures it settles right where you need it.
How soon after top dressing can I mow or let the kids play?
Wait until the grass has visibly grown through the new layer, usually after one or two mows. You want the roots anchored and the new material fully integrated before heavy traffic.
Will top dressing completely level a deep hole in one go?
No, patience is key. Fill major depressions gradually over multiple seasons to avoid smothering the grass; aim for no more than 1/2 inch of fill per application.
Do I need to top dress every single year?
Not necessarily. An annual light application builds incredible soil health, but if your lawn is already level and thriving, you can do it every other year as a maintenance boost.
Wrapping Up Your Top Dressing Project
The main goal of top dressing is to feed your soil, not just cover it up. Get the timing right in early fall or late spring, and spread that thin layer of compost or soil-sand mix with care.
Always check that your top dressing materials are safe for kids, pets, and local pollinators. Your lawn is a little ecosystem that gets better with your consistent, thoughtful attention.
Industry References
- How to Top Dress Your Lawn
- r/lawncare on Reddit: How often do you topdress your lawn?
- Top Reasons To Top Dress Your Lawn | Grass Works Lawn Care
Written by Ria Carrington. Ria is an avid lawn care enthusiast and advisor. No lawn is unsalvagable when Ria is at work. She has helped countless homeowners breath new life into their dying lawns. She has a B.Sc in Agriculture and brings practical advice combined with knowledge of plant science and her decade worth of hands on experience.