
Why Won’t Your Mower’s Pull Cord Retract? Let’s Fix It
That frustrating yank, followed by a limp string you have to manually coil back, is a problem every lawn owner faces eventually.
We will cover the simple troubleshooting steps to diagnose it, the most common causes, and the step-by-step repair you can do yourself in an afternoon.
I’ve fixed this same issue on my own mower, Max, more than once, and I’ll show you how to get it done without a costly trip to the shop.
What’s Stopping Your Pull String from Retracting?
Think of your mower’s pull cord like the string on a window shade. When you pull it, a spring inside the recoil housing tightens up like a coil. When you let go, that spring’s energy spins a pulley to wind the cord back in, neat and ready for the next pull. When it fails, it’s usually one of three culprits. If your mower is self-propelled, the drive system is often the first thing to check. A quick guide on fixing the self-propelled drive can help you get back to mowing faster.
The most common villain is a broken recoil spring. Over years of starting, that thin ribbon of metal can fatigue and snap, losing all its tension. Another is a frayed or snapped pull cord itself, which simply has nothing left to retract. The third is a gummed-up mechanism where old grease, dirt, and grass clippings have turned into a sticky glue, binding the moving parts.
Before you grab any tools, do two quick checks. First, pull the cord slowly and feel for resistance. A smooth pull with a strong, springy return is good. If it pulls out too easily or just flops loose, the spring is likely broken. Second, listen. A faint ‘tink’ or ‘snap’ when you let go often means a broken spring end has just let go inside the housing.
Tools and Parts You Can’t Fix Without
You don’t need a mechanic’s garage, but you do need the right gear. Having this small kit ready before you start will save you a trip to the garage mid-repair.
For tools, gather these basics:
- A set of screwdrivers, usually a Phillips head, to remove the recoil housing cover.
- Needle-nose pliers for handling small parts and threading the new cord.
- A socket set (often 3/8″ drive) to remove the blade or the bolt holding the pulley in place, depending on your mower model.
- A good pair of safety gloves. You’ll be handling sharp metal edges and a spring under tension.
For parts, you’ll likely need one of two things. First, identify if you need a new pull cord (sold generically as ‘lawn mower pull string’) or an entire recoil spring assembly kit. If just the cord is bad, you can buy a length of replacement cord. If the spring is broken, a kit with a new spring and often a new pulley is your best bet. When choosing parts, referencing the best lawn mower brands parts repair guides can help you select reliable replacements. This approach helps ensure you get compatible, durable components for your next repair.
A can of general-purpose lubricant like WD-40 is also smart for cleaning old gunk off the mechanism. You can find all these parts at any local hardware store like Home Depot or Lowe’s, or search online for a generic replacement using your mower’s model number. For a common mower like my old Max, I can usually find a kit for under $20.
Play It Safe: Prep Your Mower and Workspace

Before we touch a single screw, we have one rule. It’s not a suggestion. It’s the law of the garage when working on any small engine.
You must disconnect the spark plug wire. Every single time. This simple act is the only thing standing between a routine fix and a trip to the emergency room. The engine could kick over with just a tug on the cord or a turn of the blade, and you do not want your hand near it when it does.
Here’s how I do it on my mower, Max. First, locate the spark plug—it’s a short, thick, usually white ceramic nub on the side of the engine with a rubber boot on top. Usually, you would find the spark plug on the side of the engine. Grab that rubber boot firmly and pull it straight off the plug’s metal tip. You’ll hear a soft *click*. Now, tuck that wire end safely away from the plug so it can’t accidentally flop back on. I sometimes slip a small piece of cardboard between the metal connector and the plug for good measure. With that done, you’ve just made the job 100% safer.
Claim Your Clean Zone
You wouldn’t perform surgery on a picnic table in the yard. Don’t fix your mower there either. Find a clean, flat, and hard surface. I use my garage floor with a padded mat, or my workbench if I’m feeling fancy.
A clean, controlled workspace is your secret weapon against lost parts and rising frustration. Grass clippings and loose soil love to swallow tiny screws and washers forever. A smooth concrete floor or bench top means when you drop something, you’ll hear it ping and see it roll. You can find it.
Gather Your Gear
You don’t need a mechanic’s full toolkit, but a little prep goes a long way. Have these items ready before you start taking things apart:
- The right size socket wrench or screwdriver for your mower’s recoil housing cover.
- A small container. I use an old muffin tin or a few coffee cups.
- A magnet tray. This is the real pro move. It keeps steel screws and, most importantly, that recoil spring from making a daring escape across the floor.
As you take screws out, place them directly into your container in the order they came out. That little recoil spring is under tension and can be tricky. The magnet tray will hold it still. This organization isn’t just neat, it’s how you ensure everything goes back together the way it came apart. Trust me, after wrestling with Patch’s weeds all season, you don’t need this repair to be any harder.
Step 1: Removing the Starter Housing Cover
This is where we get our hands dirty. The pull cord mechanism lives under a plastic housing cover, usually on the top or side of the mower engine. Before you start, give Max a minute to cool down if he was just running. Grab a clean rag to wipe away any loose grass or dirt around the cover. You’d be surprised how much gunk can hide a screw head.
First, let’s gather the right tool. Most covers are held on by three or four screws. They’re often Phillips head, but I’ve seen flathead and even star-shaped Torx bits on newer models. Using a screwdriver that fits perfectly is the single biggest tip I can give you here; a loose fit will strip the screw head and turn a simple fix into a major headache. If a screw feels stuck, don’t force it. Apply steady pressure and make sure your driver is seated all the way in the head.
Once you’ve got the right driver, remove each screw. Do this slowly and keep them together. I drop mine into a small bowl or cup so they don’t roll away. With the screws out, the cover should lift right off.
Sometimes, though, it’s stuck. Years of vibration, heat, and grass clippings can sort of glue it on. If it doesn’t come free with gentle hand pressure, don’t yank it. Take a flathead screwdriver and very carefully work it into the seam between the cover and the engine housing. Gently twist to pry it apart, moving around the edge. The plastic can be brittle, especially on an older mower. Think of it like opening a paint can you don’t want to damage. A few light taps with your hand on the side of the cover can also help break it loose. Patience and gentle pressure are your best tools to avoid cracking the plastic housing, which is a much harder part to replace.
Step 2: Diagnosing and Fixing the Core Problem

Let’s break this down into the most common issues. We will tackle them one by one. Grab your screwdriver and some patience.
If the Recoil Spring is Broken or Unhooked
This is the heart of the retract mechanism. If the spring is broken or has popped off its anchor, the cord has nothing to pull it back. Handle this spring with respect, it’s under a lot of tension and can fly out if released suddenly. I learned this the hard way with Max, spending a sunny afternoon hunting for a spring in the grass.
First, remove the recoil starter housing from the mower engine. You will usually find a few bolts holding it on. Once off, place it on a flat, clean surface.
Now, carefully lift the pulley and spring assembly out. You might need to release the cord tension slowly. Wear safety glasses for this part, trust me.
Inspect the spring. If it is broken, you need a replacement. If it is just unhooked, you can re engage it. Here is how.
- If replacing, note how the old spring is wound. A new spring is like a watch spring, it needs to be coiled with precision and care.
- To re engage an unhooked spring, find the central hub and the anchor point. Hook the inner end of the spring into the slot on the hub.
- Wind the spring in the direction it naturally coils. Use a pair of pliers to hold tension as you wind. You will feel it getting tighter.
- Once wound, carefully place the assembly back into the housing, making sure the outer end of the spring hooks into the notch in the housing.
Take your time here. Rushing can mean starting over or, worse, getting nipped by the spring.
How to Change a Lawn Mower Pull Cord (When It’s Snapped or Frayed)
If the cord itself is the issue, this is a straightforward swap. Universal pull cord kits are a lifesaver here, often cheaper and easier to find than brand specific parts. I keep a spare in my shed for just this reason.
Start by removing the old cord from the pulley and handle. You might need to untie or cut the knot.
Here is the step by step for threading a new cord.
- Feed one end of the new cord through the hole in the pulley. Tie a secure knot, like a double overhand knot, that won’t slip back through.
- Wind the pulley in the direction that tensions the spring. Keep winding until you have a few coils of spring tension.
- Now, feed the other end of the cord through the exit hole in the housing and attach the handle. Before tying the handle, pull the cord out to its full length to set it.
- Tie another secure knot at the handle. Trim any excess cord, leaving enough for a comfortable pull.
Setting the proper cord length is key. You want it long enough to pull easily but not so long it drags on the ground. A good rule is about 12 to 18 inches from the housing to the handle.
If the Mechanism is Just Dirty or Sticky
Sometimes, the fix is the simplest. Grass clippings, old grease, and dirt can gum up the works. A thorough cleaning and a light lubricant can have your mower starting smoothly again in no time. This is what fixed Patch’s old push mower last season. Regular maintenance can head off many future mower problems. A simple basic maintenance routine—cleaning, oil checks, and blade inspections—keeps things running smoothly.
Remove the housing as before. Use a stiff brush and a degreaser to scrub away all the grime from the pulley, spring, and inside the housing. An old toothbrush works great for tight spots.
Once everything is clean and dry, apply a light lubricant. I prefer a dry lubricant spray or a dab of engine safe grease on the moving parts. Avoid over greasing, it just attracts more dirt.
Reassemble the housing and test the pull. It should retract with a crisp, smooth snap.
What If the Cord Won’t Pull At All?
This is a different beast from a slack cord. If the pull handle gives you just a few inches of hard resistance and then completely locks up, you’re likely dealing with an internal engine problem, not the starter assembly. It’s the difference between a loose shoelace and a seized-up wheel bearing.
Your first instinct might be to blame the recoil starter, but that’s rarely the main culprit here. Before you open that plastic housing, check a few other things first.
Common Culprits for a Locked-Up Pull Cord
Here are the usual suspects, starting with the simplest check.
- A Seized Engine: This is the most serious possibility. Engines seize when internal parts, like the piston and cylinder, fuse together from lack of oil or extreme overheating. If you tried to run the mower low on oil last season, this is a prime suspect. The fix is often a full engine rebuild or replacement.
- The Flywheel Brake is Engaged: This is a safety feature. On many mowers, you must hold down a lever on the handle to disengage the brake and allow the engine to turn. If that cable is damaged, disconnected, or the mechanism is stuck, the brake will be permanently on. Check if the lever moves freely and the cable is connected at the engine.
- Something is Jamming the Blade: A stick, rock, or packed grass clump can lock the blade, which locks the engine crank. Always disconnect the spark plug wire first, then tip the mower on its side (with the air filter facing up) to check for debris tangled around the blade. I’ve found more than one landscaping nail wrapped around Max’s blade.
- A Sheared Flywheel Key: This is a tiny metal piece that aligns the flywheel with the crankshaft. If you hit something solid, the force can shear this key, throwing the engine’s timing off and causing it to lock. This requires removing the flywheel cover to inspect.
When to Call for Backup
Fixing a seized engine or internal timing issue goes beyond typical weekend tinkering. If you’ve checked for a blade obstruction and confirmed the brake cable is connected, but the cord is still solidly locked, it’s a clear sign to call a small engine repair pro. They have the tools and know-how to diagnose it properly without causing more damage. I know the urge to fix everything yourself, but some battles are smarter to delegate.
Step 3: Reassembling Everything and Testing Your Work
Alright, the hard part is over. Now we put it all back together. This is where a little patience pays off big. You’re basically doing everything you just did, but in reverse order.
The key to a smooth reassembly is taking your time to align everything perfectly before you start tightening screws. Start by carefully placing the plastic housing cover back over the recoil mechanism. Make sure the center hole for the starter rope lines up cleanly and that the recoil spring’s tab is seated correctly in its slot on the housing. A misaligned spring here is the number one reason you’d have to take it apart again.
- Hold the cover firmly in place.
- Hand-tighten all the screws to hold it, but don’t crank them down yet.
- Go around with your screwdriver and snug each screw down evenly, like you’re giving a firm handshake, not trying to win an arm wrestling contest. Overtightening can strip the plastic threads.
Once the housing is secure, it’s time for the moment of truth. Reconnect the spark plug wire to the spark plug. We disconnected it for safety at the start, and forgetting this step is a classic move that leaves you wondering why your mower won’t start.
Now, give the pull cord a firm, smooth, straight-out tug. Don’t yank it at an angle. You should feel a consistent resistance, then the satisfying *snap* of the engine’s compression. Let go immediately.
If you’ve fixed it right, you’ll hear a crisp, quiet *zip* as the rope winds back into the housing in a flash. It feels efficient, like Max is ready to get back to work. That swift, silent retraction means the spring is wound right and the rope is feeding cleanly. Pull it a few more times. Each pull should be smooth, and each retraction should be brisk and complete.
When to Call in a Pro and Save the Headache
Look, I love a good weekend project as much as anyone. But some jobs are like fighting with Patch, my stubborn shady corner. You can waste a whole Saturday and end up worse than when you started. Knowing when to wave the white flag saves time, money, and your sanity.
Here’s when I’d pack up the tools and make a phone call instead.
- The engine is seized. If you pull the cord and the mower doesn’t turn over at all-it just feels solid and stuck-the engine may be locked up. This isn’t a recoil spring issue. It’s a major internal problem.
- Parts are a rusty, corroded mess. I’ve opened up housings where the entire mechanism looked like it came from the bottom of the ocean. If bolts are welded with rust or the pulley is crumbling, forcing it will just break more things.
- You’re genuinely nervous about the spring tension. This is the big one. That recoil spring is wound tight and wants to explode. If your hands are shaking or you’re dreading the “twang,” it’s not worth a trip to the ER for stitches. Trust that feeling.
The cost difference can make the decision for you. A simple recoil repair kit is often under $20. A professional repair bill for the same job typically starts around $75 to $120. If your time is precious or the risk of error is high, that professional fee starts to look very reasonable. It pays for their expertise, their parts stash, and the guarantee that it’s done right.
For complex engines or if you’ve launched a tiny but critical spacer into the lawn (it happens to the best of us), your best bet is a local small engine shop. These folks live and breathe mowers. They can diagnose issues you might miss and often have the exact OEM part on the shelf. It’s faster and more reliable than ordering the wrong thing online three times.
Greedy Grass Pro Tip: Keep Your Starter Running Smoothly

Think of your pull starter like a loyal dog. You give it a little care, and it fetches that first engine start every single time you ask. Neglect it, and you’re in for a frustrating tug-of-war. A simple routine is all it takes.
Seasonal Lubrication is Your Best Friend
Friction and grime are what kill a smooth-retracting cord. Inside that plastic housing, the recoil spring and the cord itself rub against guides and spools. Once a year, give it a refresh. I do mine right after the last fall mow, before Max gets his winter cleaning.
You don’t need much. A quick, one-second spray of a dry lubricant or a light machine oil into the cord opening is perfect. This tiny bit of maintenance prevents the internal spring from gumming up and keeps the nylon cord from drying out and fraying. It’s the cheapest insurance policy for your Saturday morning.
Your Pulling Technique Matters More Than You Think
Watch how people start a mower. Many give a sharp, sideways yank. That angle puts terrible stress on the cord and can cause it to bind or wear unevenly against the housing edge. When starting a lawn mower, it’s important to follow proper safety techniques to prevent accidents and prolong the life of your equipment.
Instead, stand firmly, grip the handle, and pull the cord straight out from the mower in one smooth, steady motion. Let the recoil mechanism do the work of pulling it back in. Pulling straight and steady is the single easiest way to prevent tangles and premature wear on the entire starter assembly. It feels more controlled, too.
The Ripple Effect of a Little Care
This isn’t just about the cord. A well-maintained starter is a sign of a cared-for machine. That steady, smooth pull means less strain on your arm and the mower’s engine crank on startup. It means no frantic jerking that could disturb the fuel line or air filter housing.
When Max starts on the first pull, the whole chore feels lighter. The coffee tastes better. Taking two minutes to lubricate and using the right technique saves you hours of repair headache and makes the simple act of starting your mower a quiet, satisfying victory. It’s how you turn a tool into a reliable partner.
Greedy Grass FAQ: Your Pull String Problems, Solved
Where’s the best place to buy a replacement pull cord?
Hit up your local hardware store like Home Depot or Lowe’s for a universal kit that fits most mowers. For a perfect match, have your mower’s model number handy when you shop online or in-store, or check out this lawn mower parts compatibility guide to ensure you’re getting the right parts.
Does Home Depot carry lawn mower pull strings?
You bet-Home Depot stocks pull cords and recoil starter kits in the lawn mower section. Use their app to check inventory at your local store before you go.
What about Lowe’s – can I get a pull string there?
Lowe’s has a solid selection of replacement pull cords and full assemblies. Their website’s store pickup feature is a lifesaver for grabbing what you need fast.
How do I find a pull string nearby in a pinch?
Quickly search “lawn mower pull string near me” online or call local repair shops-they often sell parts over the counter. This beats waiting for shipping when your grass is getting greedy.
What if I need a pull cord today, not in a week?
Universal kits at big-box stores are your best bet for a same-day fix. If they’re out, a temporary clean-and-lube might get you one more mow until the part arrives.
Getting Back to the Good Part: Mowing
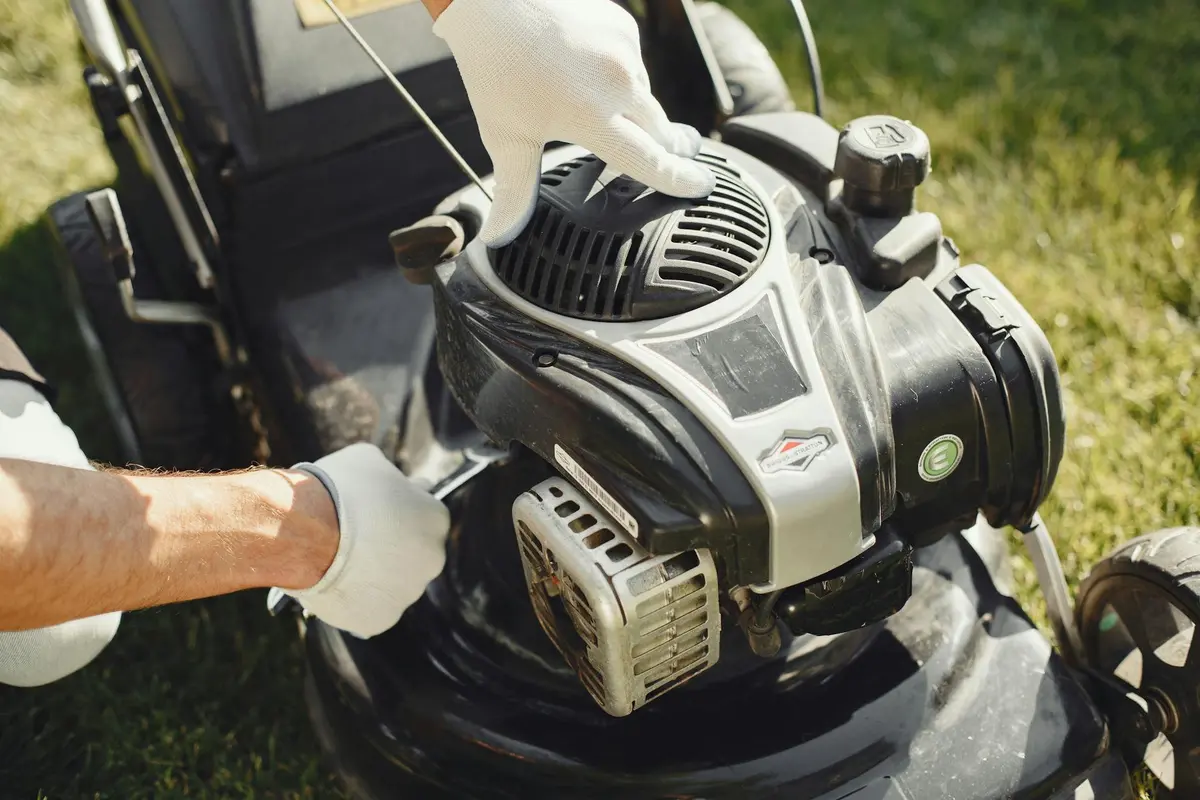
The best advice I can give is to start simple. Before you assume the worst, check the recoil spring assembly for a simple jam or a slipped pulley. Most of the time, a stubborn pull cord is a quick fix, not a death sentence for your mower. If your mower starts and then stops, that’s a familiar clue. Often a quick check of fuel, air, and spark will set you on the right path. Getting your hands a little dirty with this repair saves you a trip to the shop and gets you back on the lawn faster.
Fixing your own equipment is a big part of responsible lawn care. When you’re done, recycle any old parts properly and give Max a quick wipe-down to prevent future grime. Every small repair you learn builds confidence for the next project, making your whole lawn care routine smoother and more rewarding—especially when deciding between DIY and professional repair.
Related Guides and Information
- How to fix a pull cord on a lawn mower that won’t retract – Quora
- What to do when your lawnmower pull cord is stuck: 5 fixes | Homes and Gardens
- SOLVED: Why won’t my pull cord retract? – Briggs and Stratton 675 Series Repair – iFixit
- r/lawnmowers on Reddit: Replaced pull start but new one still won’t retract. Help diagnosing.
- Pull Start Cord | Guaranteed Unbreakable! | diamondcord™
Written by Ria Carrington. Ria is an avid lawn care enthusiast and advisor. No lawn is unsalvagable when Ria is at work. She has helped countless homeowners breath new life into their dying lawns. She has a B.Sc in Agriculture and brings practical advice combined with knowledge of plant science and her decade worth of hands on experience.