
How Does a Lawn Mower Carburetor Work and What Does It Cost to Fix or Replace?
That sputtering sound or a mower that just won’t start can quickly ruin your weekend plans. Figuring out the carburetor is the key to getting back on schedule without blowing your budget.
This guide breaks down how a small engine carburetor functions, the clear signs it is failing, your DIY repair options and costs, typical professional service charges, and how to decide between a fix or a full replacement.
I have personally cleaned and adjusted the carburetor on my mower, Max, saving myself plenty on repair bills over the years.
At a Glance: Key Takeaways for Your Saturday Morning Fix
Before you grab your toolbox, here’s what you need to know in a hurry.
- Its main job is to mix air and fuel into a perfect vapor your engine can burn, then control how much of that mix goes in to set the engine’s speed.
- You have three choices: clean it (for gunk and old gas), rebuild it (for worn gaskets or jets), or replace it (for major damage or if it’s cheaper than a rebuild).
- A professional repair typically runs between $75 and $200. Doing it yourself can cost as little as a $10 cleaning kit or $30 to $100 for a new carburetor.
The best news is that a thorough cleaning fixes most common problems, and it’s a job you can likely handle yourself for the cost of a can of cleaner.
What Is a Lawn Mower Carburetor, Really?
Think of your carburetor as your mower engine’s stomach. Its only job is to take liquid gasoline and mix it with air, creating a fine, combustible mist that the engine can actually digest and use for power.
Getting this mix right is everything. Too much fuel and the engine runs rough and smoky, like a cake with too much oil. Too much air and it sputters and dies, like a fire without enough kindling. The carburetor’s delicate balancing act is what determines whether your mower starts on the first pull or leaves you sweating and frustrated.
Modern cars use precise, computer-controlled fuel injection. But for the simple, affordable engines on our home mowers, the carburetor is still the king. It’s cheaper to make and, when it works, perfectly reliable.
I think about this every time I fire up Max, my zero-turn. That little metal box bolted to his engine is what lets him chew through my backyard every weekend. When it’s happy, he purrs. When it’s dirty, he complains. It’s that simple.
How Does a Lawn Mower Carburetor Work? A Simple, Step-by-Step Look

When Max, my zero-turn, starts sputtering, I know the trouble often traces back to this little metal box. It sounds complicated, but a carburetor is just a smart mixer. Its job is to blend just the right amount of air and gasoline into a vapor your engine can burn.
Think of it like making a perfect cup of coffee. Too much water (air) and it’s weak and won’t run right. Too much coffee (fuel) and it’s a sludgy, choking mess. The carburetor’s job is to find that sweet spot every time you pull the cord.
Step 1: The Engine Pulls in a Breath of Air
You pull the starter cord or turn the key. As the piston moves down inside the engine, it creates a vacuum. This suction pulls a rush of outside air through the carburetor’s intake. You might hear a faint hiss. This is where the whole process begins. Without this airflow, nothing else happens.
Step 2: The Magic Pinch That Creates Suction
That incoming air gets funneled through a narrow, hourglass-shaped tube inside the carb called a venturi. Just like when you blow hard over the top of a straw in your soda, the faster-moving air through this pinch creates a low-pressure zone, or suction.
This venturi effect is the secret sauce that pulls the fuel up into the airstream. No fancy pumps, just simple physics you can demonstrate at your kitchen table.
Step 3: Gas Meets Air to Make Fuel Vapor
Sitting below the venturi is a small fuel bowl, like a tiny gas tank. A thin tube, called a jet, leads from this bowl up into the low-pressure zone in the venturi. The suction yanks gasoline up through this tube, where it gets atomized-turned into a fine mist-by the rushing air.
That sharp, clean smell when you first start your mower? That’s this fresh mix of air and atomized fuel, ready to burn.
Step 4: Your Throttle Controls the Recipe
You don’t mow at full blast all the time. A butterfly valve, connected to your engine’s throttle lever, sits in the carburetor’s throat. When you set the engine to idle, this valve is nearly closed, allowing just a tiny, rich mixture through to keep it ticking over.
Open the throttle to mow, and that valve swings wide. Now it lets a huge volume of that mixed air-fuel vapor rush into the engine for full power. A sticky or gunked-up throttle valve is why your mower might surge or die when you try to change speeds. It can’t adjust the recipe smoothly.
Lawn Mower Carburetor Parts You Should Know (And What They Do)
Think of the carburetor as the mower’s brain for fuel and air. When it gets dirty or a part sticks, your engine stumbles. Knowing a few key parts helps you talk to your repair shop or even tackle a simple clean yourself. I’ve had my share of frustrating mornings with Max sputtering, and a little knowledge goes a long way.
Before you touch anything, this is your golden rule: disconnect the spark plug wire. This is non-negotiable for your safety and keeps curious pets from getting hurt if the engine accidentally turns over.
Fuel Bowl
This is the clear or metal cup underneath the carburetor that holds a small reserve of gas. Imagine it like a coffee cup that needs to stay half full. If it’s too full, gas overflows into the engine. If it’s empty, the engine starves.
A cracked bowl or one filled with gummy, old fuel residue is a classic cause of hard starting and poor performance.
Float and Needle Valve
These two parts work as a team inside the fuel bowl. The float is a hollow plastic or brass piece that rides on top of the gas. The needle valve is the tiny plunger it controls.
Their job is to shut off the flow of new gas when the bowl is full, and let more in when it’s low. It’s a perfect little mechanical feedback loop.
A stuck float, often from varnish, will cause fuel to flood the engine or not reach it at all. You might see gas dripping from the air filter or carburetor body.
Jets
These are tiny brass fittings with precise holes drilled in them. They are the final gatekeepers, metering the exact amount of fuel that gets sucked into the engine’s airstream.
The most common carburetor issue is a clogged jet from stale fuel or debris. This is like trying to breathe through a pinched straw. The engine will run lean, lack power, or die at idle.
Choke
The choke is a plate or valve that restricts airflow when you start a cold engine. By making the mixture richer (more fuel, less air), it helps the engine fire up until it warms.
A choke that sticks closed will flood the engine; one that sticks open makes cold starts nearly impossible. You’ll usually operate it with a lever or knob on the engine.
Throttle Plate
This is the gate that controls how much air flows into the engine. Open it wide for full power, close it partway for a steady idle. It’s connected to your engine’s governor system and the speed control on your mower’s handle.
A throttle plate that doesn’t move freely, or a spring that’s come loose, will prevent you from controlling the engine’s speed. Think of it like a garden hose sprayer stuck on one setting.
How to Spot Carburetor Trouble: Common Symptoms and Sounds
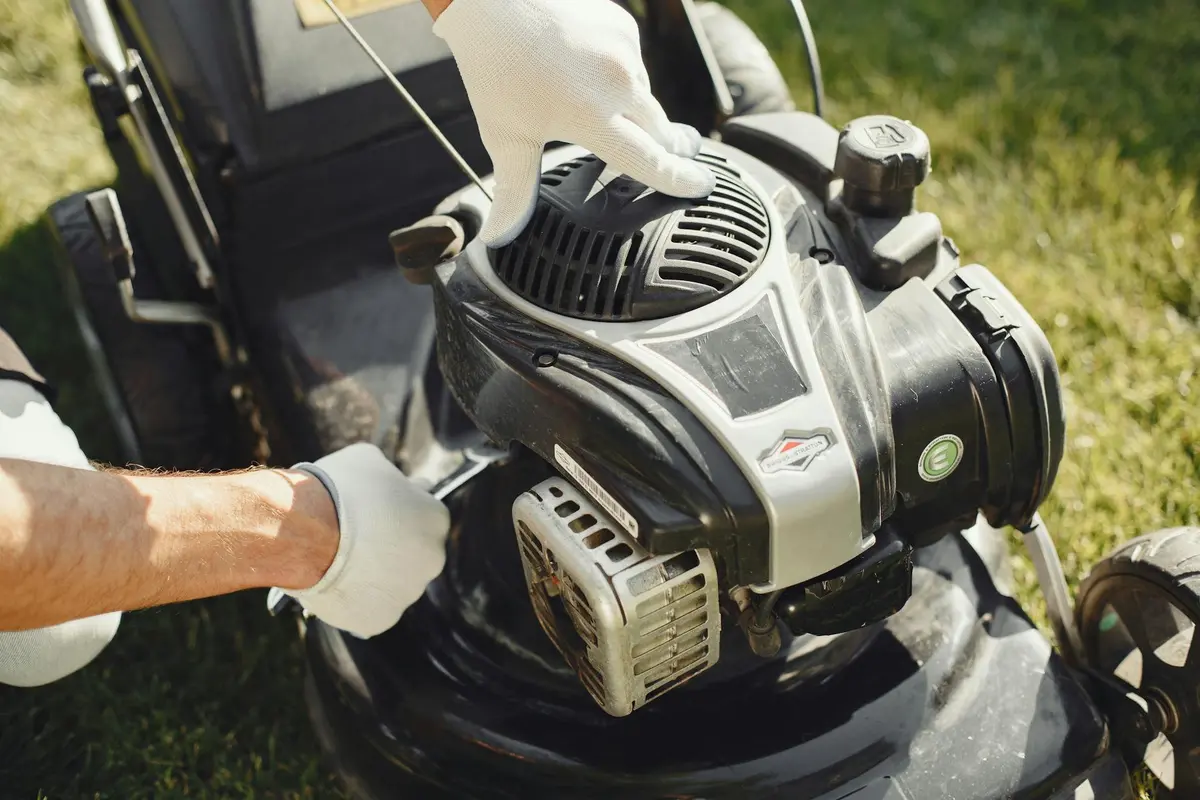
You know that feeling. You pull the cord, and instead of the confident roar you expect from Max, you get a weak cough or stubborn silence. When your mower acts up, the carburetor is often the prime suspect because it’s the heart of the fuel system. Learning the signs can save you a weekend.
The Clear Signs Your Carburetor is Crying for Help
These are the things you can see and feel. Trust your senses.
- Hard Starting: The engine refuses to turn over, or it takes a dozen pulls. This is often the first and loudest complaint.
- Rough Idle: The engine sounds uneven or shakes when it’s just running in place. It should purr, not chug.
- Black Smoke: Thick, dark smoke from the exhaust means too much fuel is burning. That’s a rich mixture, a classic carb issue.
- Loss of Power: The mower bogs down in thick grass or struggles on a slight incline. It feels lazy and weak.
- Gas Leaks: You smell fuel more than usual or see wet spots around the carburetor bowl. A worn gasket or float is likely.
Listen Closely: The Sounds of a Struggling Carb
Your ears are great diagnostic tools. Here’s what to listen for.
- Sputtering and Hesitation: The engine doesn’t run smoothly. It sounds like it’s choking, hiccuping as it tries to draw fuel.
- Backfiring: A loud pop or bang from the muffler. This often happens when unburned fuel ignites where it shouldn’t.
- Dying Under Load: The engine runs okay until you engage the blades. Then it stalls immediately. This is a dead giveaway that the carb can’t deliver the extra fuel needed for work.
Connecting the Dots: Symptoms and Their Likely Causes
These problems don’t just happen. They point to specific failures inside the carb.
- Hard starting, sputtering, dying: Often caused by stale gas clogging the tiny jets and passages. Old fuel turns to varnish and gunks everything up.
- Rough idle, black smoke: Could be a dirty air filter restricting airflow, creating a too-rich fuel mix. Or, the carb’s internal settings are out of whack.
- Gas leaks, poor running: Points to a worn float, needle valve, or bowl gasket. These parts control the fuel level inside the carb, and when they fail, the system floods or leaks.
Your Simple Diagnostic Flow: Start Here, Not with the Wrench
Before you blame the carburetor, run through this quick check. It solves more problems than you’d think.
- Check the Fuel First: Is the gas fresh (less than 30 days old)? If it’s from last season, drain it. Stale fuel is the number one cause of carb issues.
- Inspect the Air Filter: Pull it out. If it’s caked with dirt and grass, it’s starving the engine of air. A clean filter is a simple fix.
- Now Suspect the Carb: If fuel is fresh and the filter is clean, the problem is almost certainly inside the carburetor itself. This is where a cleaning or rebuild comes in.
Following this order prevents you from taking apart a perfectly good carburetor for a problem that started in your gas can.
A Note on Seasonal Headaches (Especially After Winter)
If your mower ran fine when you stored it but now won’t start, you are not alone. This is the most common story. Modern ethanol-blended fuel attracts moisture and turns gummy in just a few months inside your mower’s fuel system. Those gummed-up jets are why your spring start is so frustrating. Using a fuel stabilizer before storage or simply running the engine dry of gas in the fall can prevent this entire battle.
How to Clean a Lawn Mower Carburetor: A DIY Guide for Homeowners
When your mower sputters, won’t start, or runs rough, a gunked-up carburetor is often the villain. Old gas leaves behind a varnish that clogs the tiny passages inside. The good news is you can often fix this yourself in under an hour.
Cleaning the carburetor on your mower is a straightforward repair that can save you a trip to the shop and get your machine running smoothly again. It’s one of the many basic maintenance tasks you can perform yourself to keep your lawn mower in top shape.
What You’ll Need: The Tool Pile
Gather these items before you start. You likely have most of them.
- Safety glasses
- Work gloves
- Basic screwdrivers (flathead and Phillips)
- A set of socket wrenches
- A small can of carburetor cleaner
- A small, soft-bristled brush (an old toothbrush works perfectly)
- A clean workspace (I use my garage workbench)
- A small container with a lid for parts
Step 1: Safety First – Disconnect and Drain
This is non-negotiable. You are working with fuel and a machine that wants to spark.
- Disconnect the spark plug wire. Pull the boot off the plug and secure it away so it cannot accidentally reconnect. This prevents the engine from starting while you’re working.
- Drain the gas tank. Use a siphon or carefully tilt the mower (engine side up) over a approved gas container. Old gas is the root cause of most carb problems, so start fresh.
Always disconnect the spark plug before doing any work on your mower; it’s the easiest way to prevent a dangerous accident, especially when changing the spark plug.
Step 2: Removal and Disassembly
Now, let’s get the carburetor off. On my mower, Max, it’s bolted to the side of the engine with fuel lines attached. You can identify the location of the carburetor on your mower before starting.
- Take a picture of the carburetor and fuel lines with your phone. This is your free reassembly guide.
- Use a wrench to loosen the bolt(s) holding the carburetor to the engine.
- Carefully disconnect the fuel line(s). Have a rag handy for a few drips.
- Place the carburetor on your workbench.
- Here’s my personal tip: use that small container. As you remove screws, bowl gaskets, and tiny parts, put them in the container in the order they came off. It keeps everything organized and prevents lost springs.
Step 3: The Deep Clean – Focus on the Passages
This is the critical part. Carburetors mix air and fuel in a precise ratio. The jets and passages that do this are tiny.
Think of the main jet like a drinking straw. If even a little dried soda gums up the inside, nothing flows through. Your job is to make that straw spotless.
- Spray every part liberally with carburetor cleaner. Soak the main body, the float bowl, the jets, and the float needle.
- Use your small brush to gently scrub away visible gunk and varnish.
- Locate the main jet (usually a brass piece with a small hole in the center). Spray cleaner directly through the hole. You should see a fine mist come out the other side.
- Do the same for all visible passages in the carburetor body.
- A warning: some harsh chemicals can damage the rubber or plastic seals over time. Look for a cleaner that is safer for seals, or simply remove delicate gaskets before spraying.
Spray carburetor cleaner directly through every tiny hole and passage until it flows through cleanly; that’s how you know it’s unclogged.
Step 4: Reassembly and Reinstallation
You’re on the home stretch. This is where your photo and organized parts container pay off.
- Let all parts air dry completely. No cleaner residue should remain.
- Reassemble the carburetor in reverse order. Refer to your photo.
- Carefully reattach the fuel line(s).
- Bolt the carburetor back onto the engine. Don’t overtighten the bolts.
- Reconnect the spark plug wire.
- Fill the tank with fresh, ethanol-free gas if you can find it (it’s much better for small engines).
Give the primer bulb a few presses, set the choke, and give the pull cord a tug. With a little luck, you’ll hear the smooth purr of a fixed engine. If it still struggles, the carburetor might need a rebuild kit or full replacement, but you’ve just ruled out the most common and fixable problem yourself.
How to Rebuild a Lawn Mower Carburetor: When Cleaning Isn’t Enough

How do you rebuild a lawn mower carburetor? You take the thing apart and replace its tired internal parts with fresh ones from a kit. It’s not surgery, but it does require a careful hand and patience. I’ve had to do this with old Max, my trusty mower, after a particularly long, damp season. A simple spray clean just wasn’t cutting it anymore. Sometimes the issue isn’t just the carburetor—the engine itself may need a rebuild overhaul. That’s the natural next step to restore full power and reliability.
You know it’s time for a rebuild when cleaning fails to fix the problem. If your mower still sputters, won’t hold an idle, or gas leaks from the carburetor bowl after you’ve cleaned every jet, the issue is likely mechanical.
This usually points to worn-out soft parts that a cleaner can’t fix, like cracked gaskets, a damaged float, or a needle valve that no longer seals.
The Rebuild Process: A Kit and Some Care
First, you need the right rebuild kit. Find the model number on your mower’s engine (not the mower deck), and search for a carburetor kit for that exact model. The kit will have the parts you need, which you can cross-check using your compatibility guide.
Here are the basic steps. Take your time with each one.
- Remove the carburetor from the engine. This usually means disconnecting the fuel line, the throttle linkage, and a couple of bolts.
- Disassemble it on a clean, well-lit work surface. A white towel is perfect. It keeps parts from rolling away and makes tiny pieces easy to see.
- Take photos with your phone at each stage of disassembly. How that spring was hooked or which way a gasket faced will be a lifesaver later.
- Swap the old parts for the new ones from your kit. The needle valve and seat are critical-this is what controls fuel flow into the bowl. Replace every gasket and seal you see.
- Give all the metal passages and the main jet another quick spray with carb cleaner as you reassemble, following your photos in reverse order.
- Reinstall the carburetor, reconnect everything, and test it out.
Is It Worth the Effort?
Rebuilding is more hands-on than just spraying in cleaner, but it’s almost always cheaper than buying a brand-new carburetor. A rebuild kit typically costs between $15 and $30. A whole new carburetor unit can run from $40 to well over $100.
You’re trading a bit of your time and focus for significant savings, which is a win in my book for maintaining older equipment.
That said, look at those tiny parts on your white towel. If you’re feeling unsure or frustrated, this is a very smart point to stop. Reassembling something incorrectly can lead to bigger problems. There’s no shame in taking the carburetor (or the whole mower) to a small engine shop at this stage. They can finish the rebuild quickly and correctly, often for a reasonable fee that still keeps you under the cost of replacement. Especially if you’re not familiar with working on lawn mower parts and repairs.
Lawn Mower Carburetor Costs: Fixing, Replacing, and What to Expect
A question I hear often is, “What does a mower carburetor cost?” It comes up when your mower sputters or refuses to start on a Saturday morning. Let’s walk through the numbers so you can plan your fix without surprise.
Prices vary a lot depending on your mower’s make and model, but I’ll give you realistic ranges from my own trips to the parts store and chats with repair shops. Remember, a simple fix today can save you a big bill tomorrow.
Your Repair Options and Their Price Tags
Here’s a clear look at what each path typically costs. I’ve included what you’re actually paying for.
| Option | Typical Cost Range | What It Covers |
|---|---|---|
| DIY Cleaning | $5 to $15 | A can of carburetor cleaner spray. This is for a basic clean of gunk and varnish. |
| Rebuild Kit | $10 to $30 | A bag of new gaskets, needles, and seals to refresh your existing carburetor. |
| New Carburetor Unit | $20 to $100+ | A complete, brand-new carburetor assembly ready to install. |
| Professional Labor | $50 to $150 per hour | Shop time for a mechanic to diagnose, remove, and repair or replace the carb. |
For a professional repair, the total often lands between $75 and $250, combining parts and an hour or two of labor. When Max, my zero-turn, needed work, the quote helped me decide to do it myself.
What Changes the Final Bill?
Your final cost isn’t just about the part. A few key factors swing the price.
- Mower Age and Model: A carburetor for a common, recent mower is cheaper and easier to find. For an old or rare model, parts can be scarce and pricier.
- Carburetor Availability: Some carbs are sold everywhere. Others you might need to order online, which adds shipping and wait time.
- Local Shop Rates: Labor costs depend on your area. A shop in a big city often charges more than one in a small town.
I always check online for my mower’s model number first. It gives me a ballpark before I call a shop.
Repair or Replace? A Simple Cost Check
For an older mower, a new carburetor might not make financial sense. Think of it this way: if your mower is 10 years old and worth $200, spending $150 on a new carb and labor might be more than the mower’s value. This is a classic DIY vs professional repair decision. Sometimes a simple DIY clean makes sense, but for bigger issues a pro can be safer and faster. In that case, a DIY clean or rebuild kit is the smarter move. It gets you another season or two without a big investment. Patch, my problem area, taught me that sometimes a modest fix is the best long-term play.
A Penny of Prevention
Here’s my best tip to avoid this cost entirely. Invest in a fuel stabilizer and use it every time you store your mower, especially over winter. It keeps gas from turning into gunk inside the carb. This simple step prevents most carburetor issues. It saves you money and keeps an old mower out of the landfill, which is a win for your wallet and our pollinator friends. Sunny, my drip system, reminds me that small, efficient habits pay off big.
When to Repair, Replace, or Call a Professional: Making the Smart Choice

Hearing your mower sputter and die is frustrating. I’ve been there with Max, my zero-turn. The good news is you don’t need to panic. Most carburetor problems follow a logical path to a fix.
Start with a simple three-step decision tree: clean it first, rebuild it if internal parts are worn, and replace it only if parts are unavailable or the cost is ridiculous. This approach saves money and teaches you a lot about your machine.
The Homeowner’s Carburetor Decision Tree
- Clean It. This is always step one. Old gas leaves varnish that clogs the tiny jets and passages inside. A thorough cleaning with carburetor spray and a thin wire fixes more problems than you’d think.
- Rebuild It. If cleaning doesn’t work, a worn needle valve, torn gasket, or faulty float might be the culprit. You can buy a small kit with these specific parts for about $15 to $30. Rebuilding means swapping these pieces while keeping the main carburetor body.
- Replace It. Go here only if the body itself is damaged, if you can’t find a rebuild kit, or if a whole new carburetor costs less than the rebuild kit and your time.
Signs It’s Time for a New Carburetor
Sometimes, replacement is the only sensible choice. Look for these red flags:
- A Cracked or Warped Body: If the main metal or plastic body is physically damaged, it can’t hold a proper seal. No amount of cleaning or new gaskets will fix a fuel leak from a crack.
- An Obsolete Model: For very old mowers, the manufacturer may have stopped making rebuild kits. Finding the exact tiny part you need can become a costly scavenger hunt.
- Cost Exceeds Mower Value: This is the big one. If a professional repair quote is $200 and your mower is 15 years old, buying a new carburetor yourself for $40 makes sense. If the mower itself is only worth $100, it might be time to start shopping for a new machine instead.
When to Hand It Over to a Pro
There’s no shame in calling for help. Knowing your limits is what smart homeowners do.
Seek a professional if you lack the specific tools, the free time for a multi-hour project, or your confidence fades after trying the basic clean-out.
Some tasks, like precisely adjusting the fuel mixture screw on certain models, require a special tool and an experienced ear to tune the engine sound. Getting this wrong hurts performance and increases harmful emissions.
I called a small engine shop the first time I had to sync two carburetors. They had it done in an hour. My Saturday was saved for actually mowing.
A Final Word of Reassurance
Remember, a gummed-up carburetor from bad gas is the most common issue. It’s often a straightforward, affordable fix you can handle on a Saturday morning.
With some patience and the right approach, you can solve most carburetor problems at home, keeping a trusted mower like Max running smoothly for many more seasons.
Greedy Grass Carburetor Cost FAQ: Smart Fixes for Your Budget
Will my homeowner’s insurance cover a carburetor repair?
Almost certainly not. Home insurance is for sudden, accidental damage like a fallen tree branch, not routine maintenance or mechanical wear and tear on your mower. This repair comes out of your household budget, so the DIY route is your best wallet-saver.
I found a carburetor online for $20. Is it too good to be true?
Often, yes. While great deals exist, ultra-cheap carbs are frequently poor-quality knockoffs with inconsistent fueling that can damage your engine. Stick to reputable brands or OEM parts; a reliable $50 carb is far greedier for your grass than a bargain-bin gamble.
My mower is 8 years old. At what point should I stop repairing the carburetor?
When the repair cost nears half the value of a comparable new mower, it’s time to reconsider. If a pro quote hits $250 and a decent new mower is $500, investing in the repair can still be smart, but start weighing long-term reliability. For quick guidance, our lawn mower cost buying guide helps you weigh repair versus replacement. It explains when repair pays off and when to look at new models.
How do I know if I’m in over my head and should just call a pro?
If you’ve completed a thorough cleaning and the problem persists, or if the thought of matching tiny springs and linkages makes you sweat, call in the pros. Paying for one hour of labor is smarter than a weekend of frustration and a possible tow to the shop.
What’s the single best way to avoid ever paying for a carburetor fix?
Use a fuel stabilizer with every tank and always run the mower dry before winter storage. This one habit prevents the gunk that causes 90% of carb issues, keeping your money in your pocket and your mower ready to feast on grass.
Final Thoughts on Carburetor Care
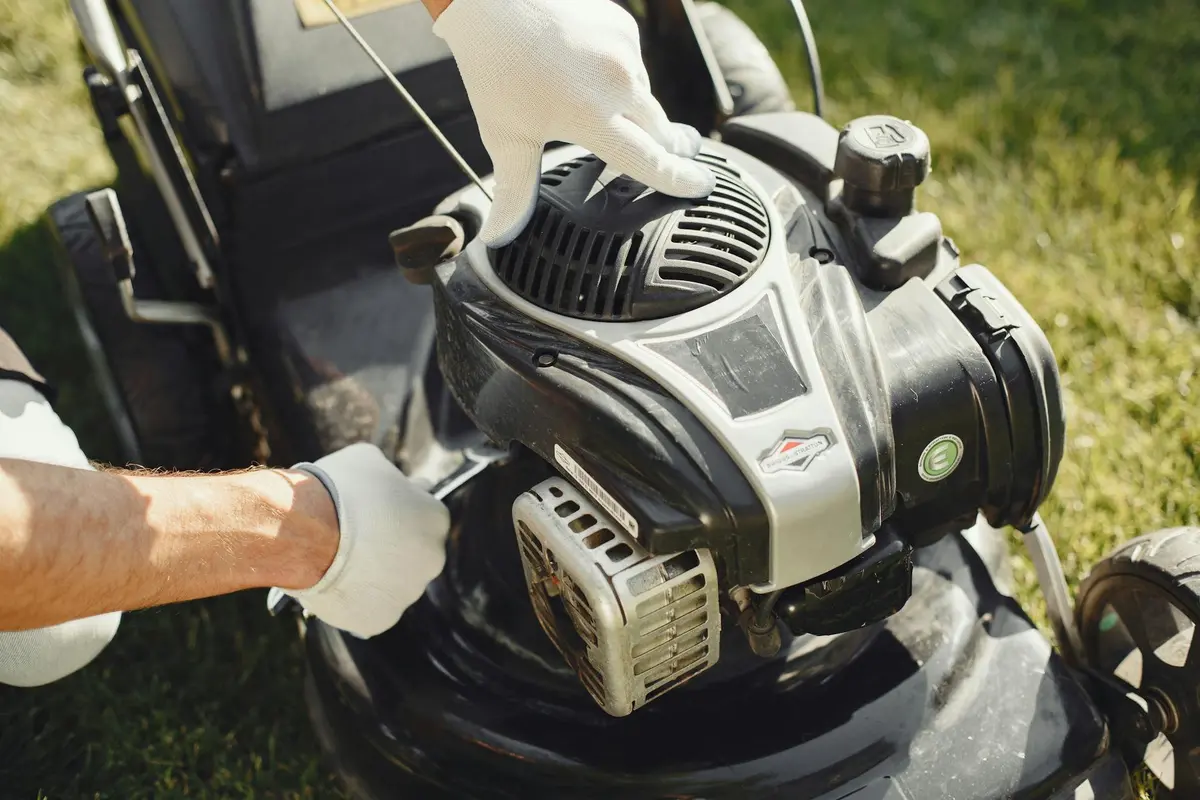
Your best defense against carburetor trouble is simple, consistent care. Regular cleaning with a spray cleaner and using ethanol-free fuel will solve most starting and running issues before they become expensive. It’s a small habit that keeps your mower ready for every cut.
Fixing a part instead of replacing the whole machine is a win for your wallet and the planet. Taking the time to learn these basics makes you a more responsible homeowner and helps you grow a healthier, thicker lawn with less frustration.
Sources and Additional Information
- Amazon.com: Lawn Mower Carburetor
- Lawn Mower Carburetors for Various Brands and Models at Low Prices
- Lawn Mower Carburetors at Tractor Supply Co.
- Mower – Small Engine Carburetors – The Home Depot
- Lawnmower Carburetor Parts for sale | eBay
- How Much Does Lawn Mower Repair Cost? – Bob Vila
- r/Columbus on Reddit: Mower Repair Price Shopping: Carburetor Rebuild
Written by Ria Carrington. Ria is an avid lawn care enthusiast and advisor. No lawn is unsalvagable when Ria is at work. She has helped countless homeowners breath new life into their dying lawns. She has a B.Sc in Agriculture and brings practical advice combined with knowledge of plant science and her decade worth of hands on experience.