
What Voltage and Specs Do Your Lawn Mower Batteries Need?
Staring at a dead mower and unsure which battery to buy? Let’s clear up the confusion around lawn mower battery voltage and specs.
We will cover common battery voltages, the different types available, key specifications like amp-hours, and how to ensure compatibility with your mower.
I’ve learned this through years of hands-on testing and keeping my own mower, Max, running without wasting a dime.
At a Glance: Key Factors for Your Mower Battery
Standing in the store aisle or scrolling online, it’s easy to get lost in codes and numbers. Ignore the marketing fluff and look for these five things on the battery’s label. They’re the non-negotiables.
Voltage is your starting power; you must match what your mower needs, usually 12 volts. Think of voltage like the water pressure in your garden hose. A 12V system needs a 12V battery. Trying to use a 6V battery is like trying to water your lawn with a trickle-it just won’t have the push to crank the engine. Most riding mowers and lawn tractors run on a standard 12V system, just like your car.
The Amp-Hour (Ah) rating tells you how long the battery can run, like the size of a water tank. If voltage is pressure, amp-hours are capacity. A higher Ah rating means a bigger “tank” of power. For mowers, you’ll typically see ratings between 20Ah and 35Ah for lead-acid batteries. A bigger lawn or a mower with more features might benefit from a higher Ah battery for consistent performance, especially if you’re also powering headlights or a charging port.
Battery Group Size is the physical blueprint; get this wrong and it won’t fit the tray. This is a standardized code like U1 or 26R that defines the battery’s length, width, and height. It’s the most common fitment issue I see. Before you buy, check your old battery or your mower’s manual for this code. A U1 group is very common for many riding mowers.
Terminal Type dictates how the cables connect, and the wrong style won’t hook up. Look at the metal posts on top. The most common types are T1 (top-post, like a car) and T2 (side-post). Some mowers use automotive-style posts with wing nuts, while others might have bolt-on tabs. Take a phone picture of your old battery’s terminals before you head to the store.
Chemistry is the heart of it, choosing between traditional lead-acid and modern lithium-ion. This is the big choice. Traditional lead-acid (often labeled SLA/AGM) is reliable and affordable but heavy and needs occasional maintenance charging. Lithium-ion (Li-ion) is much lighter, lasts longer, and holds a charge all winter, but costs more upfront. For my money, if you can swing it, the convenience of Li-ion is worth it for a mower battery.
Tools You’ll Need for Battery Work
You don’t need a fancy garage. A few basic tools handle 95% of battery jobs. I keep this kit on a shelf right next to Max, ready to go.
- A Basic Wrench or Socket Set: Usually 10mm, but sometimes 5/16″ or 7/16″. A small adjustable wrench can work in a pinch.
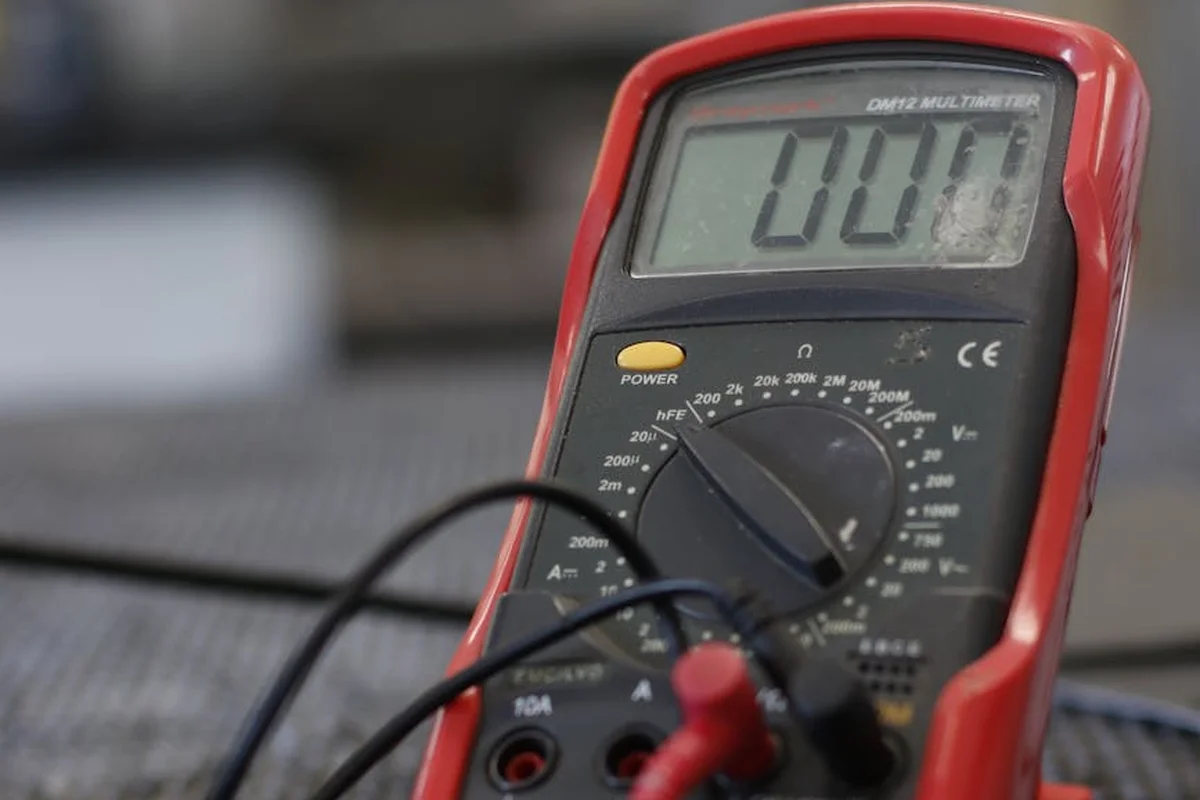
- A Voltmeter or Multimeter: This is your diagnostic lifeline. A cheap one from any hardware store lets you check voltage to see if the battery is charged or dead.
- Baking Soda & Water Mix: For cleaning corrosion. A spoonful of baking soda in a cup of water neutralizes the acidic gunk that builds up on terminals.
- A Small Wire Brush or Terminal Cleaner: To scrub those posts and cable ends until they shine bright metal. Good contact is everything.
- Safety Glasses and Gloves: Non-negotiable. Battery acid is no joke, and a slipping wrench can scratch metal.
A dedicated battery charger/maintainer is less of a tool for the job and more of a long-term investment in your battery’s health. I plug mine into Sunny’s outlet in the garage. A good maintainer, especially for lead-acid batteries, keeps it perfectly charged over the winter. It prevents the slow death that comes from sitting discharged. It’s saved me from buying a surprise new battery more than once.
What Voltage Does Your Mower Need? (6V, 12V, or More?)
For your riding mower or zero-turn, the answer is almost always 12 volts. I spent last weekend replacing the battery in my own machine, Max, and grabbing a 12V was the only option on the shelf. Modern lawn tractors and zero-turn mowers use a 12-volt system, just like your car.
You might see references to 6-volt batteries. They’re rare. You’d only find one in a very old machine or in a setup where two 6V batteries are wired together to create a 12V system.
Let’s clear something up. This talk of 12V is for the starter battery that cranks the engine. Smaller, cordless electric walk-behind mowers use different, proprietary battery packs (like 40V or 80V) that power the blade directly. We’re focusing on the engine-starting battery here.
When we say a battery is a “12-volt lawn mower battery,” we mean its nominal, or named, voltage. A healthy, fully charged 12-volt lawn mower battery will actually read between 12.6 and 12.8 volts when you test it with a meter. That’s your target. This voltage check is a useful baseline when you test other lawn mower electrical components for proper operation, too. In the next steps, we’ll show how to apply these checks across different parts of the system.
How to Test Your Mower’s Battery Voltage
Don’t guess if your battery is dead. A cheap digital multimeter tells you the truth in seconds. Here’s how I do it.
- Set your multimeter to DC Volts, usually marked with a “V” and a solid and dashed line. Use the 20V setting.
- Connect the probes. The red probe goes to the battery’s positive (+) terminal. The black probe goes to the negative (-) terminal. Listen for that solid beep on a modern meter.
- Read the number. This is your battery’s resting voltage.
Here’s your quick guide to the reading: 12.6V or higher means you’re good to go, 12.0V to 12.5V means it needs a charge, and anything below 11.8V is likely depleted and struggling.
You might see the voltage dip briefly when you turn the key to start the mower. That’s normal. This “lawn mower battery voltage drop” is the battery delivering a huge burst of power to the starter motor. If it drops below 9.5V, the battery is probably too weak.
Understanding the Other Key Specifications
Voltage is just the first box to check. The other numbers and letters on the battery’s label are just as important. Get one of these wrong, and your new battery won’t fit or won’t work right.
Amp-Hours (Ah): Your Battery’s “Fuel Tank”
Voltage is like water pressure. Amp-hours (Ah) is the size of the water tank. Amp-hours measure the battery’s capacity, or how much total power it can store for later use. A higher Ah rating means a bigger “fuel tank.” It gives you more reserve power for those cold starts or for running extra lights.
People often ask “how many amps in lawn mower battery?” and it causes confusion. They’re usually thinking of Cold Cranking Amps (CCA), which is the burst of power to start a cold engine. For capacity, you care about Amp-Hours (Ah). For a typical riding mower, look for a battery in the 30Ah to 50Ah range. When replacing a battery, you can safely choose one with the same or slightly higher Ah rating than your original. If you’re shopping, you can compare lawn mower battery prices to balance cost and capacity. This helps you buy the right battery without overpaying.
Physical Fit: Group Size and Terminal Type
The battery has to actually fit in the metal tray under your mower’s seat. This is where group size comes in. It’s a code like U1 or 26R that defines the battery’s exact length, width, and height.
Terminals are how the battery connects. The two main types for mowers are:
- Automotive Posts: These look like the classic round posts on a car battery. Cables clamp directly onto them.
- “T” Style or Screw Terminals: These have a flat, threaded stud. You attach the cable with a nut and washer. Many zero-turn mowers use this style.
If the group size or terminals don’t match, you can’t install the battery, no matter how perfect the voltage is. Take a picture of your old battery before you go shopping.
Battery Chemistry: Lead-Acid vs. Lithium (Li-ion)
You have two main choices for chemistry, and it comes down to your habits and budget.
Lead-Acid (Flooded or AGM): This is the traditional, lower-cost choice. They work fine but can sulfate (go bad) if left discharged. AGM batteries are sealed and maintenance-free, a good upgrade. They don’t love extreme cold when sitting unused.
Lithium (Li-ion): These are lighter, last years longer, and hold their charge much better in storage. They also handle cold shed temperatures better than a lead-acid battery. The catch is a higher upfront cost.
My take: if you’re diligent about using a battery maintainer and store the mower in a garage, a quality AGM lead-acid battery is a solid value. If your mower lives in an unheated shed and you want “install and forget” reliability, lithium is worth the investment. There’s no substitute for a multi-stage charger for lawn mower batteries though.
How to Find the Right Battery for Your Machine

Getting the wrong battery is a hassle you don’t need. This simple guide cuts through the noise and gets you the right part.
Step 1: Check the Old Battery’s Label
Your old battery holds all the answers. It’s the best guide you have.
Pull it out safely and wipe off any dirt. Look for the main label. You need to write down four things.
- Voltage (V): This is the big one. It’s almost always 12 volts for riding mowers and some walk-behinds.
- Amp Hours (Ah): Think of this as the battery’s gas tank size. A higher number means more runtime.
- Cold Cranking Amps (CCA): This is its starting power on a cold morning. Important for electric-start engines.
- Group Size (e.g., U1, 26R): This is the battery’s physical shape and terminal layout. It must fit your mower’s box.
Write every single number down. Take a picture with your phone. This list is your shopping list. I learned this the hard way once by only noting the voltage and Ah, then spent an afternoon trying to cram the wrong group size into Max’s tight battery tray.
Step 2: Consult Your Mower’s Manual
If you have the owner’s manual, it will list the exact battery specifications. Check the index for “battery” or “specifications.”
Can’t find the manual? No problem. Look for the model number sticker on your mower. It’s often under the seat, on the frame by the engine, or inside the hood. A quick search online for “[Mower Brand] [Model Number] owner’s manual” will usually turn up a free PDF. The model number is your key to the factory’s recommendations.
Step 3: When an Exact Match Isn’t Available
Sometimes the exact brand and model you had isn’t on the shelf. Don’t panic. You just need to match the specs, not the sticker.
Follow these rules. They have never steered me wrong.
- Voltage MUST match. Put a 12V battery in a 12V system. This is not flexible.
- Group Size MUST match. This ensures it fits the space and the terminals are in the right place.
- Amp Hours (Ah) can be equal or slightly higher. A battery with more Ah is safe and gives you more reserve power.
- Terminal Type MUST match. Automotive posts (round, on top) or side terminals (flat, on the side) need the right cables.
A common worry is, “Won’t a battery with more amps hurt my mower?” The answer is no. Think of it like a water hose. The battery is the water tank. The mower’s starter is the faucet. The mower will only “draw” the amps it needs, so a bigger tank (higher Ah) is just a benefit, not a danger.
Caring For Your Battery to Make It Last
A good battery is an investment. A little routine care saves you money and the headache of a no-start mower right when the grass is getting tall. For longer life, simple practices in electric lawn mower battery lifespan care can help you get more from each charge. Small habits, like proper charging and storage, make a big difference.
The Winter Storage Ritual (And Summer Tips)
When you put the mower away for the season, give your battery a proper send-off. I do this every fall, right after Max’s final cut.
- Clean the terminals. Brush off any white or blue crusty corrosion.
- Charge it fully. A 100% charged battery resists freezing and sulfation, which kills batteries.
- Disconnect it or use a maintainer. Simply disconnecting the negative cable stops slow power drain. For best results, connect a battery maintainer.
- Store it in a cool, dry place. A garage shelf or basement floor (not concrete if possible) is ideal. Avoid attics or sheds that get very hot or cold.
During the mowing season, keep it simple. Every few cuts, make sure the battery case is free of caked-on grass and dirt, and give the terminal connections a wiggle to ensure they’re snug.
Using a Battery Maintainer (Trickle Charger)
You might ask, should I leave my lawn mower battery on a trickle charger? The short answer is yes, but use the right tool. A basic old-school “trickle charger” can overcharge and cook your battery. What you want is a modern “smart battery maintainer.”
These clever devices charge the battery, then switch to a low “float” or “maintenance” mode that keeps it at 100% without overcharging. It’s like plugging in your mower over winter, the same way you’d stack a cord of wood for a fireplace. You’re just preserving the tool for when you need it. I plug mine in around Thanksgiving and forget it until spring. The battery is always ready.
Safe Cleaning and When to Dispose
If you see corrosion on the terminals, clean it safely. Mix a spoonful of baking soda with a little water to make a paste. Wear gloves and glasses. Disconnect the battery cables (negative first). Apply the paste to the corroded areas it will fizz. Scrub with an old toothbrush or terminal brush, wipe clean with a damp cloth, dry thoroughly, and reconnect (positive first).
Batteries don’t last forever. When it can’t hold a charge even after a proper maintenance cycle, it’s time. An old lawn mower battery is hazardous waste and must be recycled. Do not throw it in the trash. The good news is almost any store that sells new batteries, like auto parts stores or lawn equipment dealers, will take your old one for recycling, often for free. If you’re upgrading your mower, it’s also important to dispose of and recycle the old lawn mower properly. Look for local programs that accept old lawn mowers to keep hazardous materials out of landfills.
What to Do When the Battery Fails

Even the best battery has a lifespan. When your mower refuses to turn over, don’t panic. A few simple checks can usually point you to the culprit, and the fix is often straightforward. If your lawn mower won’t start, a quick troubleshooting guide can help you pinpoint the issue before you dive in. In the next steps, you’ll see how to run these checks efficiently.
My Mower Won’t Start. Is It the Battery?
You turn the key and…nothing. Or maybe just a sad clicking sound. Before you call for help, let’s do a quick check. First, see if any dashboard lights come on when you turn the key. No lights at all usually points to a dead battery or a bad connection.
That clicking noise is a classic sign. It often means the battery has just enough juice to engage the starter solenoid but not enough to actually crank the engine. The most reliable test is the voltmeter check we talked about earlier. Hook it up. A reading below 12.4 volts when the battery is at rest means it’s likely too weak to start your mower.
So, how do you know if your lawn mower battery is bad? Look for these clear signs:
- It consistently fails the 12.6-volt resting test.
- It won’t hold a charge, dying again shortly after you jump or charge it.
- You see physical swelling or bulging of the battery case.
- There’s heavy white or blue corrosive crust around the terminals.
Can You Jump-Start a Lawn Mower?
In a pinch, yes, you can. I’ve done it to get Max back to the garage. But I treat it strictly as a temporary, get-out-of-trouble fix, not a solution.
Can you jump your lawn mower battery from your car battery? You can, but you must be very careful. A car’s electrical system is much more powerful. The safest method is to use another riding mower as the donor. If you must use a car, make sure the car’s engine is OFF. Never have the donor car running, as its alternator can send a damaging voltage spike to your mower’s sensitive electronics.
Connect the jumper cables in this order: Positive (+) donor to positive (+) mower, then negative (-) donor to a clean, unpainted metal bolt on your mower’s engine block (not the dead battery’s negative terminal). Start your mower, then carefully disconnect in reverse order. This is just to get you moving so you can properly charge or replace the battery.
The Simple Process of Swapping It Out
Replacing the battery is one of the easiest jobs you’ll do on your mower. The key is doing it safely to avoid sparks or a shock. Here’s my five-step process for replacing a lawn mower battery.
- Put on safety glasses and gloves. Disconnect the BLACK (-) negative terminal first. Loosen the nut and wiggle the clamp off.
- Disconnect the RED (+) positive terminal next.
- Remove the hold-down clamp or strap that keeps the battery from bouncing around.
- Lift the old battery straight out. They can be heavy, so lift with your legs.
- Reverse the order for the new battery. Set it in, secure the hold-down, connect RED (+) first, then connect BLACK (-) last.
Keeping the terminal connections clean and tight prevents most future starting problems. If you see corrosion, clean the terminals and cable clamps with a mix of baking soda and water and a wire brush before installing the new battery.
A Look at Recommended Battery Types

When you’re buying a replacement, you’ll see a few main types. I think of them in tiers, from reliable standard to long-term investment. Your choice depends on your budget and how much you dislike doing this job again.
The Reliable Standard: Sealed Lead-Acid (AGM)
This is my go-to recommendation for most homeowners. An Absorbent Glass Mat (AGM) battery is the modern version of the classic lead-acid battery. It’s completely sealed and maintenance-free, so you never add water. They are affordable, easy to find at any hardware store or mower shop, and they last a solid 3-4 years with proper care.
For a dependable, cost-effective replacement that just works, an AGM battery is the practical choice. It’s like buying a reliable work boot. It does the job well without fuss.
The Long-Term Investment: Lithium-Ion (Li-ion)
This is the premium upgrade. A lithium-ion battery costs more upfront, sometimes two to three times more than a standard AGM. But what you get for that money can be worth it if you plan to keep your mower for many years, especially when compared to other electric batteries used in lawn mowers.
Li-ion batteries are much lighter, often by half. They have a significantly longer lifespan, potentially lasting 5-8 years or more. They perform better in cold weather and hold their charge much longer when sitting idle over the winter. Most have built-in battery management systems to prevent damage from overcharging or deep discharge.
Choosing lithium-ion is like upgrading from a basic mower to a commercial-grade machine. You pay more now to save hassle and money on replacements later. For me, the weight savings alone is tempting when I’m heaving a battery in and out of the shed.
Quick Lawn Mower Battery FAQ: Your Voltage Questions, Answered
Why is a 12-volt lawn mower battery so common?
It’s the perfect balance of power and practicality. A 12V system gives your mower’s starter the hearty crank it needs, using components that are affordable and easy to find, just like your car.
My battery tests at 12.8 volts but still won’t start the mower. What gives?
That means it has a surface charge but no guts. The battery likely has a dead cell and can’t deliver the amps needed; it’s time for a load test or a replacement.
What does a big “voltage drop” mean when I try to start?
A healthy dip is normal, but a plunge below 9.5 volts is a cry for help. It tells you the battery is too weak to handle the starter’s demand and is on its last legs.
Do I need a voltage regulator for my mower’s battery?
If your mower has a charging system (like an alternator or stator), it already has one built in. Your job is just to keep the battery terminals clean and tight so the regulator can do its work.
Is a reading of 12.6 volts always “fully charged”?
For a standard 12V lead-acid battery, yes-that’s your gold standard. For a lithium (Li-ion) battery, expect a full charge reading closer to 13.3 or 13.4 volts, so know your battery’s chemistry.
Final Thoughts on Lawn Mower Power

The best battery for your mower is the one it was built to use. Always check your owner’s manual or the label on your old battery first; that simple step saves time, money, and a lot of frustration. A lawn mower parts compatibility guide can help you verify which components fit your model.
Taking care of your battery, like cleaning terminals and storing it properly, is just as important as caring for your grass. When it’s finally time to replace it, please recycle the old one responsibly-it’s a small habit that makes a big difference for our green spaces.
Research and Related Sources
- What Type of Battery is a Lawn Mower Battery? – MOWRATOR
- Lawn Mower Batteries | Interstate Batteries
- What Kind of Lawn Mower Battery I Need? | Batteries Plus
Written by Ria Carrington. Ria is an avid lawn care enthusiast and advisor. No lawn is unsalvagable when Ria is at work. She has helped countless homeowners breath new life into their dying lawns. She has a B.Sc in Agriculture and brings practical advice combined with knowledge of plant science and her decade worth of hands on experience.