
How Do You Test a Lawn Mower’s Electrical System?
Nothing kills a Saturday morning faster than turning the key and hearing… absolutely nothing from your mower.
This guide will walk you through finding the problem without guessing. We will cover testing the battery, checking connections and safety switches, and troubleshooting the starter and solenoid.
I’ve saved myself hundreds on shop fees by learning to test these components on my own mower, Max.
What Tools Do You Actually Need for DIY Electrical Testing?
You don’t need a professional mechanic’s toolbox to figure this out. I’ve diagnosed most of Max’s electrical gremlins with just a handful of items I keep in a small bag on my workbench.
Here’s the short list of absolute essentials.
- A basic digital multimeter.
- Safety glasses.
- A pair of work gloves.
- A basic set of hand wrenches or sockets.
Let’s talk about that multimeter. If you’ve never used one, it seems intimidating. Think of it less like a complex scientific device and more like a stethoscope for electricity. Instead of listening to a heartbeat, its probes “listen” for the presence and strength of electrical flow, or check for breaks in the circuit. It tells you the story of what’s happening (or not happening) inside those wires.
A simple multimeter is your primary diagnostic tool for nearly every electrical problem your mower can have.
There are a couple of optional tools that can make life easier. A spark plug tester is a little inline device that lights up if you’re getting spark, which is a quicker check than pulling the plug. A pack of simple jumper wires with alligator clips can help you bypass switches for testing. Nice to have, but not required to get started.
When you first turn on your multimeter, you’ll see a dial with many symbols. For our purposes, you only need two settings. Set it to the “V” with a straight line (not a wavy line) for DC volts to test the battery or any wire that should have power. Set it to the Omega symbol (Ω) for “ohms” or resistance to check for breaks in a wire or component like a safety switch.
Safety First: The Non-Negotiable Rules Before You Start
We’re dealing with machines that have spinning blades and small engines that can start unexpectedly. This isn’t a place for shortcuts. I learned my respect for these rules the hard way years ago, and I want you to skip that lesson.
Your first move, every single time, is to disable the engine’s ability to start. On a walk-behind mower, disable the spark plug by locating the rubber boot, grasping it firmly, and pulling it straight off. On a riding mower like Max, you must also disconnect the battery. Loosen the nut on the negative ( – ) terminal, slip the cable off, and tuck it away so it can’t accidentally touch the post. Always double-check that the engine is fully off and the blades have stopped before proceeding. This is part of safely turning off a lawn mower before any maintenance.
Disconnecting the spark plug wire and battery terminal is the single most important step to prevent a sudden, dangerous engine start.
Work in a dry, well-lit area like a garage or driveway on a clear day. Moisture and electricity are a bad mix, and good light helps you see small wire colors and connections. Let the engine and muffler cool down completely before you start poking around to avoid a nasty burn.
Finally, get organized. Use a small cup or tray for any screws or bolts you remove. Before you disconnect a wiring harness or a bundle of wires, take a quick picture with your phone. That two-second photo can save you twenty minutes of frustration trying to remember what plugged in where. Trust me, all those black and red wires start to look the same once they’re loose.
Where to Begin: Is It a “No-Start” or a “Runs Poorly” Problem?
You walk out to the shed, ready to tackle the weekend’s growth. You pull the key or yank the cord. Nothing happens, or maybe it sputters and dies. That sinking feeling hits. Before you get overwhelmed, take a deep breath. The first step is to listen closely and ask one simple question.
What exactly is the mower doing, or not doing?
If you turn the key and hear absolutely nothing, not even a clicking sound, you likely have a “no-crank, no-start” situation. This is often a sign of a dead battery, corroded terminals, or a failed safety switch. On the other hand, if the engine turns over (cranks) but never actually fires up and runs, that’s a “cranks but no-start.” This points to a missing ingredient in the combustion recipe: spark, fuel, or air.
For our focus on electrical gremlins, the spark is our prime suspect. If the mower starts but then runs rough, sputters under load, or dies after a few minutes, you might be dealing with a “runs poorly” electrical issue. Think of a weak spark that can’t handle the heat or a charging system that’s not keeping the battery alive. A quick check is to test lawn mower spark plugs to confirm whether the spark is the culprit. If the test reveals a weak or inconsistent spark, replacing the plugs may restore a clean, reliable spark.
The fix is often simpler than you think, so always, always check the easy stuff first. Is the battery cable tight and clean, or is it loose and green with corrosion? On a riding mower, is the blade engagement lever fully disengaged? Are you firmly seated so the seat safety switch is activated? I’ve lost track of how many times a simple, overlooked connection was the culprit with my mower, Max.
How to Check a Lawn Mower Ignition Coil and Spark Plug
If you’ve ruled out the simple connections, it’s time to look at the heart of the electrical spark system. The spark plug and the ignition coil work as a team. One creates the spark, and the other delivers it to the engine. We’ll check both.
Start With a Visual Spark Plug Inspection
First, locate and carefully remove the spark plug. You’ll need a socket wrench that fits it snugly. Look at the business end of the plug. A healthy plug will have a light tan or gray coating on the electrode. What you don’t want to see is heavy black, sooty carbon (often a fuel mixture issue) or a wet, glossy appearance (often a sign of oil or unburned fuel). Check the electrode itself. Is it badly worn down or melted? If the plug looks damaged or excessively dirty, replace it with an identical new one. This cheap fix solves many problems.
The Simple “Ground Test” for Spark
This is the old-school, highly effective test to see if you’re getting any spark at all. Reconnect the spark plug wire to your (clean) plug. With insulated pliers, hold the metal body of the spark plug firmly against a clean, unpainted part of the engine block, like a cooling fin. This “grounds” the plug. Have a helper briefly crank the engine.
You should see a bright blue spark jump the gap inside the plug. If you see a weak orange spark or no spark at all, your ignition system is failing. The culprit is usually the coil, the plug wire, or a safety switch killing the circuit.
How to Test a Lawn Mower Ignition Coil with a Multimeter
If you have no spark, the ignition coil is the next logical suspect. A basic multimeter is your best friend here. Set it to measure resistance (Ohms, Ω).
- Locate and disconnect the coil. It’s a small, black module mounted near the flywheel. Unplug the spark plug wire and any thin kill switch wire attached to it.
- Identify the terminals. Your coil has two main terminals: one for the spark plug wire (the high-tension terminal) and a smaller primary terminal where the kill wire was attached.
- Test the primary windings. Touch one multimeter probe to the small metal primary terminal. Touch the other probe to the metal arm of the coil that bolts to the engine (the ground). You should get a reading. For most small engines, this is typically between 0.1 and 2.0 Ohms. A reading of “OL” (Open Loop) means the wire inside is broken and the coil is dead.
- Test the secondary windings. Move one probe to the inside of the spark plug wire boot (where the metal connector is). Keep the other probe on the coil’s ground arm. Expect a much higher reading, often between 2,500 and 5,000 Ohms. A zero reading indicates an internal short.
Any reading of “OL” or zero where you expect resistance confirms a bad ignition coil that needs replacement. Service manuals have the exact specs, but these ranges are a reliable guide for homeowner equipment.
Don’t Forget the Kill Switch Wire
Here’s a classic headache saver. That thin wire you unplugged from the coil? It connects to the kill switch system (like your blade lever or ignition key). If that wire is damaged or the switch is faulty, it can permanently ground the coil, killing the spark. To test for this, simply leave the kill wire disconnected and repeat your spark test. If you now get a strong blue spark, the problem isn’t your coil, it’s somewhere in that safety switch circuit. It’s a simple check that can save you from buying a part you don’t need.
How to Test a Lawn Mower Solenoid and Starter

That single, solid click when you turn the key is the sound of your solenoid doing its job. Think of it as the heavy-duty switch for your starter motor. It takes the small current from your key switch and uses it to slam closed a big internal contact, sending the full fury of your battery to the starter. No click usually means no start.
Sometimes, that internal contact gets stuck open. There’s an old-school trick: with the key in the “on” position, give the solenoid’s metal body a firm tap with a wrench handle. This is a diagnostic trick, not a repair, and you must be extremely careful. Ensure the mower is on a flat surface, the parking brake is set, and the blade engagement lever is off. Wear gloves and eye protection. If it clicks and cranks after a tap, the solenoid is bad and needs replacing.
How to Test a Lawn Mower Solenoid with a Multimeter
For a more precise diagnosis, a multimeter is your best friend. Set it to the continuity setting (it looks like a sound wave symbol).
- Disconnect the battery cables for safety.
- Find the two large terminals on the solenoid where the thick battery and starter cables connect.
- Touch a multimeter probe to each large terminal. You should get no continuity (no beep).
- Now, have a helper turn and hold the ignition key in the “start” position. With the key engaged, test the two large terminals again. You should now have continuity (a beep). If you don’t, the solenoid is not activating and is faulty.
How to Test a Lawn Mower Starter
If the solenoid clicks powerfully but nothing happens, the starter is the prime suspect. First, check for power. Reconnect the battery. Set your multimeter to DC volts (20V range). Touch the red probe to the starter’s main terminal (where the thick cable from the solenoid connects) and the black probe to a clean, unpainted spot on the starter housing. Have your helper crank the engine. You should see battery voltage (about 12.6V) at the terminal while cranking. If you have voltage but no spin, the starter has likely failed.
For a bench test, disconnect the battery and remove the starter. Do this carefully, as it involves direct battery power. Connect a jumper cable from the positive battery post to the starter’s main terminal. Briefly touch another jumper from the starter’s metal body to the negative battery post. The starter should spin vigorously. Intermittent failure, like a starter that sometimes works and sometimes just clicks, often points to worn brushes inside or a dead spot on the armature. At that point, replacement is usually the most practical fix.
Testing the Wiring Harness and Safety Switches
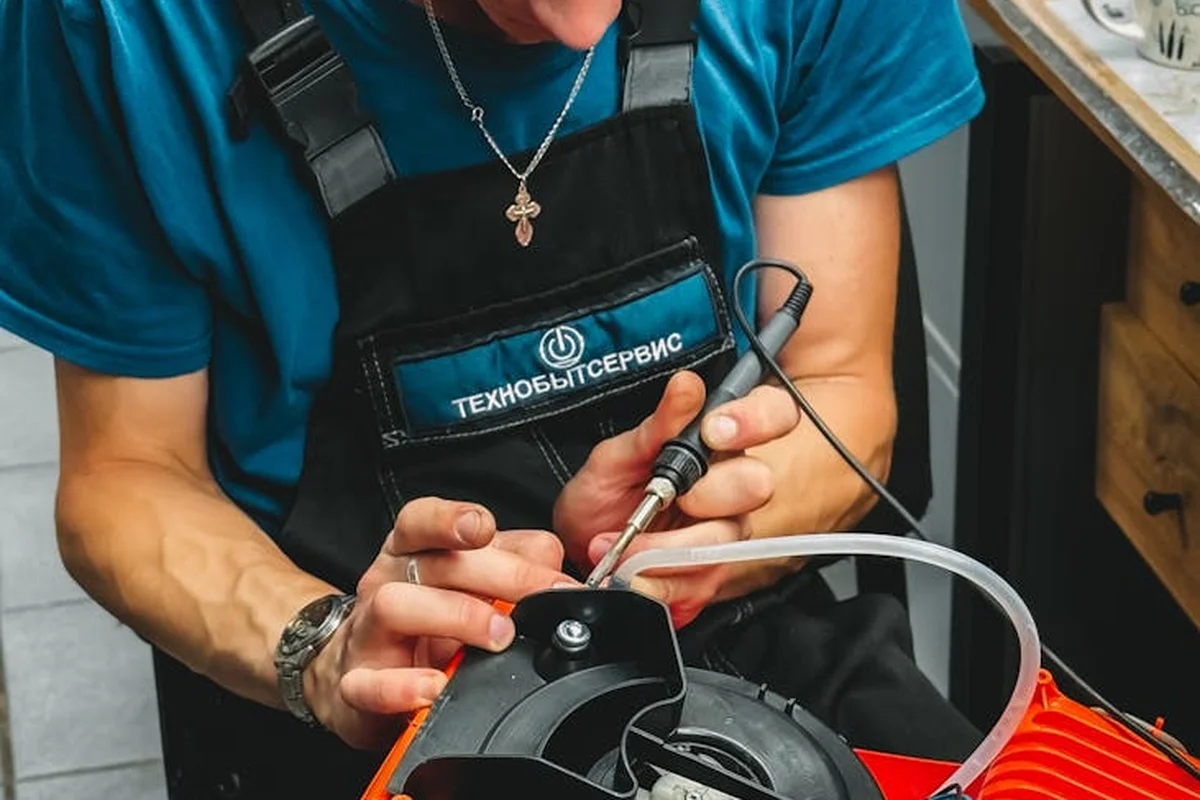
If you’ve ruled out the battery, solenoid, and starter, the problem is often in the wiring. This is your mower’s nervous system. Over years of vibration, heat, and moisture, wires can crack and connectors can corrode, especially on a trusted workhorse like my old mower, Max. That’s part of diagnosing and repairing common lawn problems. In the next steps, we’ll walk you through diagnosing and repairing these issues so your mower stays in top shape.
Start with your eyes. Trace the wiring harness from the battery forward. Look for cracked or brittle insulation, wires that have been chewed by critters, or the tell-tale greenish-white crust of corrosion on connector pins. Gently wiggle connectors while trying to start the engine; a change in behavior points to a bad connection.
How to Test a Riding Mower Electrical System Harness
For hidden breaks, use your multimeter on the continuity setting again. Disconnect the battery. Find the two ends of a wire you suspect. For example, trace a wire from the ignition switch to the solenoid’s small “S” terminal. Place one probe on each end of that single wire run. A continuous beep means the wire is good. Silence means there’s a break somewhere along its length. You’ll need to check each wire methodically.
This is where a wiring diagram becomes priceless. Searching for “[Your Mower Model] wiring diagram” online can find you a map of the entire electrical system. Having a diagram for your specific model, whether it’s a John Deere, Toro, or Cub Cadet, turns a confusing maze of colored wires into a logical circuit you can follow.
The Role of Safety Switches
Modern mowers have safety switches on the seat, the brake pedal, and the blade engagement lever. They are designed to break the circuit and prevent starting if conditions aren’t safe (like if you’re not sitting down with the brake set). A faulty switch acts like a broken wire. Knowing how those safety features work is part of essential lawn mower safety tips. For a quick, practical checklist, see our lawn mower safety tips.
To diagnose one, you can temporarily bypass it for testing purposes only. Locate the switch (often a small plastic box with two wires where a lever or pedal presses it). Unplug its connector and insert a short piece of wire with the ends stripped to bridge the two terminals in the harness side of the connector. If the mower starts with the bypass in place, that switch is bad. Remember, this is a diagnostic step. Always repair or replace a faulty safety switch immediately.
Battery and Charging System Checks
Let’s start with the most common problem and the easiest fix. Nine times out of ten, an electrical issue starts with a bad connection. Before you do anything else, grab a wrench, disconnect the battery cables (negative first, always), and look at the terminals.
A quick scrub with a wire brush and baking soda paste can fix a mower that’s been clicking or acting sluggish for weeks. I’ve brought Max back from the dead more than once just by cleaning off that fuzzy blue corrosion. Reconnect the cables tight (positive first, then negative) and try it. You might be done already.
Testing Your Battery’s True Health
If cleaning didn’t work, it’s time to see what’s really in the tank. You’ll need a basic digital multimeter. Think of your battery like a bucket of water. The voltage is how full the bucket is. A healthy, fully charged battery at rest should read about 12.6 volts.
- Set your multimeter to DC Volts (20V range).
- Touch the red probe to the positive (+) terminal and the black probe to the negative (-) terminal.
- Note the reading. 12.4V is okay but getting low. Anything under 12.2V means the battery is weak and likely needs a charge before testing further.
But a bucket can have a hole. The real test is under load. This tells you if the battery has the strength to crank the engine.
- With the battery charged and connected, have your helper turn the ignition key to “start” (or pull the safety levers and push the pedal, depending on your mower).
- While they are trying to crank, touch your meter probes to the terminals again.
- Watch the voltage.
If the voltage during cranking drops below 10 volts, the battery is weak and probably needs replacement, even if the “at rest” voltage looked good. It simply can’t hold a charge under pressure.
Is Your Mower Recharging Itself?
If you jump-start the mower and it runs, but then won’t start again later, the charging system might be the culprit. Most riding mowers have an alternator or stator that keeps the battery topped up while the engine runs. If the battery isn’t holding a charge, you may need to charge lawn mower tractor batteries with a proper charger. Keeping the battery charged can help prevent future starting issues.
You can do a simple output test with your multimeter.
- Start the mower and let it run at a fast idle.
- Set your multimeter to DC Volts again.
- Touch the probes to the battery terminals with the engine running.
You should see a reading between 13.5 and 14.5 volts. This shows the system is generating a charge. If you only see 12.6V or less, the alternator isn’t working. This gets more complex to fix, but knowing this tells you the problem isn’t just the battery.
When It’s Time to Hand the Wrenches to a Pro
You’ve checked the connections and tested the battery. You’re already ahead of most people. But sometimes, the clues point to a problem deeper than wires and terminals. That’s not a failure on your part. A good mechanic knows when a job needs another set of eyes.
Call a professional if your testing suggests an internal engine issue. For example, if the battery and starter are strong but the engine cranks unusually fast and sounds “empty,” it could have low compression. No amount of electrical work will fix a mechanical problem inside the engine. A mechanic can do a compression test in minutes and give you the real diagnosis.
You should also consider professional help if the wiring harness is chewed up, burned, or a tangled mess. Tracing a single broken wire is one thing. Rebuilding a whole harness is another. If the repair requires pulling the engine or dismantling the dashboard on a complex zero-turn, and that thought makes you sweat, it’s okay to stop.
For newer or expensive mowers, a pro diagnosis can actually save you money. I learned this the hard way once. Buying a battery, then a starter, then a solenoid in a guessing game gets costly fast. A trusted shop with the right diagnostic tools can often pinpoint the exact faulty component on the first try — especially when you use a local repair service.
Walking into a shop and saying, “The battery tests fine at rest but drops to 8 volts under load, and the alternator is putting out 14 volts,” immediately makes you a knowledgeable customer and gets you the right fix faster. You’ve done the hard work of narrowing it down. Letting a pro handle the final, complicated repair is just smart strategy.
Your Electrical Gremlin FAQs, Answered

How do I test the entire wiring harness on my riding mower?
Your multimeter’s continuity (beep) mode is perfect for this. Disconnect the battery, pick one wire in the harness, and touch a probe to each end-a clean beep means it’s good, and silence means you’ve found a break.
Is testing a John Deere wiring harness any different?
The process is identical, but your secret weapon is a model-specific wiring diagram. Search online for “[Your John Deere Model] wiring diagram” to turn that colorful spaghetti of wires into a clear map you can follow logically.
My mower’s electrical problem comes and goes. What’s the first thing I should check?
Nine times out of ten, that’s a classic sign of a dirty or loose connection. Before you dig deep, thoroughly clean your battery terminals and then firmly wiggle every connector in the harness while trying to start it-a change in behavior points right to the culprit.
Can a single bad safety switch kill all the power in my mower’s harness?
Absolutely. These switches are designed to break the circuit for safety. Use your multimeter’s continuity setting to test each one; a faulty switch will show no continuity when it’s supposed to be “closed,” acting just like a severed wire in your harness.
If I find a broken wire in the harness, should I replace the whole thing?
Not necessarily. For a single clean break, a proper solder and waterproof heat-shrink tube repair is a solid, permanent fix. If the harness is brittle, chewed up, or has multiple failures, then replacing the entire section is the greedy move for long-term reliability.
Wrapping Up Your Electrical Diagnostics
When your mower won’t start, always check the battery terminals and cables first. A clean, tight connection is the most common fix and saves you from chasing complicated ghosts. If it still won’t start, follow our lawn mower troubleshooting guide for the next steps.
Keeping your mower running smoothly means less waste and more time spent on what matters-growing a thick, healthy lawn that’s safe for pets and pollinators. I’m always learning something new from the lawn itself, and I hope this guide gives you the confidence to tackle your next project.
Research and Related Sources
- How to test a small engine charging system, battery & …
- How to Check Your Mower’s Battery Health with a Multimeter | Blog
- How to test my lawn mower battery with a multimeter – Quora
- Lawn Mower Electrical Troubleshooting – YouTube
- How to Test a Voltage Regulator on a Lawn Mower – Oreate AI Blog
- How To Test a Lawn Mower Starter with a Multimeter
Written by Ria Carrington. Ria is an avid lawn care enthusiast and advisor. No lawn is unsalvagable when Ria is at work. She has helped countless homeowners breath new life into their dying lawns. She has a B.Sc in Agriculture and brings practical advice combined with knowledge of plant science and her decade worth of hands on experience.